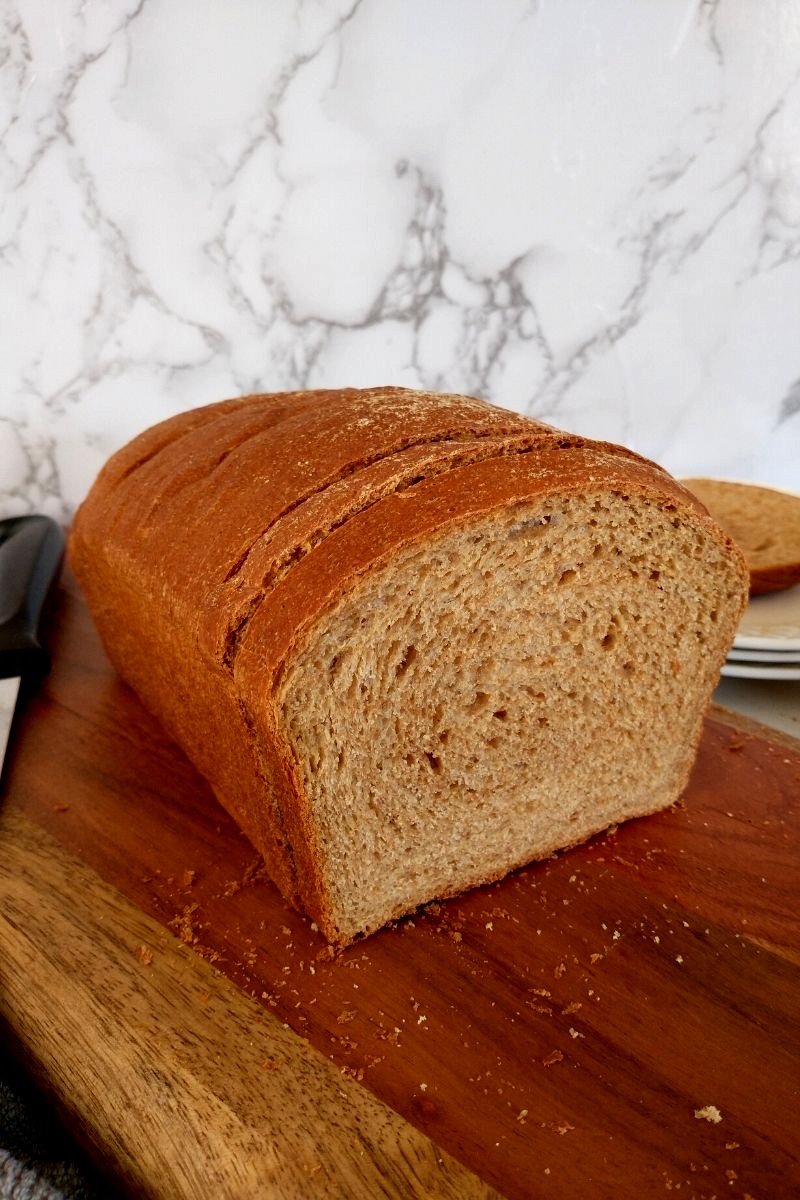
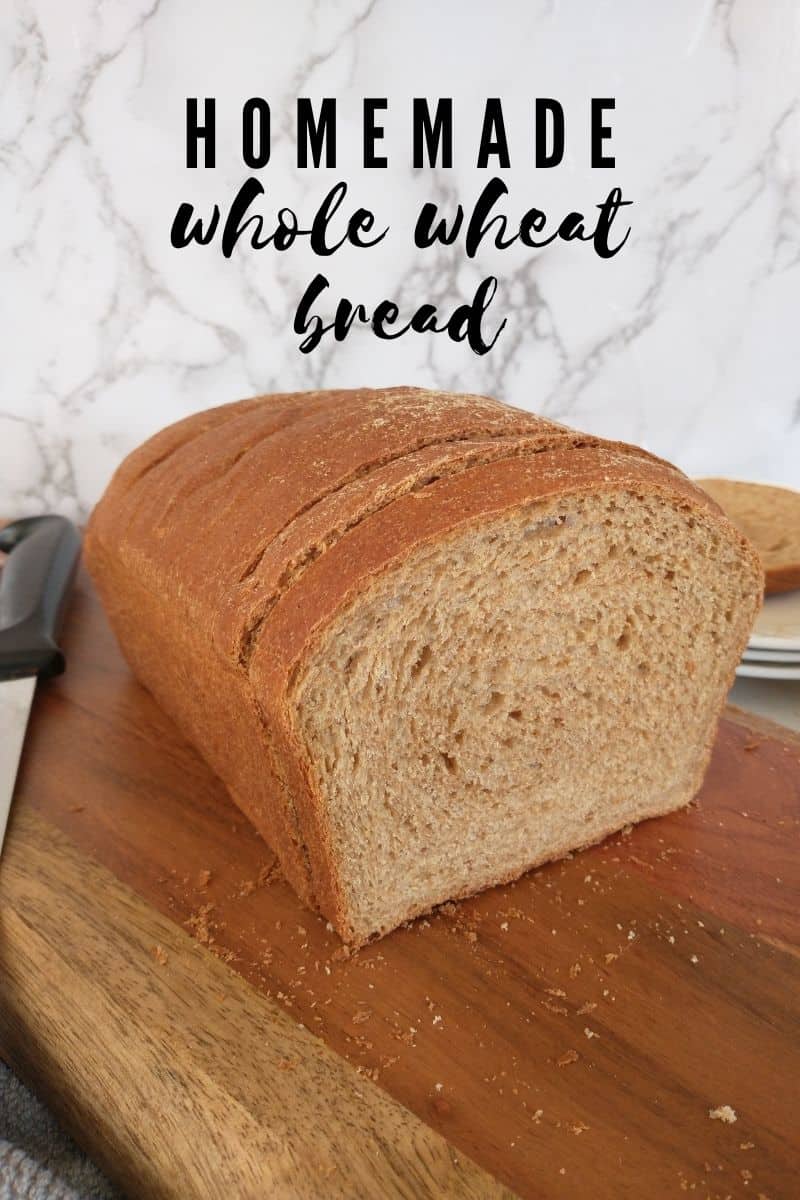
Freshly baked Whole Wheat Bread straight from the oven! There's nothing quite like the aroma and taste of homemade bread. Made with whole wheat flour, this loaf is rich in fiber and nutrients. Start your day right with a slice of this homemade goodness!
Delicious and Nutritious Whole Wheat Bread Recipe! Whip up a homemade loaf of wholesome whole wheat bread with this easy-to-follow recipe. Packed with fiber and nutrients, whole wheat bread is a healthy choice for your daily bread cravings.
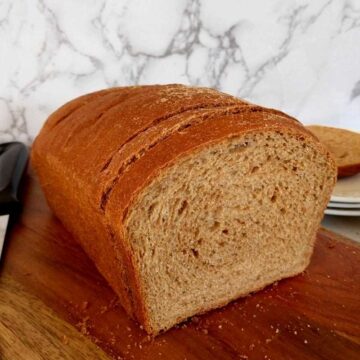
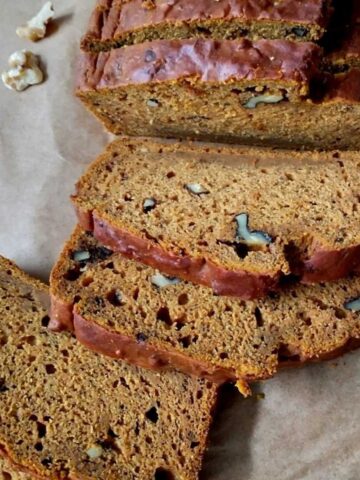
Delicate, yet strong enough to hold all your favorite toppings. This homemade whole wheat bread is soft on the inside and crusty on the outside. My kids love veggie sandwiches for their lunch, and this bread makes an excellent choice. It’s hearty, filling and honestly, nothing beats the fresh taste and flavor of freshly baked homemade bread.
If you are new to baking, try this recipe, you will be pleasantly surprised how easy it is. Made with simple pantry ingredients, this bread is easy to make at home and tastes amazing. You don’t have to be a pro, to make this café style brown bread at home.
Jump to:
The Best Whole Wheat Bread Recipe
Whole wheat bread is a wholesome and nutritious option that has gained popularity due to its health benefits and distinct flavor. Unlike white bread, which is made from refined flour that has been stripped of its bran and germ, whole wheat bread retains these nutritious components. As a result, it offers a higher fiber content and a richer array of vitamins, minerals, and antioxidants.
Making whole wheat bread at home allows you to have complete control over the ingredients, ensuring a fresh and preservative-free loaf. With a few simple steps, you can create a homemade loaf of whole wheat bread that not only caters to your taste preferences but also provides you with the numerous health benefits associated with whole grains. So, let's dive into the world of whole wheat bread baking and discover the joy of creating your own nutritious and delicious loaf from scratch.
You may also enjoy my Honey Oat Bread, Homemade Crescent Rolls, and Brioche Dinner Rolls.
Ingredients
Here's a description of the key ingredients used in making whole wheat bread:
- Whole Wheat Flour: Whole wheat flour is the key ingredient in whole wheat bread. It has a slightly nutty flavor and a darker color compared to white flour. Whole wheat flour is rich in dietary fiber, vitamins, and minerals. See nutritional information at USDA.gov.
- Warm Water: Warm water is used to activate the yeast in the bread dough. It should be at a temperature between 105°F and 110°F (40°C to 43°C) to provide an ideal environment for the yeast to grow and ferment.
- Active Dry Yeast: Yeast is a microorganism that helps the bread dough rise and gives it a light and airy texture. Active dry yeast needs to be activated by dissolving it in warm water and allowing it to froth before adding it to the dough.
- Honey (or Alternative Sweetener): Honey is commonly used as a sweetener in whole wheat bread. It adds a touch of sweetness and helps to feed the yeast. However, you can also use alternative sweeteners like maple syrup, agave nectar, or sugar, depending on your preference.
- Olive Oil: Olive oil adds moisture and richness to the bread, contributing to its texture and flavor. It also helps to keep the bread tender and prevent it from drying out.
How To Make Whole Wheat Bread
Here are some helpful tips and answers to commonly asked questions about making this delicious bread recipe. For the complete recipe, including detailed ingredient amounts and step-by-step instructions, refer to the recipe card provided below.
Do You Proof The Yeast?
Yes, typically, active dry yeast used in this whole wheat bread recipe needs to be proofed before adding it to the dough. However, if you are using instant yeast, it can be added directly to the dry ingredients without proofing.
To proof the yeast, dissolve it in warm water (around 105°F to 110°F or 40°C to 43°C) along with a small amount of sugar or honey. Let it sit for about 5-10 minutes until it becomes foamy on the surface. If the yeast doesn't activate and become frothy, it's recommended to start with fresh yeast and check the temperature of the water to ensure it's within the proper range.
How To Measure Flour The Right Way
It is important to measure the flour using the right method. To avoid over-measuring, do not scoop the flour straight from the container. First, loosen the flour by giving it a good stir with a spoon or a spatula. Next, spoon the flour into the measuring cup, and fill the cup slightly over the rim. Now, level the flour using the back of the spoon or a knife.
This helps ensure you're not packing too much flour into the measuring cup, which can lead to a denser and drier loaf.
Consistency Of The Dough
The consistency of the dough is soft, elastic, and non-sticky. When you poke the dough, it springs back and does not stick.
Check the consistency of the dough after kneading it for 4-5 minutes. If it feels too sticky, add some flour and if it is too dry, add 1-2 teaspoons of warm water, and knead the dough, until it is nice and soft.
How Long Do You Knead The Dough
Depending upon the method used for kneading, the time will vary. If you are using a stand mixer to knead the dough, it takes somewhere from 5-7 minutes to knead the dough. If kneading the dough by hand, it takes around 10-15 minutes for a soft, pliable dough.
How Do I Know If The Dough Is Kneaded Enough
A well-kneaded dough will be soft, elastic, springs back when you poke your finger, and won’t be sticky. If the dough does not pass this simple test, it means it needs more kneading.
Here are a few ways you can tell that the dough is kneaded well:
- First, it forms into a nice smooth dough, the dough will start to leave the sides of the bowl.
- Secondly, poke a finger, and if the dough springs back, and is not sticky, the dough is kneaded well.
- Lastly, you can also do a windowpane test. Take a small piece of dough, and stretch it as thin as possible. If the dough does not tear, and you can see a thin layer of dough, it means the dough is kneaded well.
Why Do You Knead The Dough
It is important to knead the dough before rising, as kneading develops the gluten in the dough. Gluten is made of long strands of protein, which makes the dough stretchy. The stretchy dough can hold the bubbles created by the yeast, thus making the dough rise.
How To Check For The Doneness Of The Bread
Different ovens work differently. Baking time may vary depending upon the oven, and the size of the baking pan. Here are a few ways you can tell if the bread is baked right, as follows:
- Appearance: Visually just looking at the bread one can tell if it's baked right or not. If all the sides and top of the bread are golden browns, 90% of the bread is baked. I would allow 5-7 minutes of additional baking time just to be on the safe side, so the inside of the bread is baked well.
- Tap The Bottom - Take the bread out of the pan and tap at the bottom of it. If it sounds hollow, means it's baked.
- Check The Internal Temperature - With practice, one can tell if the bread is baked well by simply using the first two clues. However, if you are new to baking, I would highly recommend using an instant-read thermometer. Simply insert the thermometer into the center of the bread. If the temperature is around 190 F, the bread is fully baked.
- Rule Of Thumb - If in doubt, just bake for extra few minutes. It's better to eat overbaked bread than underbaked.
Why Is My Bread Dense
For soft and fluffy bread, the yeast needs to rise well. If the rising time is too short or too long, chances are the bread will turn dense and heavy.
When the dough is proofed, depending upon how many gas bubbles are produced, more will result in soft bread. If the dough is proofed for long, more than double its size, chances are that the rapid-rise dough will collapse once it hits the hot oven, resulting in a dense and heavy loaf of bread. Ideally proof the dough until it's doubled in volume, anything less or more than it will result in dense, heavy bread.
Why Is The Center Of The Bread Not Baked
The whole wheat bread browns quickly from the sides and top. It can sometimes be misleading because based on the outer crust, we might think the bread is baked. Therefore, it is important to tent the bread around 22 minutes of baking, to allow the center of the bread to be baked fully.
Make sure you tap the bottom of the loaf, if it sounds hollow means the bread is baked, else allow it for additional few minutes of baking.
If you think your oven is too hot, and the bread is browning too quickly, reduce the temperature to 325 F and bake it for a longer period.
Why Did The Bread Not Rise
Failure of the bread to rise is due to the lack of gas molecules produced by the yeast. If the yeast is old, or if the temperature of the water, when the yeast is added to it, is higher than 110F, yeast will not bloom. Failing to rise during the baking.
Make sure the yeast is fresh or alive. The temperature of the water must be around 110F for the yeast to bloom. Add the honey or sugar, which acts as food for the yeast to grow, resulting in more gas bubbles. Avoid adding salt while blooming the yeast, salt hinders the growth of the yeast.
Why Does Bread Collapse After It Is Baked
If the dough is proofed for long, either during the first rise or second rise of the shaped loaf, chances are that as soon as the bread loaf hits the hot oven it will collapse.
To assure that the dough is structurally strong and can hold its shape do as follows. First, proof the dough until it's double in volume. And secondly, allow the shaped loaf to rise slightly higher than the rim of the pan.
My Bread Smells Yeasty
When the bread is not baked fully it will smell yeasty. Bake the bread fully, the center of the bread must be baked and if using the instant-read thermometer must read 190F in the center.
Directions For Make Ahead Dough
Follow STEP1 & STEP2 and prepare the dough. Place the dough in a lightly greased, air-tight container and place it in the refrigerator. The dough will rise slowly overnight in the refrigerator. In the morning, remove the dough and let it sit at room temperature for around 30 minutes or until doubles in volume. Continue with STEP 4.
Directions To Freeze The Dough
Follow the recipe through STEP 3. After first proofing, deflate the dough, wrap it tightly in a plastic wrap, and then with aluminum foil. Place it in a freezer-safe, Ziploc bag and freeze it for up to 3 months. Thaw overnight in the refrigerator, or on a kitchen counter. Continue with STEP 4.
Storage
Once the bread cools completely, place it in a Ziploc bag, or an air-tight container. Bread lasts for a few days at room temperature or up to a week in the refrigerator.
Bread freezes beautifully. Store it in a freezer-friendly storage bag or container, and it will last for a couple of months. Thaw the bread in the refrigerator or on the kitchen counter. Allow it to come to room temperature or warm it up in the oven for 1-2 minutes, before serving.
Tips
Here are some tips to help you achieve the best results when making whole wheat bread:
- Use Fresh Ingredients: Ensure that your whole wheat flour, yeast, and other ingredients are fresh. Expired or stale ingredients can affect the quality and rise of the bread.
- Measure Accurately: Use proper measuring tools, such as a kitchen scale or measuring cups/spoons, to measure ingredients accurately. This will help maintain the proper ratios and ensure consistent results.
- Adjust Flour Consistency: Whole wheat flour absorbs more moisture compared to white flour. If your dough feels too dry and stiff, add a small amount of water (a tablespoon at a time) until the dough becomes smooth and elastic. On the other hand, if the dough is too sticky, gradually add a little more flour until it reaches the right consistency.
- Allow Proper Rising Time: Whole wheat bread may require slightly longer rising times compared to white bread due to the denser nature of whole wheat flour. Be patient and allow the dough to rise until it has doubled in size during the specified rising times.
- Provide a Warm Environment: Yeast works best in a warm environment. Choose a warm, draft-free area for the dough to rise. You can preheat your oven to a low temperature (around 100°F/38°C) for a few minutes, then turn it off and place the covered dough inside to rise. Alternatively, you can also use Instant Pot to proof the dough. Use the Yogurt setting on Instant Pot and proof the dough for 30 minutes.
- Knead Thoroughly: Proper kneading helps develop gluten and gives the bread structure. Knead the dough until it becomes smooth, elastic, and springs back when gently pressed with your finger. This usually takes around 8-10 minutes.
- Avoid Over-Proofing: Be cautious not to over-proof the dough during the rising stages. Over-proofing can lead to a dense and deflated loaf. Monitor the dough closely, and once it has doubled in size, move on to the next step.
- Preheat the Oven: Make sure to preheat your oven to the recommended temperature before baking. This ensures that the bread bakes evenly and achieves a desirable crust.
- Test for Doneness: To check if the bread is done baking, tap the bottom of the loaf. It should sound hollow. If needed, you can use an instant-read thermometer to ensure the internal temperature reaches around 190°F (88°C) for fully baked bread.
- Allow Cooling Time: After baking, transfer the bread to a wire rack to cool completely before slicing. This allows the bread to set and retain its moisture.
FAQ
Yes, whole wheat bread is generally considered good for you. It is a healthier alternative to white bread, as it retains the nutritious bran and germ of the wheat kernel, providing more fiber, vitamins, minerals, and antioxidants.
The healthiest bread to eat is typically whole grain or whole wheat bread. These varieties retain the entire grain, including the bran and germ, which provides more fiber, vitamins, minerals, and antioxidants compared to refined white bread.
Diabetics may benefit from choosing bread with a lower glycemic index, such as whole grain or whole wheat bread, as these types of bread are digested more slowly, resulting in a slower rise in blood sugar levels. Additionally, breads labeled as "100% whole grain" are a good option as they contain the entire grain and offer more nutrients and fiber.
Whole wheat bread is generally considered better than white bread due to its higher fiber content, which aids in digestion, promotes satiety, and helps regulate blood sugar levels. Whole wheat bread also retains more vitamins, minerals, and antioxidants compared to white bread, making it a more nutritious choice.
Pairing


The Best Whole Wheat Bread - Easy Homemade Bread Recipe
Equipment
- 2 Loaf Pan
Ingredients
- 5 ½ cups whole wheat flour, spoon & leveled;
- 2 cups lukewarm water [100 F – 110 F]
- ¼ cup honey, maple syrup or sugar
- 2 teaspoon salt
- ⅓ cup unsalted butter or olive oil
- 3 ½ teaspoon active dry yeast
Instructions
STEP 1: PROOF YEAST
- Into the bowl of a stand mixer, stir in lukewarm water [100*F – 110* F], honey, and yeast. Let the mixture stand for 10 minutes, or until it turns frothy, and doubles in volume.Note: If the yeast is active, the mixture turns frothy, and doubles in volume. If the mixture does not double in size, start the process again with fresh yeast.
STEP 2: PREPARE THE DOUGH [BY HAND OR USING STAND MIXER]
- Add whole wheat flour, salt, butter, or olive oil to the yeast mixture. With the back of a wooden spatula, combine the ingredients to form a shaggy mass of dough.
- Using a dough hook attachment, knead the dough for 5-7 minutes, or until the dough is soft and pliable (dough will start to leave the sides of the bowl and form into a smooth ball).Note: If you are kneading by hand, mix the dough with the back of a spatula until all the ingredients are just combined. Transfer the dough to a lightly floured work surface. Knead the dough until it is soft, pliable, springs back when pressed, and is not sticky around 8-10 minutes.
STEP 3: FIRST PROOFING USING INSTANT POT
- Place the dough in the greased inner pot. Place the lid, and cover the pot. Turn ON YOGURT (less) for 30 minutes. After 30 minutes, the dough will have risen and doubled in volume.Note: I used a glass lid that fits, to cover the inner pot.Note: First Proofing Using Traditional Method – Shape the dough into a ball and place it in a greased bowl. Cover the bowl with a damp kitchen towel and place it in a warm place, for 60-90 minutes or until it doubles in volume.
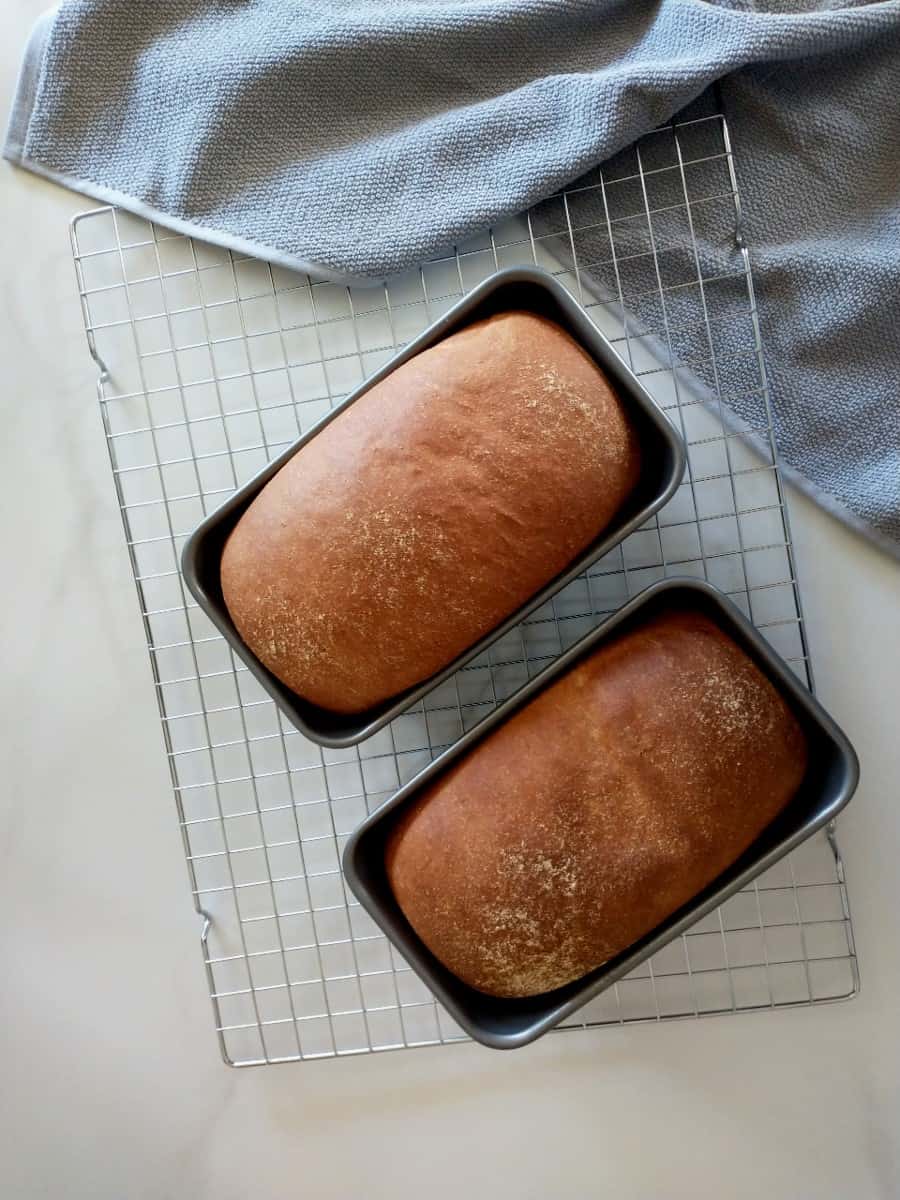
STEP 4: SHAPE THE BREAD LOAF
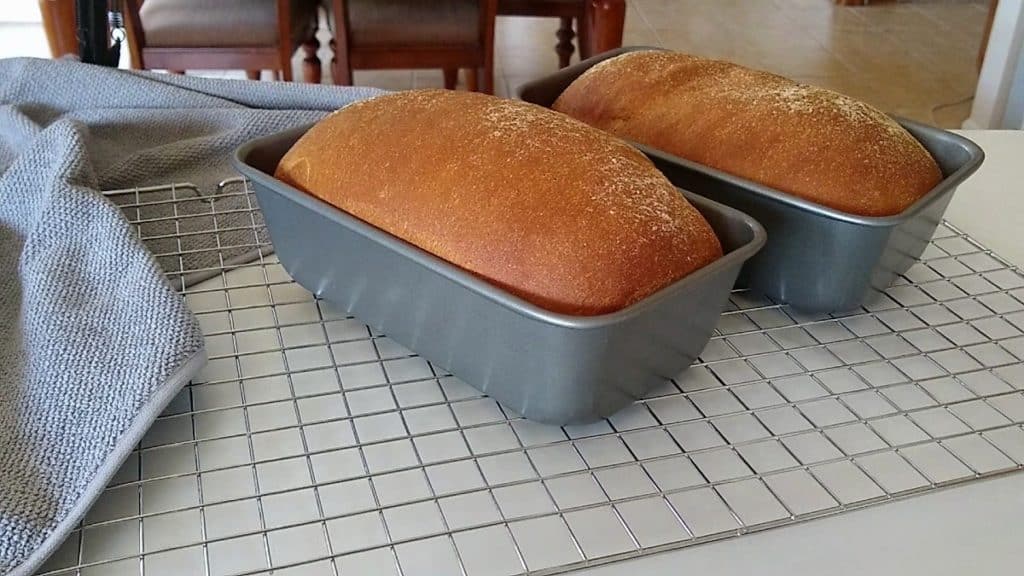
- Grease two, 9-by-5 inch loaf pans with some softened butter or oil.
- Transfer the dough onto a work surface and deflate it.
- Using a bench cutter, divide the dough into 2 equal pieces.
- Take a piece of the dough ball, and flatten it into a rectangle with a width equivalent to the loaf pan.
- Roll the dough into a shape of a log, starting with a shorter end. Place the shaped dough, seam side down, into the greased loaf pan.
- Dust some flour over the shaped loaves. Cover with a plastic wrap and place it in a warm place to rise again for around 45-60 minutes or until it’s slightly over the rim of the pan.
STEP 5: BAKE WHOLE WHEAT BREAD
- Towards the end of the second rise, pre-heat the oven to 350 F.
- Bake for 30-35 minutes, or until the top is golden brown.
- At around 22 minutes of baking, tent the bread with some aluminum foil to prevent the top of the bread from browning.
- Remove from the oven and transfer the bread to a cooling rack.
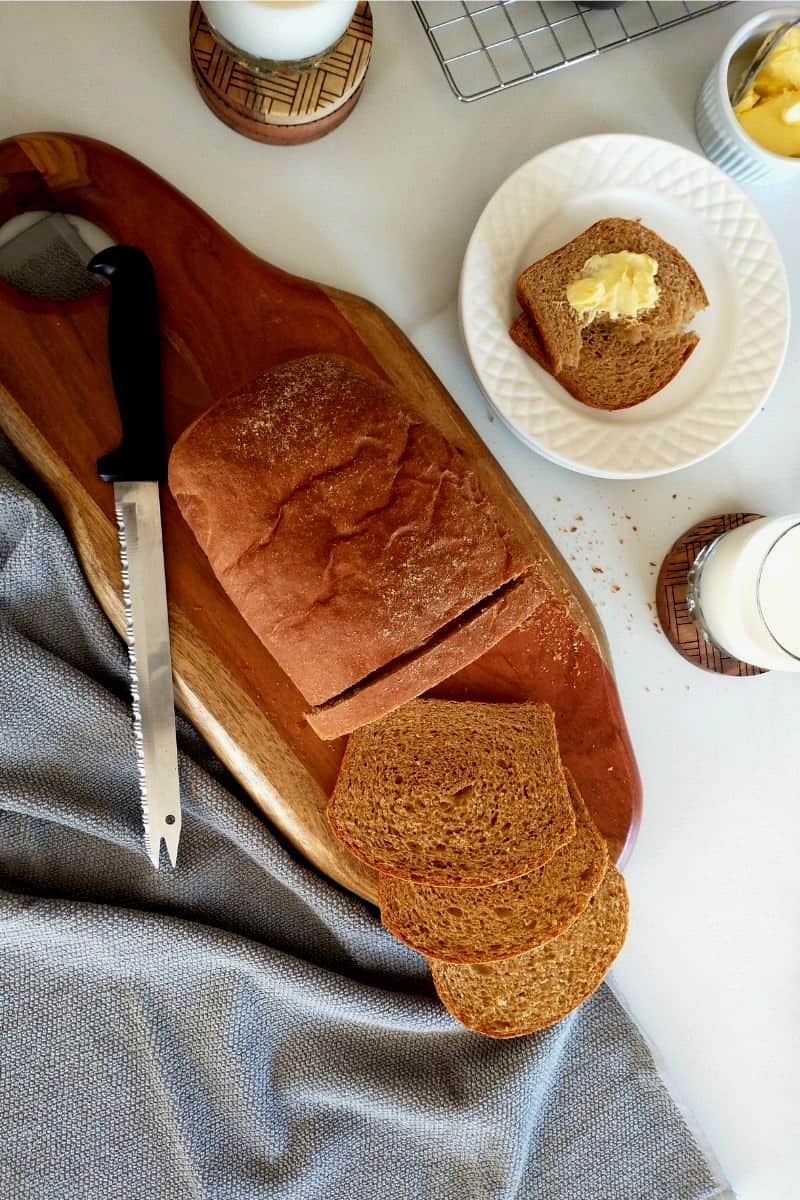
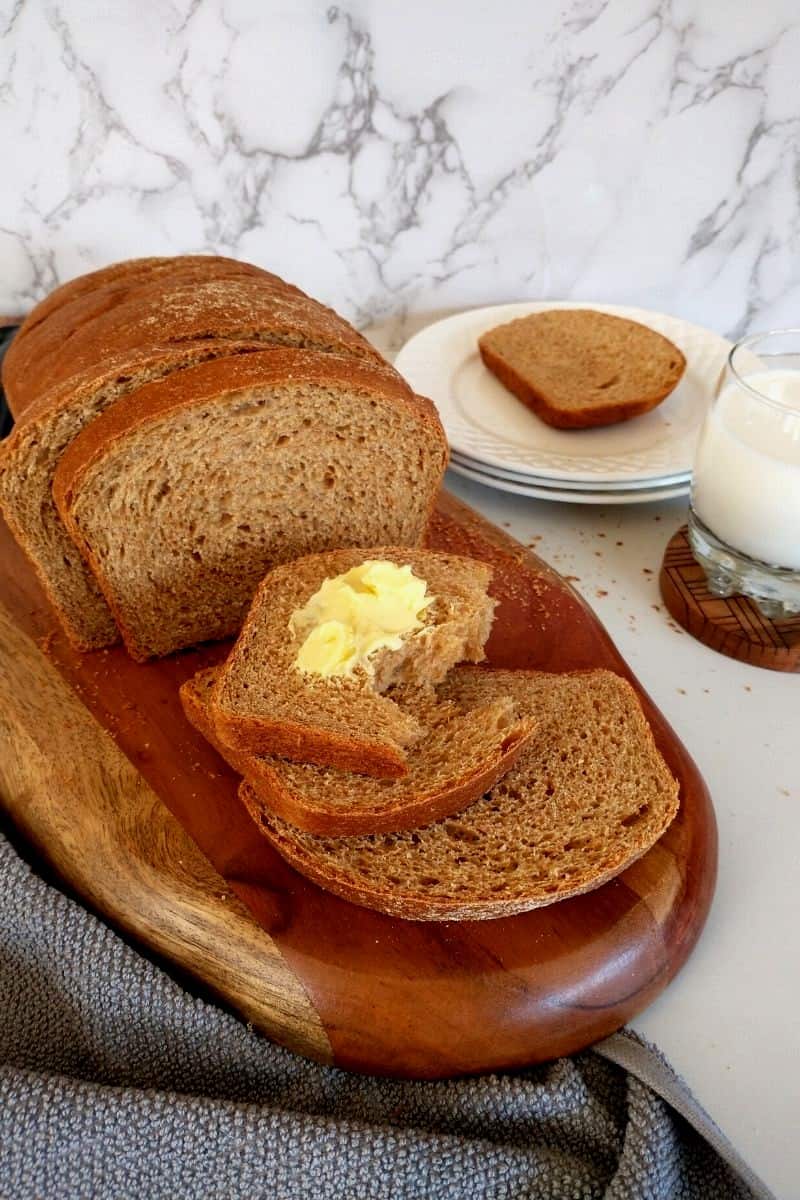
- Let the bread come to room temperature. Using a serrated or bread knife slice the bread loaf into desired pieces. Enjoy a slice of warm, soft whole wheat bread with some butter.
- Wrap the leftover bread into a paper towel. Place it into a Ziploc bag and store it in the refrigerator for up to a week.
Video
Notes
- Directions For Make Ahead Dough
- Directions To Freeze The Dough
- Directions For Freezing Bread
- Tips For Soft Whole Wheat Bread
- Frequently Asked Questions
Nutrition
Disclaimer
Nutrition values are my best estimates. If you rely on them for your diet, use your preferred nutrition calculator.


Sara says
Hi, Thanks for sharing this whole wheat bread recipe. My bread always used to turn out dense, I tried your recipe and it was perfect. Thanks for all the tips and for the recipe video, helped me a lot.
Jyoti Behrani says
Wonderful! Glad to hear that the bread turned out good 🙂
Tina says
This was fabulous! It turned out so soft and had perfect texture. I also added some mixed seeds and it added a nice crunch to the bread. Thanks for an amazing recipe.
Jyoti Behrani says
I am so glad you liked my recipe 🙂 Thanks!
Abhisha says
Your recipe was awesome...this was my first baking experience and I didn't expect it to turn out so well..it was fluffy and tasty...my whole family liked it..thank you so much!
Jyoti Behrani says
Great! I am so glad you liked my recipe 🙂 Thanks for sharing your feedback!
Himanshi says
What will be the quantity if I want to use instant yeast? Thanks!
Jyoti Behrani says
For instant yeast the quantity remains the same. Please follow the directions on the package to proof the yeast. Thanks!
Anne says
Can I use molasses instead of honey? If so, will the quantity remain 1/4 cup?
Jyoti Behrani says
Sorry, I have not tried this recipe with molasses. You can use maple syrup or sugar instead of honey, same quantity. Thanks!
Anu says
Thanks a lot for this recipe.Bread came out soft.
Jyoti Behrani says
Awesome! I am so glad you liked my recipe 🙂
Erica says
Can this recipe be successful cut in half to make one loaf only? Running low on whole wheat flour but I still want to make it! Thank you!
Jyoti Behrani says
This recipe can be easily cut in half. You can make just one loaf of bread. I usually make 2 loaves, as I use my stand mixer to knead the dough. But you can also knead the dough by hand. Hope this helps. Thanks!
Carissa says
Looks like a great recipe. Quick question: Do you remove the bread from the pans to cool or just cool them in the pan on the rack?
Thanks!
Jyoti Behrani says
Hi Carissa,
Allow the bread to cool for 5 minutes in the pan on the rack. Once it is slightly cool, carefully remove it from the pan and place it on the cooling rack. Thanks!
Maureen says
Thanks for a fabulous bread - I love it. I mix the dough in my bread machine but bake the bread in a regular oven, & also add sunflower seeds & ground flax seeds. Can I mix all purpose flour with wholewheat as my husband prefers white bread to wholewheat but he'll take a mix? or do you have a recipe for white bread?
Jyoti Behrani says
Hi Maureen
You can substitute all-purpose flour instead of whole wheat flour in this recipe. You can sub all whole wheat flour with ap flour or use half whole wheat and half ap flour, both work. Thanks!