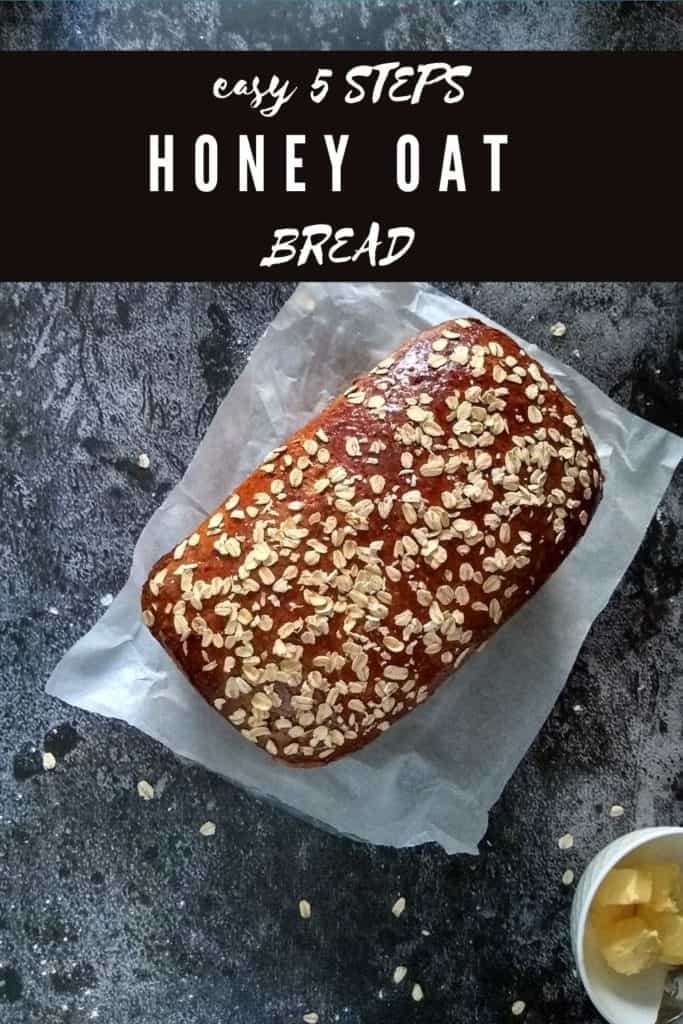
Honey Oat Bread is made with basic ingredients easily available in our pantry. This homemade honey oatmeal bread recipe is simple, easy, and tastes amazing. If this is your first time baking bread, try this flawless, 5 steps easy recipe, perfect for beginners.
Delicate, yet strong enough to hold all your favorite toppings. This homemade bread is soft on the inside and crusty on the outside. My kids love veggie sandwiches for their lunch, and this bread makes an excellent choice. It's hearty, filling and honestly, nothing beats the fresh taste and flavor of freshly baked homemade bread.
If you are new to baking, try this recipe, you will be pleasantly surprised by how easy it is to make homemade bread. Made with simple pantry ingredients, this bread is easy to make at home and tastes amazing. You don't have to be a pro, to make this gourmet-style bread at home.
I used a Stand Mixer for this recipe. However, the dough can be made by hand. It just takes an extra few minutes to knead the dough, that's all. You can proof the dough using the traditional method or Instant Pot. I live in a cold climate and therefore I prefer to use Instant Pot for consistent results. I have shared both techniques of proofing the bread in detail in the post and also in the recipe card. Be sure to check it out.
Jump to:
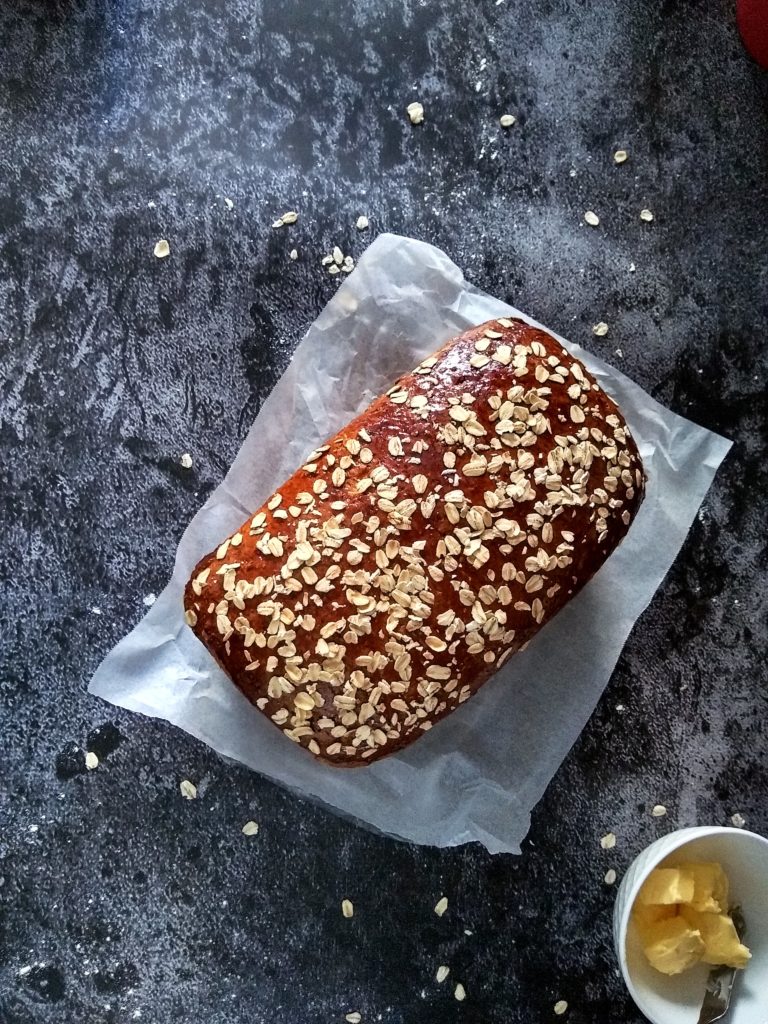
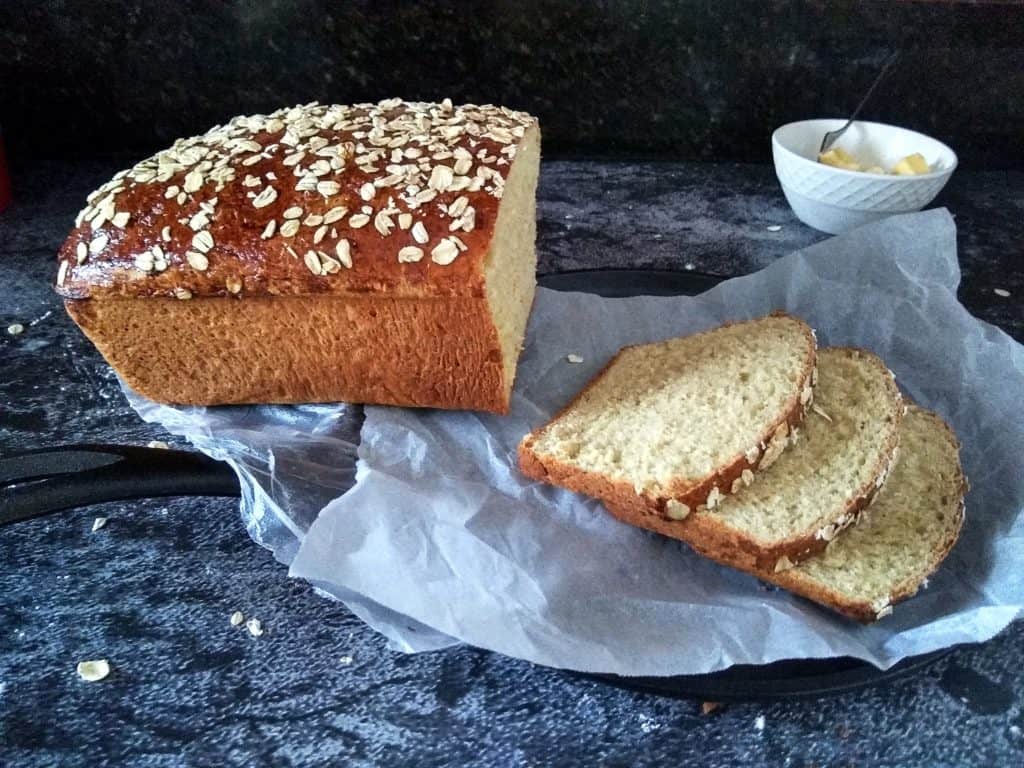
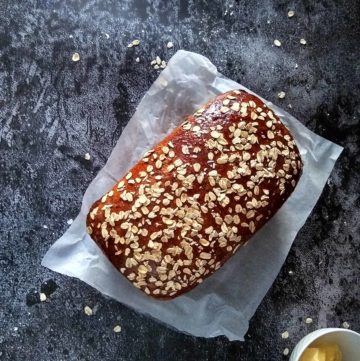
Pic Shown: oatmeal honey bread
Ingredients for Honey and Oat Bread Recipe
This recipe makes 1 loaf (9 inches by 5 inches) of bread. You can easily double this recipe. However, the proofing time remains the same.
- all-purpose flour
- whole milk
- rolled oats
- honey
- unsalted butter
- Active Dry Yeast
- water
- sugar
- eggs
- salt
- oil
- unsalted butter
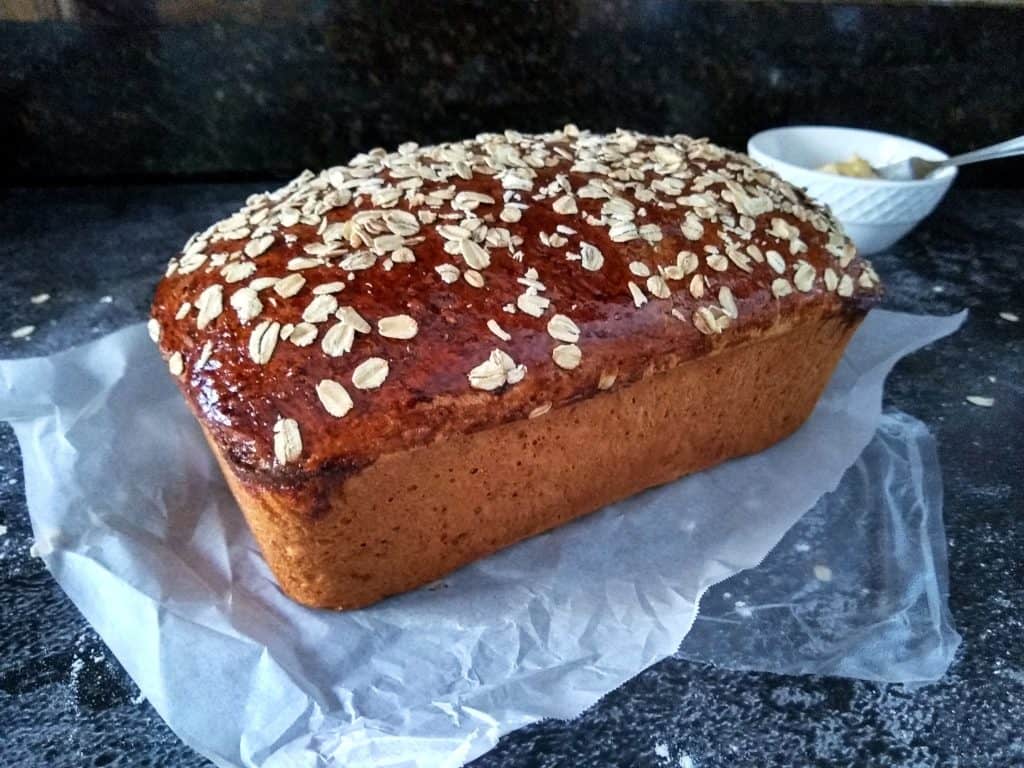
Pic Shown: Oat Honey Bread
Recipe Honey Oat Bread
It is extremely straightforward and relatively easy to make, this oatmeal honey bread at home. Follow my foolproof recipe and make this gourmet style bread in just 5 easy steps.
1. Prepare the dough [By hand or using a Stand Mixer]
2. First proofing [Traditional or using Instant Pot]
3. Shape the bread
4. Second proofing
5. Bake
Step-by-step Recipe
Step 1: Prepare the dough
In a saucepan, bring milk to a boil. Turn OFF the heat. Stir in butter, honey, and oats. Set it aside for 10-15 minutes.
In a cup, stir in warm water [100*F – 110* F], sugar, and yeast. Let the mixture stand for 10 minutes, or until it turns frothy, and doubles in volume.
Note: If the yeast is active, the mixture turns frothy, and doubles in volume. If the mixture does not double in size, start the process again with fresh yeast.
Pour the oats mixture into the bowl of a standing mixer. Add flour, salt, yeast mixture, and beaten eggs. Using a dough hook attachment, knead for 5-7 minutes, or until the dough is smooth and elastic (dough will start to leave the sides of the bowl and form into a ball).
Note: If you are kneading by hand, the dough will be very sticky at first. Transfer the dough to a lightly floured work surface. Add knead the dough until it is soft, elastic, springs back when pressed, and is not sticky around 15-20 minutes.
Optional: If the dough feels too sticky, add some flour and if it is too dry, add 1-2 teaspoons of warm milk, and knead the dough, until it is nice and soft.
Shape the dough into a ball and place it in a greased bowl.
Step 2: First Proofing
Place the dough in a greased bowl and turn it once to grease the top.
Cover the bowl with a kitchen towel, and place it in a warm place, for 60-90 minutes or until it doubles in volume.
If using Instant Pot for proofing, place the dough in the greased inner pot, and turn it once to grease the top. Place the lid, and cover the pot. Turn ON YOGURT (normal) for 1 hour.
Note: I used a glass lid that fits, to cover the inner pot.
Step 3: Shape the bread
Grease a 9*5 inch baking pan with some softened butter.
Transfer the dough onto a lightly floured work surface and deflate it. Using your hands, roll out the dough into a 9*5 inch rectangle.
Tightly roll the dough into a log, starting from the short edge, and pinch the seam.
Place the loaf in a greased baking pan (seam side down). Press the dough to fill the corners of the pan.
Step 4: Second Proofing
Cover the shaped bread with a loose plastic wrap or a clean kitchen towel, and place it in a warm place, for 1 – 1.5 hours or until it doubles in size and is around half an inch above the rim of the Loaf Pan.
Step 5: Bake
Preheat the oven to 350 F.
Brush the top of the bread with some reserved egg and sprinkle some oats.
Bake the bread for 30-40 minutes or until the top is golden brown and the wooden screwer inserted comes out clean.
Note: If the top is browning quickly, loosely tent the bread with the foil.
Remove the bread from the oven, carefully remove it from the pan and transfer it to a wire cooling rack. Allow the bread to cool for 20 minutes before serving.
Using a sharp serrated (or bread) knife, cut the bread into desired slices. Enjoy this homemade oatmeal honey bread with some butter!!
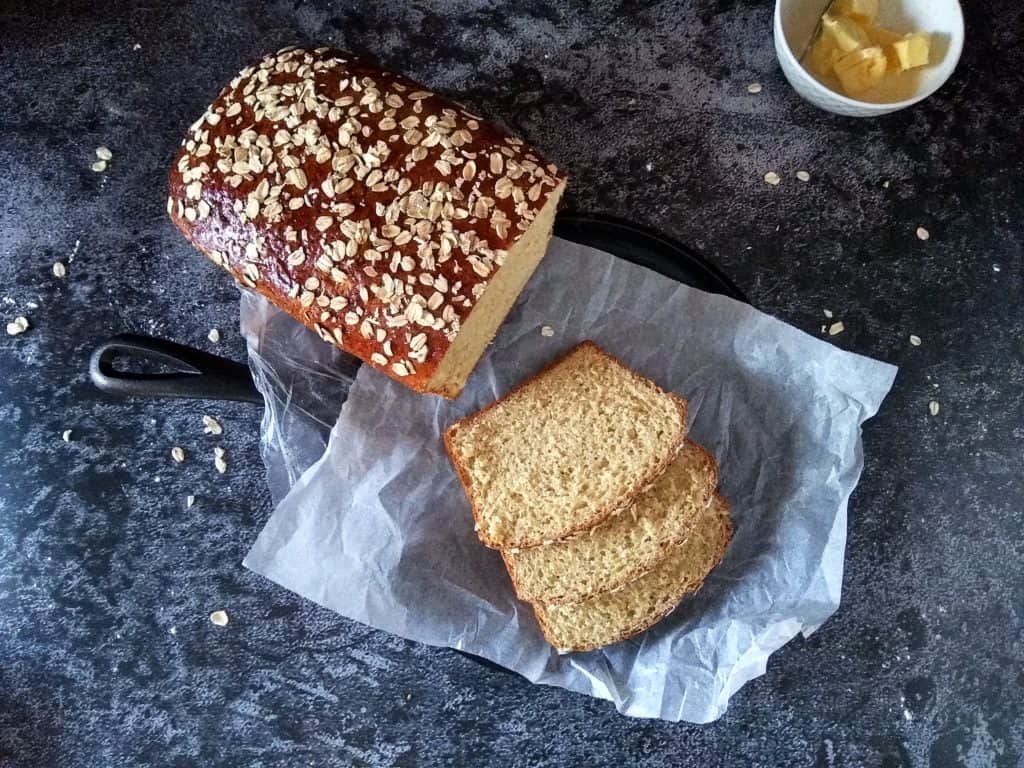
Pic Shown: Honey Oatmeal Bread
Pro Tips for Best Oatmeal Honey Bread
For measuring the flour, do not scoop the flour, instead, lightly fill the measuring cup with the flour, and level it with the back of the spoon. See FAQ – How to measure the flour right way
If the yeast is active, the mixture turns frothy and doubles in volume. If the mixture does not double in size, start the process again with fresh yeast.
To measure honey, grease the measuring cup with some oil or non-stick spray. The honey will not stick to the measuring cup.
This bread is mildly sweet. You can increase or decrease the sweetness as per liking, by adding more or less honey.
Do not skip the salt in the recipe, it helps balance the sweetness of the honey.
Check the consistency of the dough after kneading it for 4-5 minutes. If it feels too sticky, add some flour and if it is too dry, add 1-2 teaspoons of warm milk, and knead the dough, until it is nice and soft.
Do not over-knead the dough. As soon as the dough is soft, elastic, springs back when pressed, and is not sticky. You know the dough is kneaded well.
Proof the dough until it becomes double in volume, do not overproof it.
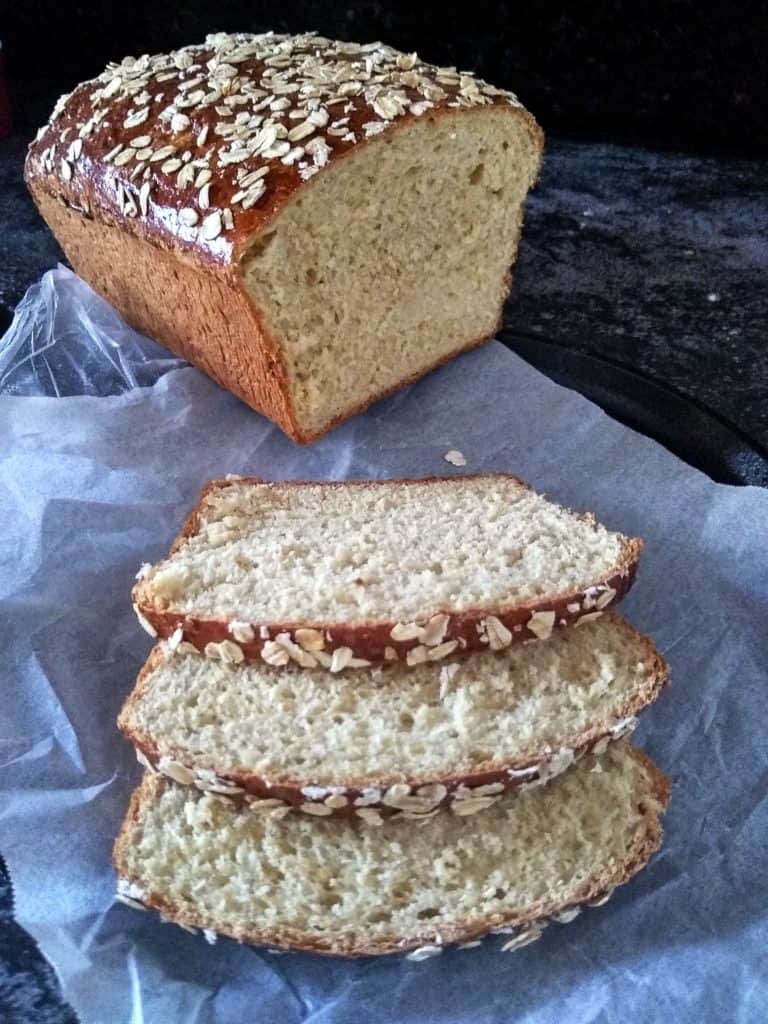
Allow the bread to cool for at least 20 minutes. Use a sharp serrated knife to cut the bread into pieces. This bread is quite soft from the inside and crusty from the outside. A serrated knife gives clean-cut pieces, without tearing them apart.
Pic Shown: recipe honey and oat bread
Frequently Asked Questions
How to measure flour the right way?
It is important to measure the flour using the right method. To avoid over-measuring, do not scoop the flour straight from the container. First, loosen the flour by giving it a good stir with a spoon or a spatula. Next, spoon the flour into the measuring cup, and fill the cup slightly over the rim. Now, level the flour using the back of the spoon or a knife.
Consistency of the dough
The consistency of the dough is soft, elastic, and non-sticky. When you poke the dough, it springs back and does not stick.
Check the consistency of the dough after kneading it for 4-5 minutes. If it feels too sticky, add some flour and if it is too dry, add 1-2 teaspoons of warm milk, and knead the dough, until it is nice and soft.
How long do you knead dough?
Depending upon the method used for kneading, the time will vary. If you are using a stand mixer to knead the dough, it takes somewhere from 5-7 minutes to knead the dough. If kneading the dough by hand, it takes around 10-15 minutes for a soft, non-sticky dough.
How do I know if the dough is kneaded enough?
A well-kneaded dough will be soft, and elastic, springs back when you poke your finger, and won’t be sticky. If the dough does not pass this simple test, it means it needs more kneading.
Here are a few ways you can tell that the dough is kneaded well:
First, it forms into a nice smooth dough, the dough will start to leave the sides of the bowl.
Secondly, poke a finger, and if the dough springs back, and is not sticky, the dough is kneaded well.
Lastly, you can also do a windowpane test. Take a small piece of dough, and stretch it as thin as possible. If the dough does not tear, and you can see a thin layer of dough, it means the dough is kneaded well.
Why do you knead the dough?
It is important to knead the dough before rising, as kneading develops the gluten in the dough. Gluten is made of long strands of protein, which makes the dough stretchy. The stretchy dough can hold the bubbles created by the yeast, thus making the dough rise.
Why is my dough too sticky?
Too much liquid can cause sticky dough. Also, if you used cold, or room temperature milk, it can result in the leaking of glutens, causing the dough to be sticky.
My dough is too tight
When using a stand mixer chances are that you overworked the dough. The change in the composition of gluten molecules results in a non-stretchy dough.
Overworked dough often feels too tight, and tough and breaks when you try to pull, or roll.
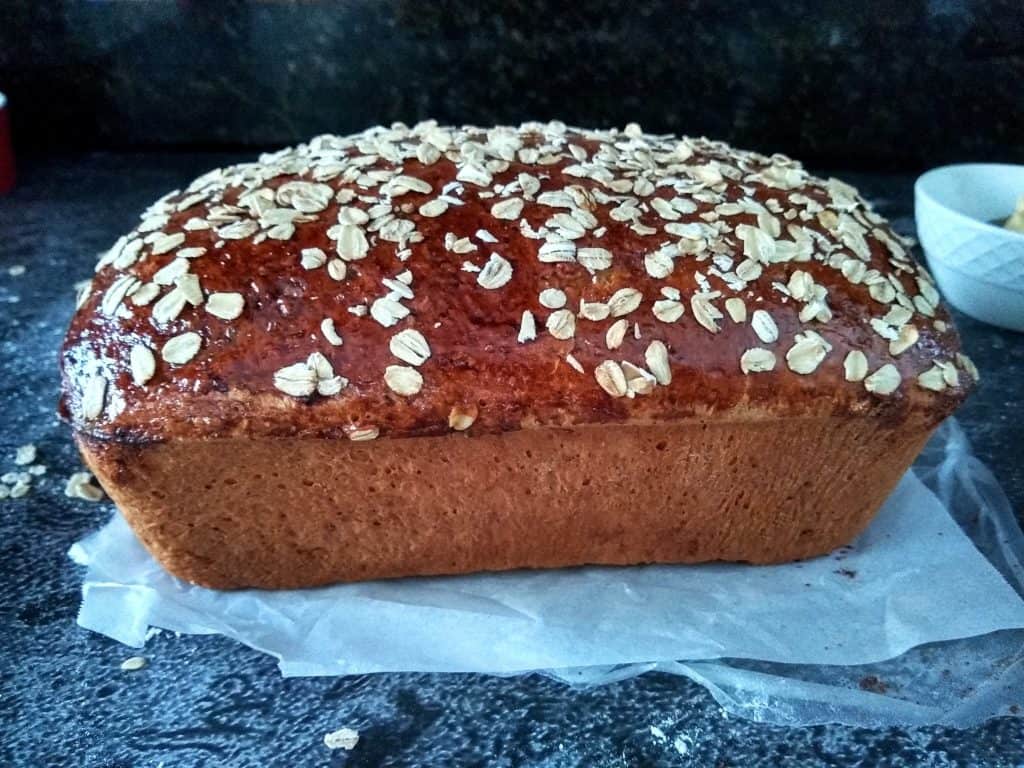
Pic Shown: oatmeal honey bread recipe
Why bread is dense and chewy?
For a nice, soft, and fluffy bread, it is important to knead the dough enough. When the dough is not kneaded enough, either using a stand mixer or by hand, the dough will lack strength. When you make bread using this dough, chances are it will turn out chewy and quite dense in texture.
What makes bread light and soft?
As the yeast grows, it produces gas and carbon dioxide. Depending on how much gas is produced in the dough, the bread will turn out light and soft.
How do you know if bread is baked properly?
I know when it comes to bread, It is not easy to tell if it is baked right or not, especially when you can't see what's inside it. Well, here are some of the ways, that I find helpful to get a perfect loaf of bread.
1. Appearance
The easiest way to tell if the bread is baked to perfection or not is by just looking at it. With time and practice, one gets good at judging the baked good visually. There are quite a few things that one should keep in mind while baking bread. Depending upon the moisture in the dough, the size of the loaf, and whether the dough is enriched (contains eggs, butter, or milk ) or not, enriched dough usually takes longer to bake.
The ideal loaf of bread, when it's done, will have a dry, firm crust. If the crust is pale, it needs a few extra minutes of baking. Also, if you brushed the top with milk, butter, or eggs, you will see the bread has a nice, deep brown color.
2. Sound
This is interesting! Did you know you can tell if your bread is baked right or not, by listening to it? Isn't that amazing! Yes, a perfectly baked loaf of bread, when tapped at the bottom sounds hollow. When the baking time is up, remove the bread from the loaf pan, and tap it at the bottom of the bread, you will hear a hollow sound, indicating the doneness of the bread.
3. Internal temperature
New to baking? Take all the guesswork out and use an instant-read thermometer, to read the internal temperature of the bread. Insert the thermometer in the center of the loaf, it should read around 190 F. For enriched dough bread (one with milk, butter, or eggs), the internal temperature should read around 200 F.
4. Rule of thumb
Can't decide if the bread is cooked right or not? In doubt, always give those extra few minutes of baking. It doesn't hurt, you might end up with a bit of dry bread, but hey it's better than the under baked one!
How to store bread?
Once the bread cools completely, place it in a Ziploc bag, or an air-tight container. Bread lasts for a few days at room temperature or up to a week in the refrigerator.
Bread freezes beautifully. Store it in a freezer-friendly storage bag or container, and it will last for a couple of months.
Defrost, reheat, and enjoy Honey Oats Bread.
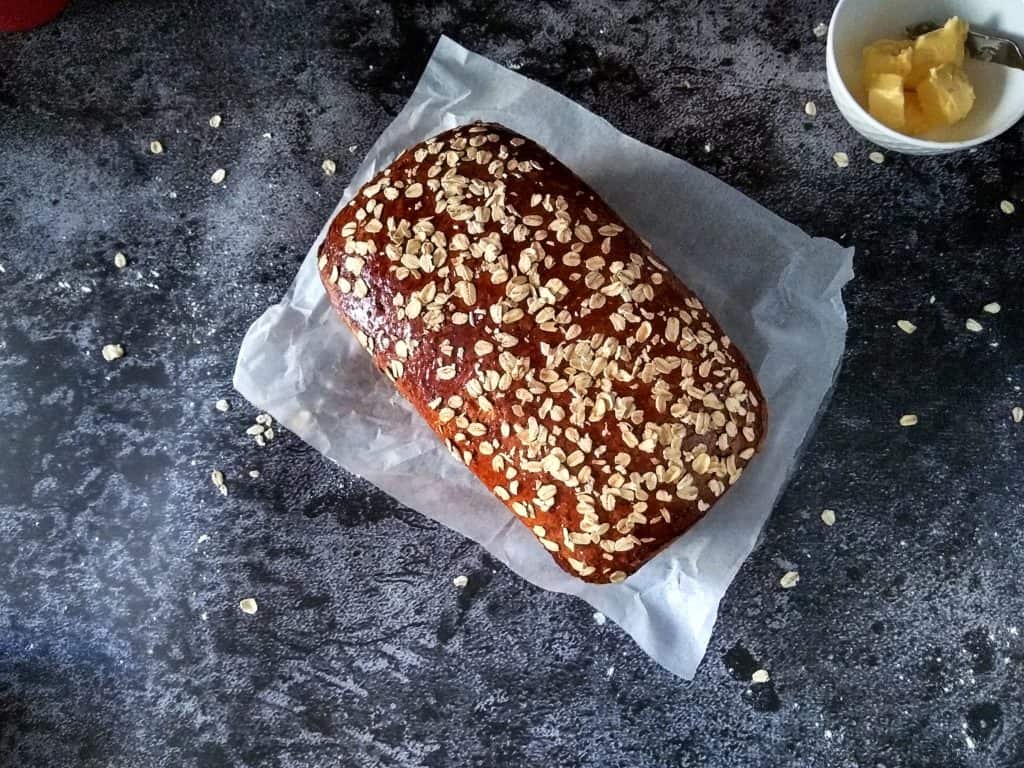
Pic Shown: recipe for honey oatmeal bread
Homemade Bread Recipes
Love homemade bread? Check out some more bread recipes on the blog:
- Chocolate Babka [Post includes 16 different sweet and savory filling ideas]
- Star Bread
- Homemade Naan Bread [Garlic Naan]
- Brioche Rolls [Dinner Rolls]
- Homemade Whole Wheat Bread
Easy Honey Oat Bread | Oatmeal Honey Bread Recipe
Equipment
Ingredients
INGREDIENTS FOR DOUGH
- 3 cup (390 g) all purpose flour; plus 1-2 tablespoon, as needed
- ¾ cup (180 ml) whole milk
- 1 cup (95 g) rolled oats
- ¼ cup (85 g) honey
- 2 tablespoon (28 g) unsalted butter
- 2 ½ teaspoon (7.6 g) Active Dry Yeast
- ¼ cup (60 ml) warm water [100 F – 110 F]
- ½ tablespoon sugar
- 2 large eggs room temperature, beaten [reserve 1 tablespoon]
- 1 teaspoon salt
- ½ tablespoon vegetable oil, to grease the bowl
- 1 tablespoon unsalted butter, softened, to grease the baking pan
FOR THE TOPPING
- 1 tablespoon reserved egg, for brushing
- 1-2 tablespoon rolled oats, for sprinkling
Instructions
Step 1: Prepare the dough
- In a saucepan, bring milk to a boil. Turn OFF the heat. Stir in butter, honey, and oats. Set it aside for 10-15 minutes.
- In a cup, stir in warm water [100*F – 110* F], sugar, and yeast. Let the mixture stand for 10 minutes, or until it turns frothy, and doubles in volume.Note: If the yeast is active, the mixture turns frothy, and doubles in volume. If the mixture does not double in size, start the process again with fresh yeast.
- Pour the oats mixture into the bowl of a standing mixer. Add flour, salt, yeast mixture, and beaten eggs. Using a dough hook attachment, knead for 5-7 minutes, or until the dough is smooth and elastic (dough will start to leave the sides of the bowl and form into a ball).Note: If you are kneading by hand, the dough will be very sticky at first. Transfer the dough to a lightly floured work surface. Add knead the dough until it is soft, elastic, springs back when pressed, and is not sticky around 15-20 minutes.
- OPTIONAL: If the dough feels too sticky, add some flour and if it is too dry, add 1-2 teaspoons of warm milk, and knead the dough, until it is nice and soft.
- Shape the dough into a ball and place it in a greased bowl.
Step 2: First Proofing
- Place the dough in a greased bowl and turn it once to grease the top.
- Cover the bowl with a kitchen towel, and place it in a warm place, for 60-90 minutes or until it doubles in volume.
- If using Instant Pot for proofing, place the dough in the greased inner pot, and turn it once to grease the top. Place the lid, and cover the pot. Turn ON YOGURT (normal) for 1 hour.Note: I used a glass lid that fits, to cover the inner pot.
Step 3: Shape the bread
- Grease a 9*5 inch baking pan with some softened butter.
- Transfer the dough onto a lightly floured work surface and deflate it. Using your hands, roll out the dough into a 9*5 inch rectangle.
- Tightly roll the dough into a log, starting from the short edge, and pinch the seam.
- Place the loaf in a greased baking pan (seam side down). Press the dough to fill the corners of the pan.
Step 4: Second Proofing
- Cover the shaped bread with a loose plastic wrap or a clean kitchen towel, and place it in a warm place, for 1 – 1.5 hours or until it doubles in size and is around half an inch above the rim of the baking pan.
Step 5: Bake
- Pre-heat the oven to 350 F.
- Brush the top of the bread with some reserved egg and sprinkle some oats.
- Bake the bread for 30-40 minutes or until the top is golden brown and the wooden screwer inserted comes out clean.Note: If the top is browning quickly, loosely tent the bread with the foil.
- Remove the bread from the oven, carefully remove it from the pan and transfer it to a wire cooling rack. Allow the bread to cool for 20 minutes before serving.
- Using a sharp serrated (or bread) knife, cut the bread into desired slices. Enjoy this homemade Honey Oat Bread with some butter!!
Notes
- Pro Tips for Best Honey Oat Bread
- Frequently Asked Questions
Nutrition
Disclaimer
Nutrition values are my best estimates. If you rely on them for your diet, use your preferred nutrition calculator.

Linda Quiroz says
Hello, thank you for your reply!
I didn’t have flax meal on hand so I tried chia seeds, they worked out pretty good, the bread turned out delicious ?
Thank you!
Linda Quiroz
Jyoti Behrani says
I am so glad you liked it 🙂 Thanks for sharing your feedback!
Leanne says
I brush the egg and sprinkle some oats just before the second proof and it still turned out wonderfully. Thanks!
I doubled the recipe.
Jyoti Behrani says
Awesome! I am so glad you liked my recipe 🙂 Thanks for sharing your feedback!
Agnes T says
Thank you for the recipe, Jyoti!
It’s a success for me- a first timer! Taste great and the recipe is easy to follow.
Jyoti Behrani says
Awesome! I am so glad you liked my recipe 🙂 Thanks for sharing your feedback!
Josephine says
I made this using almond milk and vegan butter (for my dairy free husband) and it came out amazing! Kneaded by hand and oven proofed awesome recipe!
Jyoti Behrani says
Awesome! I am so glad you liked my recipe ? Thanks for sharing your feedback!
Laura says
When you say all purpose flour is that white baking flour of white bread flour? From the U.K. so just wondering if there was a correct one to be using!
Jyoti Behrani says
Hi, All-purpose flour is the white flour used in baking. Bread flour has a higher protein content than all-purpose, and comes in white and whole wheat varieties. Hope this helps. Thanks!
Priya says
Hi! Thanks for the recipe. When do you use the reserve beaten eggs and oats? It’s looking good so far!
Jyoti Behrani says
Hi, I brush the top of the bread with some reserved egg and sprinkle some oats just before baking the bread. Thanks!
Lisa Delima says
This is a great recipe that doesn’t require to much brain power! I wanted to impress my new boyfriend with my kitchen skills and wanted to make everything from scratch. When I was setting the table I noticed he was focused on me. So I figured I would ask him to pull the bread out of the oven. He got hit in the face with that freshly baked smell and his eyes opened wide. Wow he said. So we sat down to eat and I asked him to cut a few slices. You might have thought he made it himself the way he was smiling. He was so impressed. The next day we went to his family cook out and all he talked about was this bread that his girlfriend made for him and said dam she is a keeper! I will be making this again! Thankyou…
Jyoti Behrani says
Hi Lisa,
I am so glad you liked my recipe 🙂 Thank you for trying my recipe!