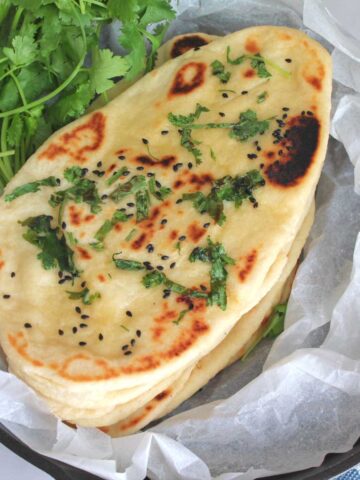
Bagels Recipe: These homemade New York-style Bagels are just like the ones you get in New York City. Perfect crisp, golden brown from the outside, chewy and fluffy from the inside.
These homemade bagels are easy to make. In just 5- easy steps, make these best New York-style bagel at home and enjoy them with your loved ones!!
Freshly baked homemade bagels are perfect for your weekend brunch! Homemade bagels are perfectly crisp on the outside and soft, and fluffy from the inside.
It has a chewy, slightly dense texture, just like the ones you get in New York City. The right balance of flavors and texture makes them my go-to recipe for homemade bagels. Bang on flavors!!
This recipe is inspired by my trip to New York City, where I had my first bagel. Love, at first sight, LOL!! 🙂 They were amazing and I always wanted to recreate the same at home.
Sharing my easy, 5-step, flawless recipe for the best New York Style bagel. Make them today right in the comfort of your home and enjoy these beauties!!
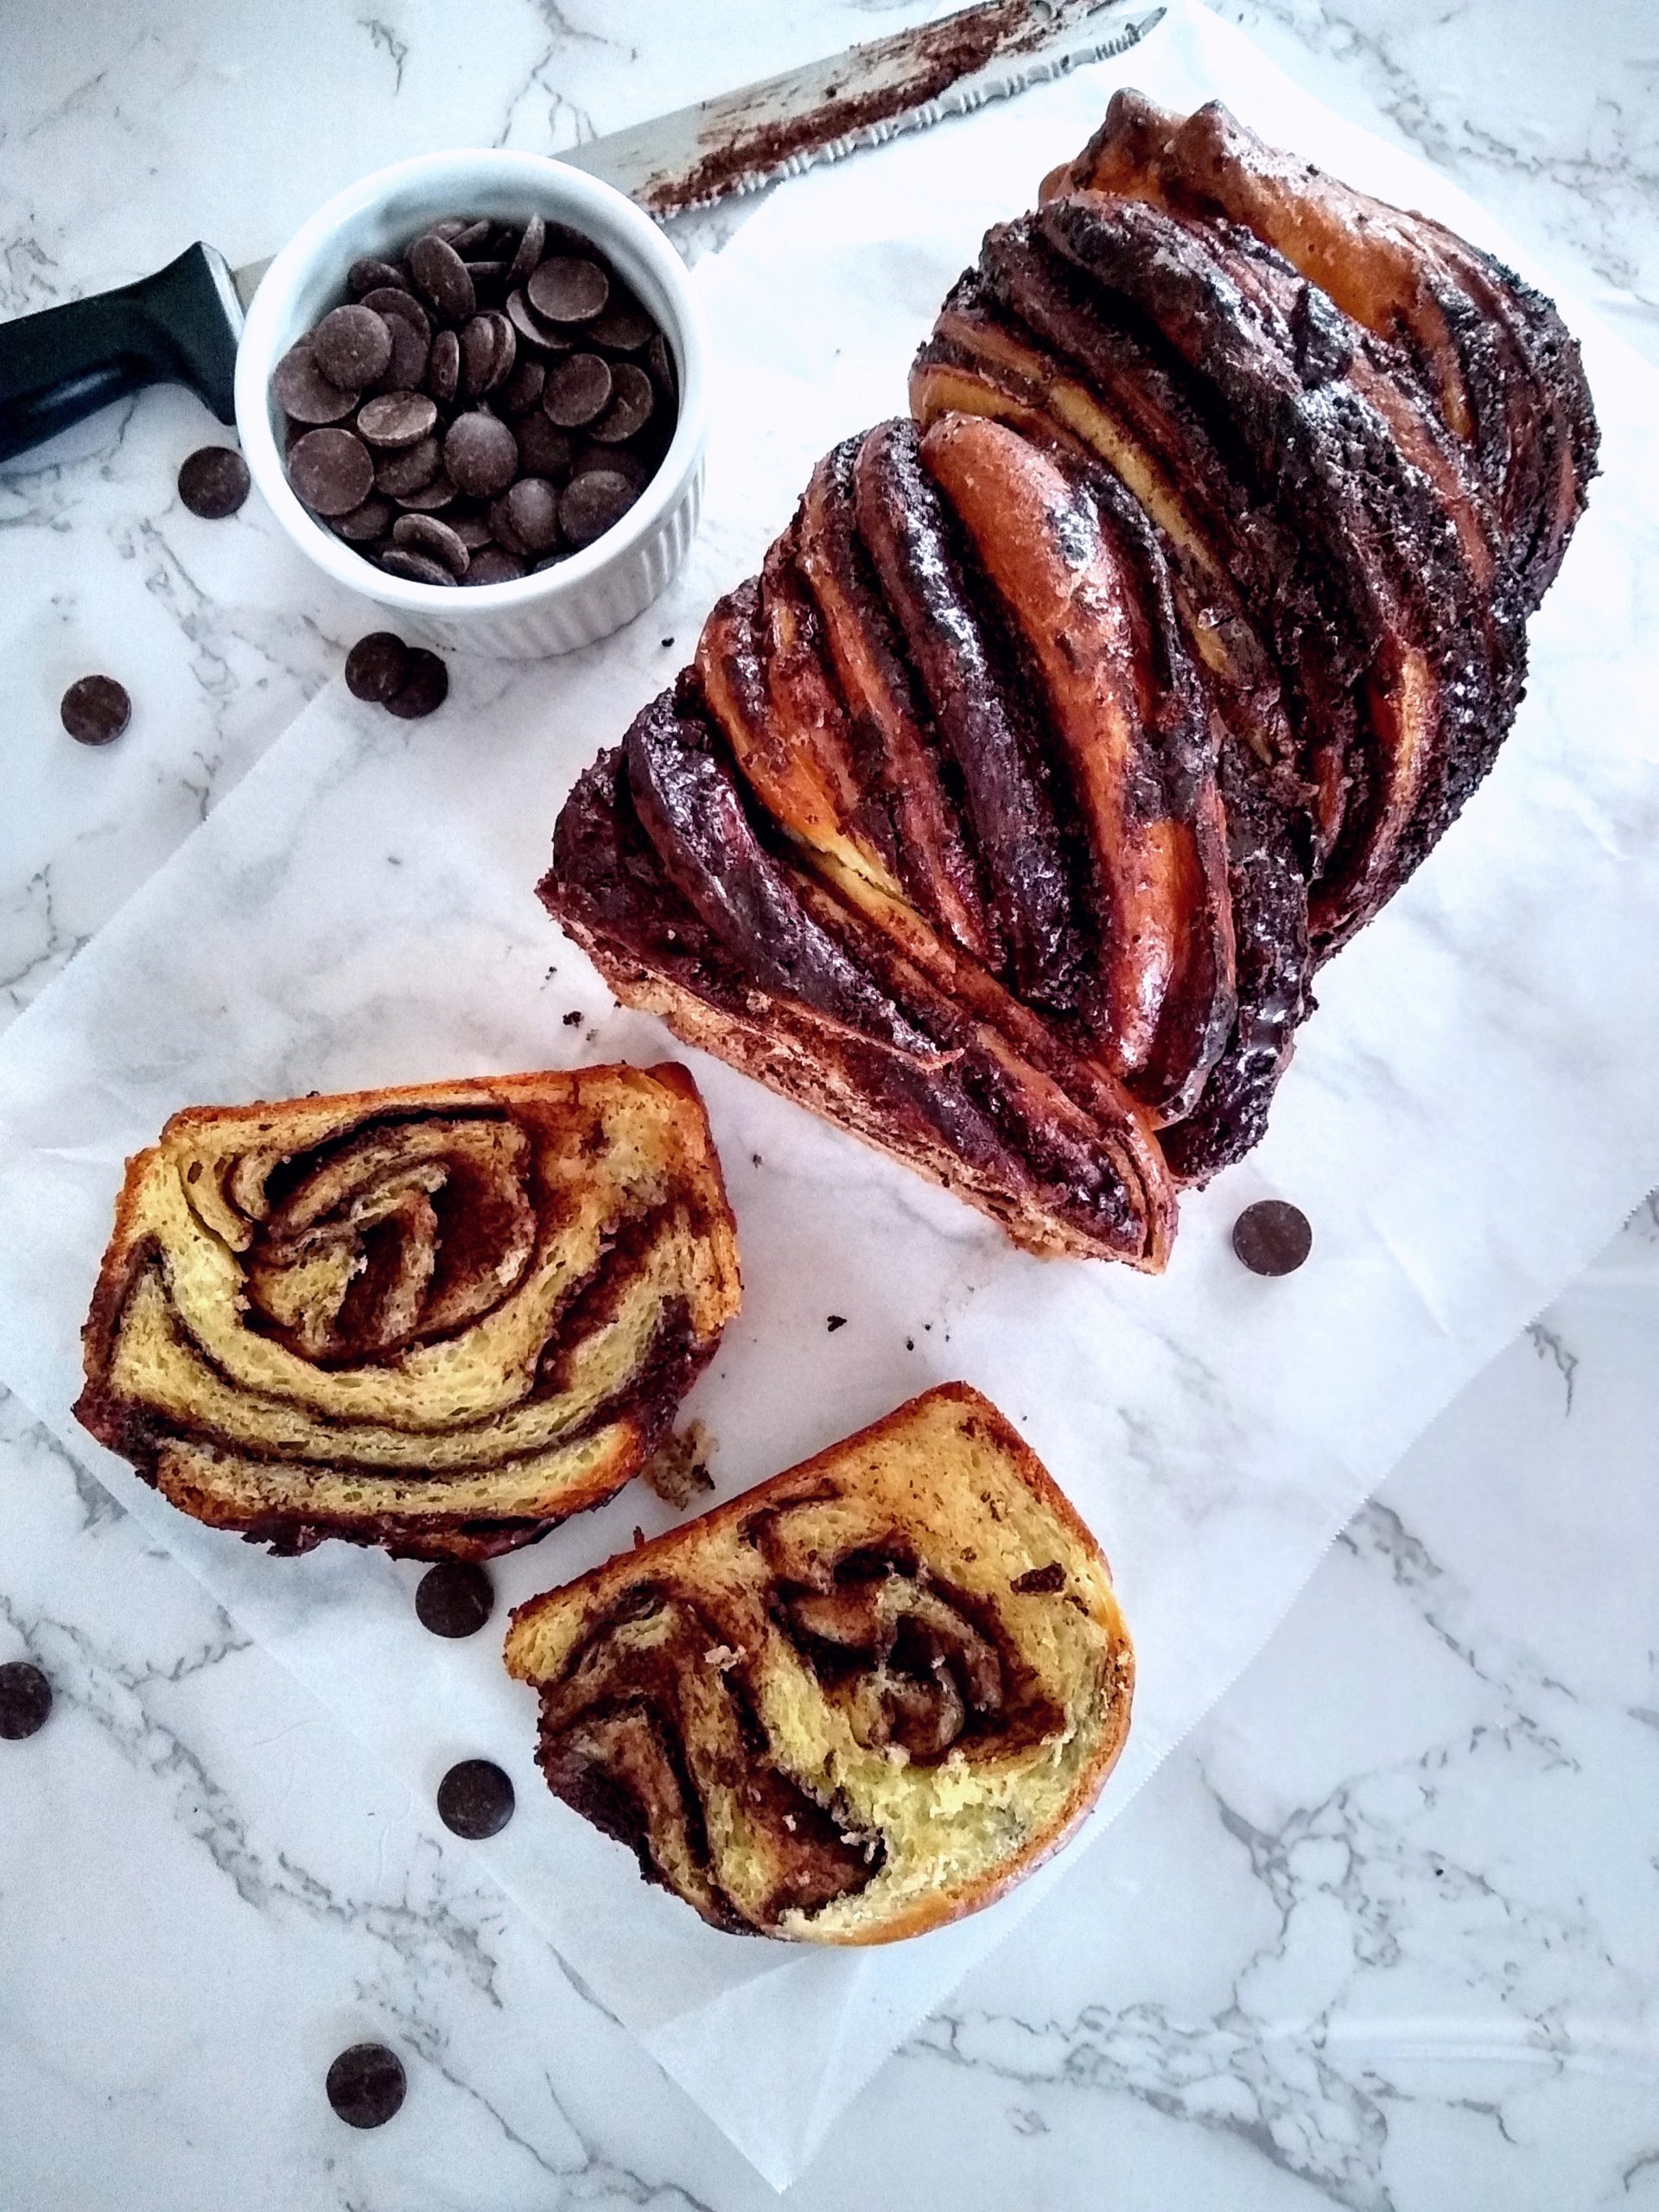
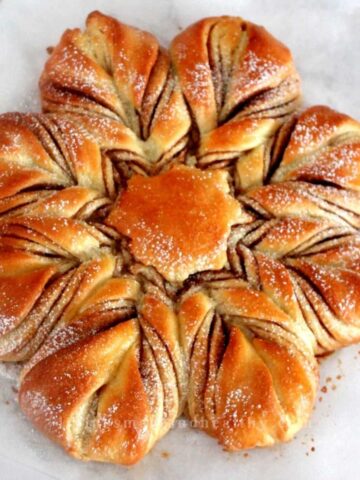
If you love homemade bread, try these English muffins, they are so good! We love it with this 3-ingredient, no pectin, homemade Strawberry Jam!
This sweet and tangy, Indian-inspired Apple Cranberry Chutney goes well with Brioche Rolls [Dinner Rolls]
Jump to:
- Ingredients for recipe for bagels (New York-style bagel)
- How to make New York-style bagels?
- Toppings for New York-style Bagels
- Bagel variations for New York-style bagel recipe
- Instructions for make-ahead dough
- How to freeze the dough
- Pro tips for bagels recipe | New York-style bagels recipe
- Frequently Asked Questions
- More Bread Recipes
- Easy Bagels Recipe | New York-Style Bagel Recipe
What is bagel?
A bagel is a bread, originating in the Jewish communities of Poland, made from yeasted dough, and shaped into a form of a ring. It was introduced in the US in the late 19th century.
Before baking the bagels, it is briefly boiled in water with some baking soda or barley malt syrup. It is brown, crusty on the outside, and dense, chewy from the inside.
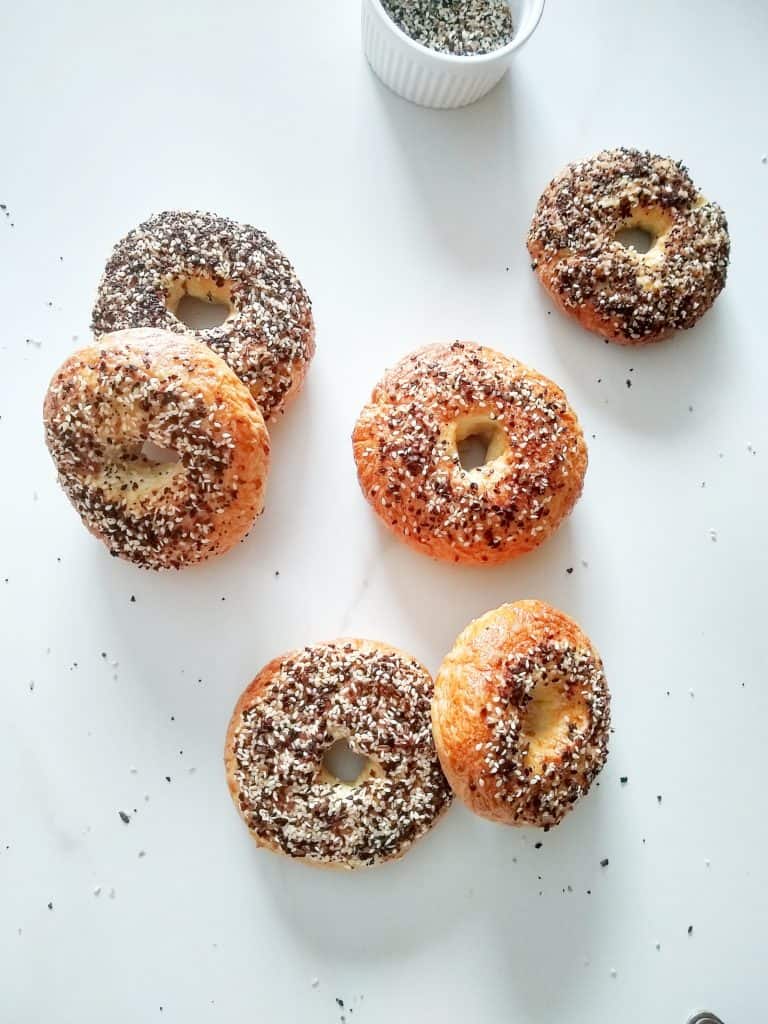
Bagels come in many varieties and flavors, from plain bagels to the ones topped with a variety of seeds such as sesame seeds, poppy seeds, etc.
Pic Shown: New York-style Bagels Recipe
Ingredients for recipe for bagels (New York-style bagel)
For the bagel dough:
- Bread flour
- sugar
- Active Dry Yeast
- Everything Bagel Seasoning, homemade or store-bought
- lukewarm water
- salt
For the water bath:
- water
- baking soda or barley malt syrup
Homemade Everything Bagel Seasoning Recipe
- 2 tablespoon dried onion flakes
- 2 tablespoon dried garlic flakes
- 1 tablespoon poppy seeds
- 2 tablespoon white sesame seeds
- 1 tablespoon black sesame seeds
- ½ tablespoon flakey salt
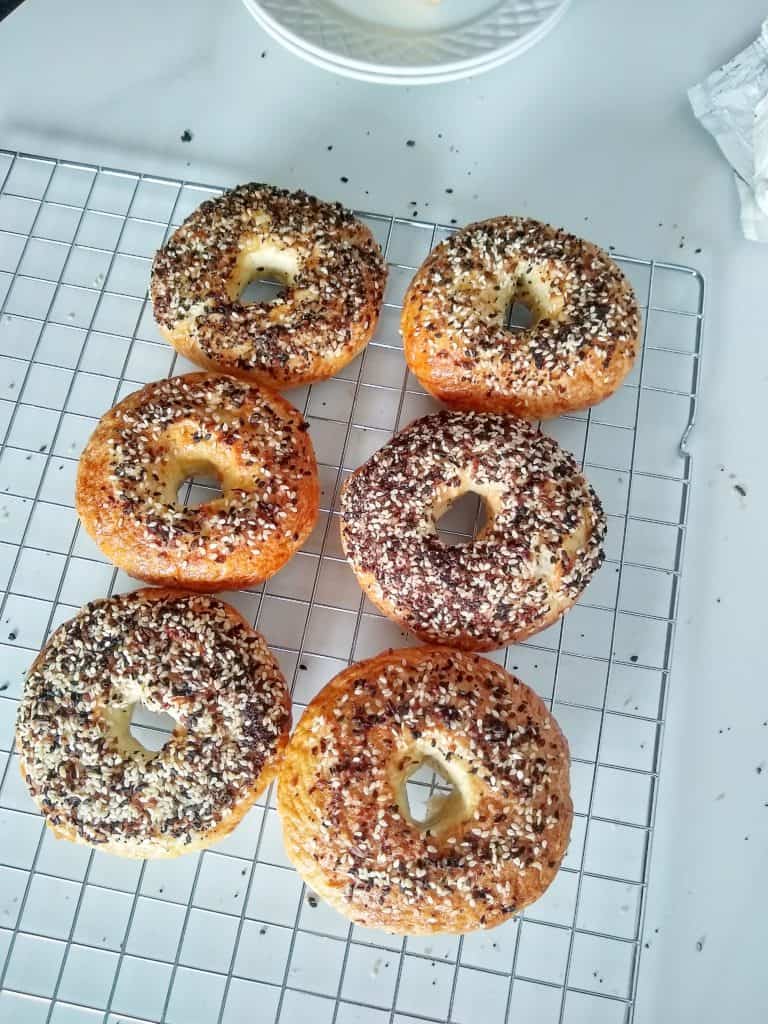
Pic Shown: Easy bagel recipe | New York-style Bagel Recipe
How to make New York-style bagels?
It is extremely straightforward and relatively easy to make, New York-style bagels at home. Follow my foolproof recipe and make these gourmet-style bagels in just 5 easy steps.
- Prepare the dough | By hand or using a Stand Mixer
- First proofing | Tradition or using an Instant Pot
- Divide the dough & second proofing
- Water bath
- Bake bagel
Directions for New York-style Bagel recipe
Step 1: Prepare the dough | By hand or using a Stand Mixer
In a cup, stir in warm water [100* – 110* F], sugar, and yeast. Let the mixture stand for 10 minutes, or until it turns frothy, and doubles in volume.
Note: If the yeast is active, the mixture turns frothy, and doubles in volume. If the mixture does not double in size, start the process again with fresh yeast.
Into the bowl of a stand mixer, add flour, salt, and yeast mixture. Using a dough hook attachment, knead for 5-7 minutes, or until the dough is smooth and elastic (dough will start to leave the sides of the bowl and form into a ball).
Note: If you are kneading by hand, the dough will be very sticky at first. Transfer the dough to a lightly floured work surface. Knead the dough until it is soft, and elastic, springs back when pressed, and is not sticky around 15-20 minutes.
Optional: If the dough feels too sticky, add some flour and if it is too dry, add 1-2 teaspoons of warm water, and knead the dough, until it is nice and soft.
Shape the dough into a ball and place it in a greased bowl.
Step 2: First proofing
Place the dough in a greased bowl and turn it once to grease the top.
Cover the bowl with a kitchen towel, and place it in a warm place, for 60-90 minutes or until it doubles in volume.
If using an Instant Pot for proofing, place the dough in the greased inner pot, and turn it once to grease the top. Place the lid, and cover the pot. Turn ON YOGURT (normal) for 30 minutes.
Note: I used a glass lid that fits, to cover the inner pot.
Step 3: Divide the dough & second proofing
Lightly grease a ( 9 * 12 ) inch baking sheet.
Transfer the dough onto a work surface and deflate it. Divide the dough into 8 equal pieces. Cover the pieces with a damp kitchen towel, while you work with a single piece.
Note: You can use a kitchen scale to precisely divide the dough into equal pieces.
Take a piece of the dough ball, gather all the edges, and tuck them in the center. Turn the dough, seam side down, and roll it into a smooth ball.
Place the rolled dough ball, seam side down, onto a baking dish. Cover with a damp kitchen towel while you roll the rest of the balls.
Cover the dough balls with a damp kitchen towel, and place them in a warm place, for 20 minutes or until it doubles in size.
Step 4: Water bath
While the dough is resting, preheat the oven to 425 F. Fill a large pot or Dutch oven with water. Bring the pot to a boil, reduce and let it simmer.
Once the dough balls have doubled in volume, shape the dough. Using your index finger, poke a hole through the center of the dough ball. Now, hold the dough on one hand of your index finger, and with your second-hand index finger rotate, to stretch the dough to form a one-inch hole. (*refer to a recipe video for step by step)
Place the rolled bagel onto a greased baking sheet, and cover it with a damp kitchen towel. Repeat the process with the remaining dough balls.
Gently place 2-3 bagels in the simmering water, and boil for 2 minutes, turning halfway through. Carefully, remove the bagels with the help of a spider strainer and place them on a greased baking sheet.
Repeat the process with the remaining bagels.
Step 5: Bake bagel
Apply egg wash to the bagels. Sprinkle or dip the bagels in the seasoning mix and place them on a baking sheet.
**refer to the post below, for more Bagel variations
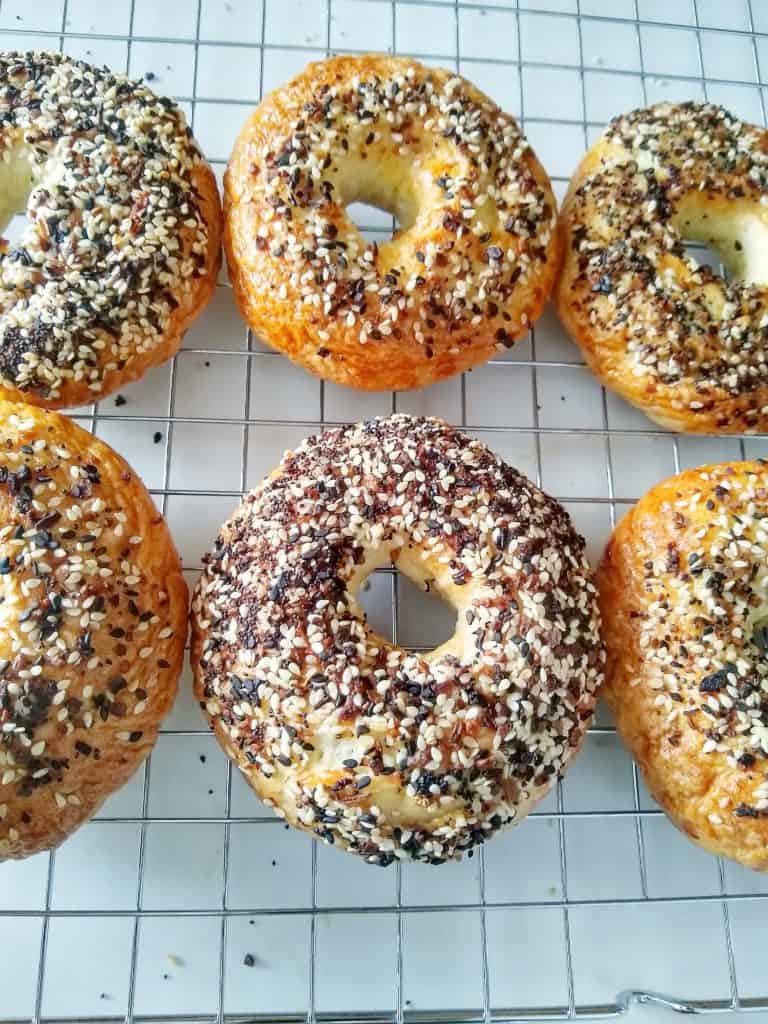
Bake for 20-22 minutes, or until golden brown.
Transfer the bagels onto a cooling rack, and allow them to cool completely. Bagels taste best the next day. Enjoy!!
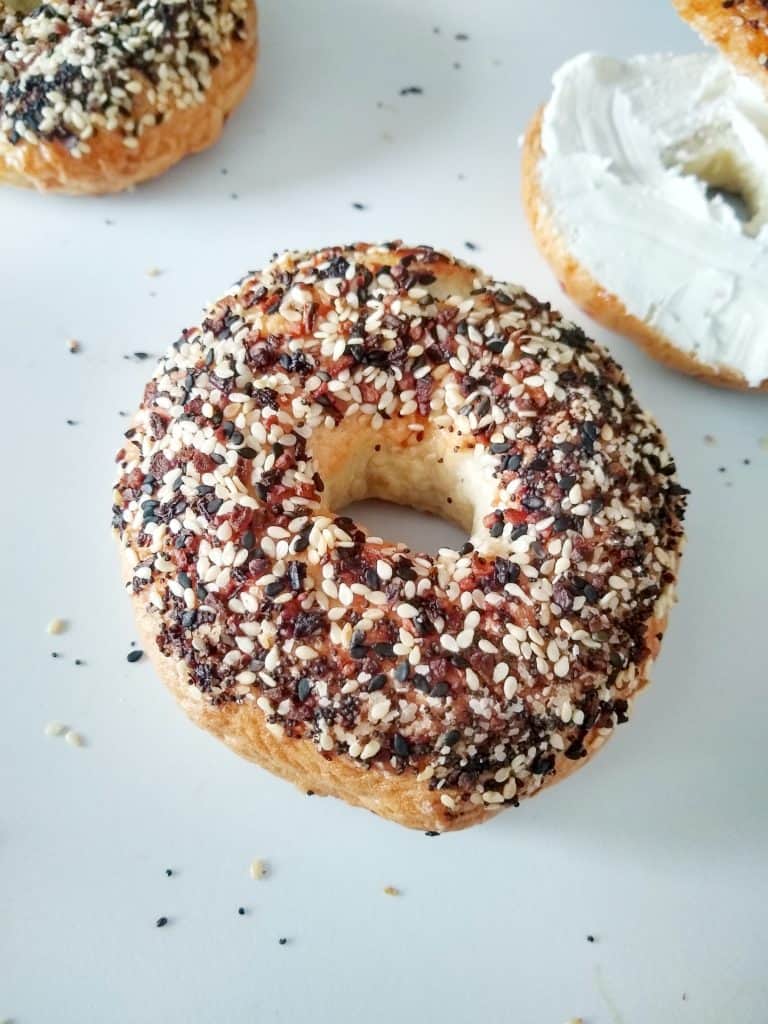
Pic Shown: Recipes for bagels | New York-style bagel
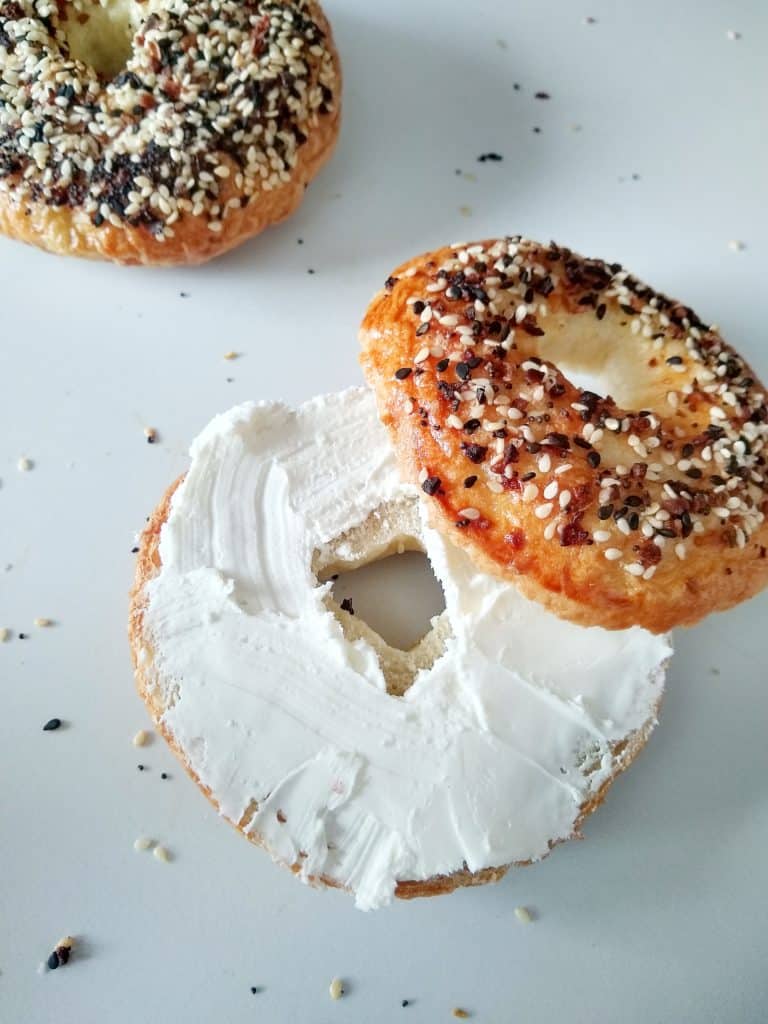
Toppings for New York-style Bagels
Cream Cheese is my favorite way to enjoy this New York-style bagel. Simple and amazing! However, you can dress your bagel whichever way you like it, possibilities are endless.
- cream cheese
- Poached or pan-fried eggs,
- avocado mash, loaded with fresh veggies, smoked salmon, and capers.
- cream cheese & Apple Cranberry Chutney
- Strawberry Jam
- Tomato Chutney
Bagel variations for New York-style bagel recipe
In this recipe, I used Everything Bagel Seasoning to flavor my bagels. However, You can flavor your bagels in many different ways. Here are some of the ways, I like to flavor my bagels:
Sesame seed bagels
Easily available, and a great source of fiber, and plant protein. I always have white sesame seeds in my pantry and it makes them easy to use in cooking. Sprinkle or dip the egg-washed bagels with some seeds, and bake.
You can also use black sesame seeds, chia seeds, pumpkin seeds, flax seeds, or even a combination of seeds that work great.
Poppy seeds
These tiny little black seeds are loaded with nutrients and absolute taste buster. I thoroughly enjoy these poppy seeds on my bagels. Sprinkle or dip the egg-washed bagels with some poppy seeds, and bake.
Cheese bagel
Love Cheese? Well, here's where you can add as much or as little cheese to your bagel and enjoy it. I love Asiago, cheddar cheese-topped bagels, they taste amazing. Generously, sprinkle some cheese on egg-washed bagels. I also like to add some Jalapeno pepper to jazz it up. Love the cheese and Jalapeno pepper combo!!
Garlic bagel
Bake the bagel for 20-22 minutes, and remove the bagels from the oven. Brush bagels with some milk, sprinkle dried garlic flakes and some coarse salt. Return the bagels to the oven, and bake for 2 minutes or so.
Onion bagel
Just like garlic, dried onion flakes, with some coarse salt make a great addition to the bagel.
Simply salt
Love the salty bagels? Sprinkle some coarse salt on egg-washed bagels, bake, and enjoy it with your favorite cream cheese. My kids love these salty bagels with some strawberry cream cheese. YUM!!
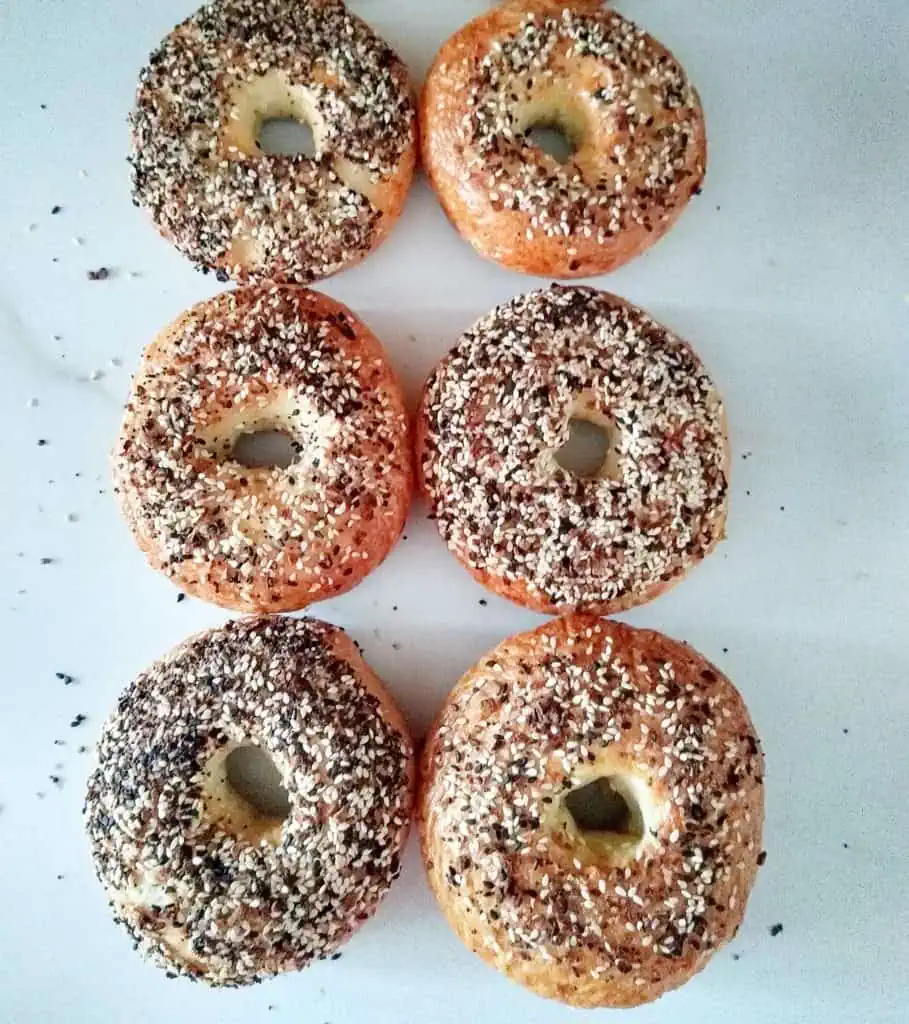
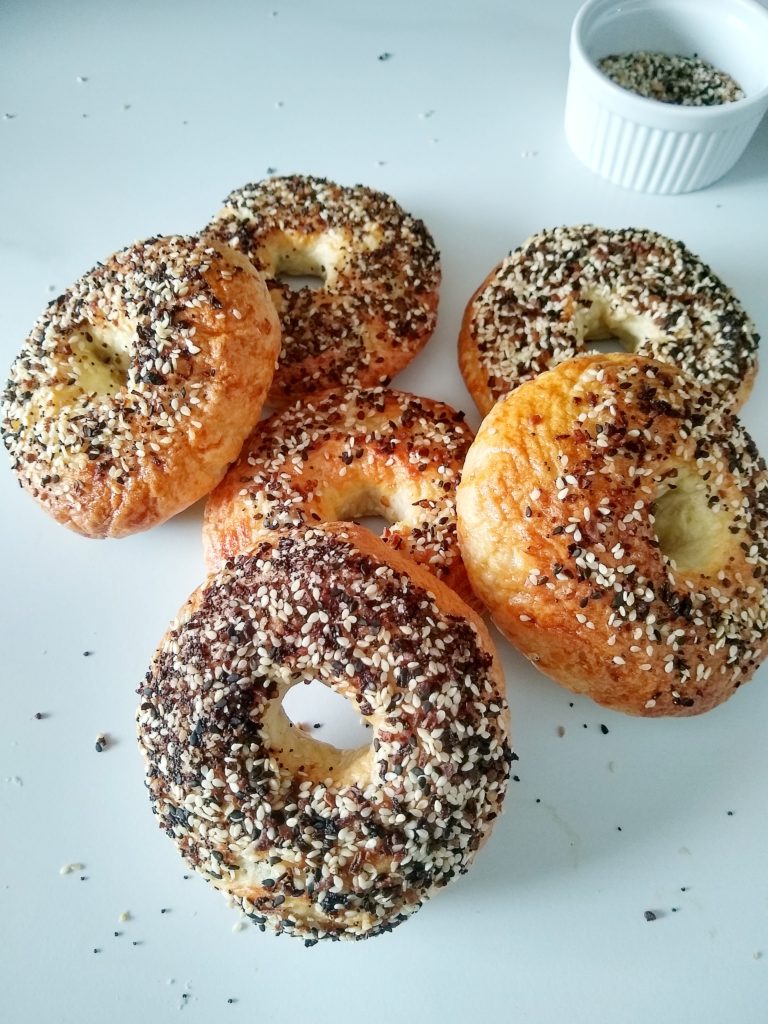
Pic Shown: recipe of bagels | New York-style Bagel
Instructions for make-ahead dough
Prepare the dough as described in Step 1. Place the dough in a lightly greased, air-tight container and place it in the refrigerator. The dough will rise slowly overnight in the refrigerator. In the morning, remove the dough and let it sit at room temperature for around 45 minutes or until doubles in volume. Continue with Step 3.
How to freeze the dough
- Follow the Step 1 & Step 2.
- After first proofing, deflate the dough, wrap it tightly in a plastic wrap, and then with aluminum foil.
- Place it in a freezer-safe, Ziploc bag and freeze it for up to 3 months.
- Thaw overnight in the refrigerator, or on a kitchen counter.
- Continue with Step 3.
Pro tips for bagels recipe | New York-style bagels recipe
For measuring the flour, do not scoop the flour, instead, lightly fill the measuring cup with the flour, and level it with the back of the spoon. See FAQ – How to measure flour right way
If the yeast is active, the mixture turns frothy and doubles in volume. If the mixture does not double in size, start the process again with fresh yeast.
Check the consistency of the dough after kneading it for 4-5 minutes. If it feels too sticky, add some flour and if it is too dry, add 1-2 teaspoons of warm water, and knead the dough, until it is nice and soft.
Do not over-knead the dough. As soon as the dough is soft, elastic, springs back when pressed, and is not sticky. You know the dough is kneaded well.
Proof the dough until it becomes double in volume, do not overproof it.
Cover the dough with a damp kitchen towel at all times. The dough dries out very quickly.
Grease the baking sheet or else the bagels might stick to the baking sheet.
Don't worry if the shaped bagel looks slightly wrinkly, it will look good once baked.
Allow the bagels to cool completely before serving. Bagels taste great the next day!!
Frequently Asked Questions
How to measure flour the right way?
It is important to measure the flour using the right method. To avoid over-measuring, do not scoop the flour straight from the container. First, loosen the flour by giving it a good stir with a spoon or a spatula. Next, spoon the flour into the measuring cup, and fill the cup slightly over the rim. Now, level the flour using the back of the spoon or a knife.
Consistency of the dough
The consistency of the dough is soft, elastic, and non-sticky. When you poke the dough, it springs back and does not stick.
Check the consistency of the dough after kneading it for 4-5 minutes. If it feels too sticky, add some flour and if it is too dry, add 1-2 teaspoons of warm water, and knead the dough, until it is nice and soft.
How long do you knead dough?
Depending upon the method used for kneading, the time will vary. If you are using a stand mixer to knead the dough, it takes somewhere from 5-7 minutes to knead the dough. If kneading the dough by hand, it takes around 10-15 minutes for a soft, non-sticky dough.
How do I know if the dough is kneaded enough?
A well-kneaded dough will be soft, and elastic, springs back when you poke your finger, and won’t be sticky. If the dough does not pass this simple test, it means it needs more kneading.
Here are a few ways you can tell that the dough is kneaded well:
First, it forms into a nice smooth dough, the dough will start to leave the sides of the bowl.
Secondly, poke a finger, and if the dough springs back, and is not sticky, the dough is kneaded well.
Lastly, you can also do a windowpane test. Take a small piece of dough, and stretch it as thin as possible. If the dough does not tear, and you can see a thin layer of dough, it means the dough is kneaded well.

Why do you knead the dough?
It is important to knead the dough before rising, as kneading develops the gluten in the dough. Gluten is made of long strands of protein, which makes the dough stretchy. The stretchy dough can hold the bubbles created by the yeast, thus making the dough rise.
Why is my dough too sticky?
Too much liquid can cause sticky dough. Also, if you use cold, or room temperature milk, it can result in the leaking of glutens, causing the dough to be sticky.
Why is my dough too tight?
When using a stand mixer chances are that you overworked the dough. The change in the composition of gluten molecules results in a non-stretchy dough.
Overworked dough often feels too tight, and tough and breaks when you try to pull, or roll.
Why is there a hole in a bagel?
Mainly two reasons, why bagels have holes in them. First, the hole in the middle of the bagel allows for even cooking and baking of the dough.
Second, the hole in the bagel makes it easier to transport, as it can be stacked easily onto wooden dowels.
Why are bagels boiled before baking?
Boiling bagels briefly before baking, add to the chewy texture of the bagels. For a slightly chewy texture, boil the bagels for 1 minute on each side.
For extra chewiness, boil it for 2 minutes on each side.
How to store bagels?
Once the bagel cools completely, place it in a Ziploc bag, or an air-tight container. Bagels last for a few days at room temperature or up to a week in the refrigerator.
Bagels freeze beautifully. Store it in a freezer-friendly storage bag or container, and it will last for a couple of months. Defrost, toast, and enjoy New York Style Bagel.
More Bread Recipes
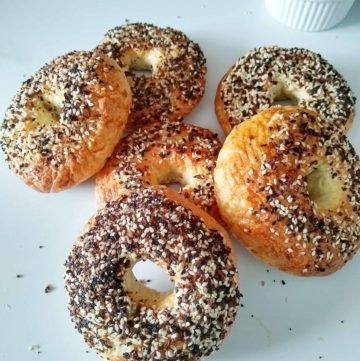
Easy Bagels Recipe | New York-Style Bagel Recipe
Equipment
Ingredients
Ingredients for recipe for bagels (New York-style bagel)
For the bagel dough:
- 4 cups (525 g) Bread flour
- 1 tablespoon Active Dry Yeast
- 1 tablespoon sugar
- 1 ⅓ cup lukewarm water
- 1 ½ teaspoon salt
- Everything Bagel Seasoning, homemade or store-bought
For the water bath:
- 8 cups water
- ½ tablespoon baking soda or barley malt syrup
For Homemade Everything Bagel Seasoning Recipe
- 2 tablespoon dried onion flakes
- 2 tablespoon dried garlic flakes
- 1 tablespoon poppy seeds
- 2 tablespoon white sesame seeds
- 1 tablespoon black sesame seeds
- ½ tablespoon flakey salt
Instructions
Directions for New York-style Bagel recipe
Step 1: Prepare the dough | By hand or using a Stand Mixer
- In a cup, stir in warm water [100*F – 110* F], sugar, and yeast. Let the mixture stand for 10 minutes, or until it turns frothy, and doubles in volume.Note: If the yeast is active, the mixture turns frothy, and doubles in volume. If the mixture does not double in size, start the process again with fresh yeast.
- Into the bowl of a stand mixer, add flour, salt, and yeast mixture. Using a dough hook attachment, knead for 5-7 minutes, or until the dough is smooth and elastic (dough will start to leave the sides of the bowl and form into a ball).Note: If you are kneading by hand, the dough will be very sticky at first. Transfer the dough to a lightly floured work surface. Add knead the dough until it is soft, elastic, springs back when pressed, and is not sticky around 15-20 minutes.
- OPTIONAL: If the dough feels too sticky, add some flour and if it is too dry, add 1-2 teaspoons of warm water, and knead the dough, until it is nice and soft.
- Shape the dough into a ball and place it in a greased bowl.
Step 2: First proofing
- Place the dough in a greased bowl and turn it once to grease the top.
- Cover the bowl with a kitchen towel, and place it in a warm place, for 60-90 minutes or until it doubles in volume.
- If using Instant Pot for proofing, place the dough in the greased inner pot, and turn it once to grease the top. Place the lid, and cover the pot. Turn ON YOGURT (normal) for 30 minutes.Note: I used a glass lid that fits, to cover the inner pot.
Step 3: Divide the dough & second proofing
- Lightly grease a ( 9 * 12 ) inch baking sheet.
- Transfer the dough onto a work surface and deflate it. Divide the dough into 8 equal pieces. Cover the pieces with a damp kitchen towel, while you work with a single piece.Note: You can use a kitchen scale to precisely divide the dough into equal pieces.
- Take a piece of the dough ball, gather all the edges, and tuck them in the center. Turn the dough, seam side down, and roll it into a smooth ball.
- Place the rolled dough ball, seam side down, onto a baking dish. Cover with a damp kitchen towel while you roll the rest of the balls.
- Cover the dough balls with a damp kitchen towel, and place them in a warm place, for 20 minutes or until it doubles in size.
Step 4: Water bath
- While the dough is resting, pre-heat the oven to 425 F. Fill a large pot or Dutch oven with water. Bring the pot to a boil, reduce and let it simmer.
- Once the dough balls have doubled in volume, shape the dough. Using your index finger, poke a hole through the center of the dough ball. Now, hold the dough on one hand of your index finger, and with your second-hand index finger rotate, to stretch the dough to form a one-inch hole. (*refer to a recipe video for step by step instructions)
- Place the rolled bagel onto a greased baking sheet, and cover it with a damp kitchen towel. Repeat the process with the remaining dough balls.
- Gently place 2-3 bagels in the simmering water, and boil for 2 minutes, turning halfway through. Carefully, remove the bagels with the help of a spider strainer and place them on a greased baking sheet.
- Repeat the process with the remaining bagels.
Step 5: Bake bagel
- Apply egg wash to the bagels. Sprinkle or dip the bagels in the seasoning mix and place them on a baking sheet.**refer to the post below, for more BAGEL VARIATIONS
- Bake for 20-22 minutes, or until golden brown.
- Transfer the bagels onto a cooling rack, and allow them to cool completely. Bagels taste best the next day. Enjoy!!
How to serve bagel
- Apply some generous amount of cream cheese, or dress it with your favorite topping. Enjoy homemade New York Style bagels!
Video
Notes
- Pro Tips For Perfect New York Style Bagel
- Frequently Asked Questions
- Instructions For Making Ahead Dough
- Instructions To Freeze The Dough
Nutrition
Disclaimer
Nutrition values are my best estimates. If you rely on them for your diet, use your preferred nutrition calculator.


Helen says
Made these today and they turned out perfect! Thanks for the foolproof recipe! The entire process felt like a breeze and the bagels turned out great!! ?? ??
Jyoti Behrani says
Awesome!! I am so glad to you found my recipe helpful.
Julie says
I made these for Easter Sunday and they turned out perfect! I’m doing them again today. Though there are a number of steps and you need to be able to have the time to follow the process, they are not difficult. Just follow the recipe!
Jyoti Behrani says
Great! I am so glad you liked my recipe 🙂 Thanks for sharing your feedback!
HEATHER PERINE says
Love bagels..can't wait to make a homemade bagel especially with everything bagel seasoning YUM!
David says
Wow, impressive, you have replicated a classic NYC bagel perfectly, it seems! I know folks that get accustomed to the New York bagels definitely look down upon bagels elsewhere...so the best solution is to follow your recipe!
Jyoti Behrani says
Thank you David. I'm so glad you found my post helpful.
Jessica Formicola says
This is the best bagel recipe I've ever tried! They turn out perfectly every time!
Jyoti Behrani says
Hi Jessica, I’m so happy to hear this! You’re so welcome!
Valerie says
Everything is my favorite type of bagel, soooo good! This is very similar to a recipe used in a bagel store I used to work in.
Jyoti Behrani says
Hi Valerie, I'm so glad you liked my recipe 🙂