Instant Quinoa Mysore Masala Dosa is a nutritious twist on the classic South Indian crepe, replacing traditional rice with protein-packed quinoa. This gluten-free delicacy offers a healthy and delicious option to enjoy with your favorite chutneys and fillings.
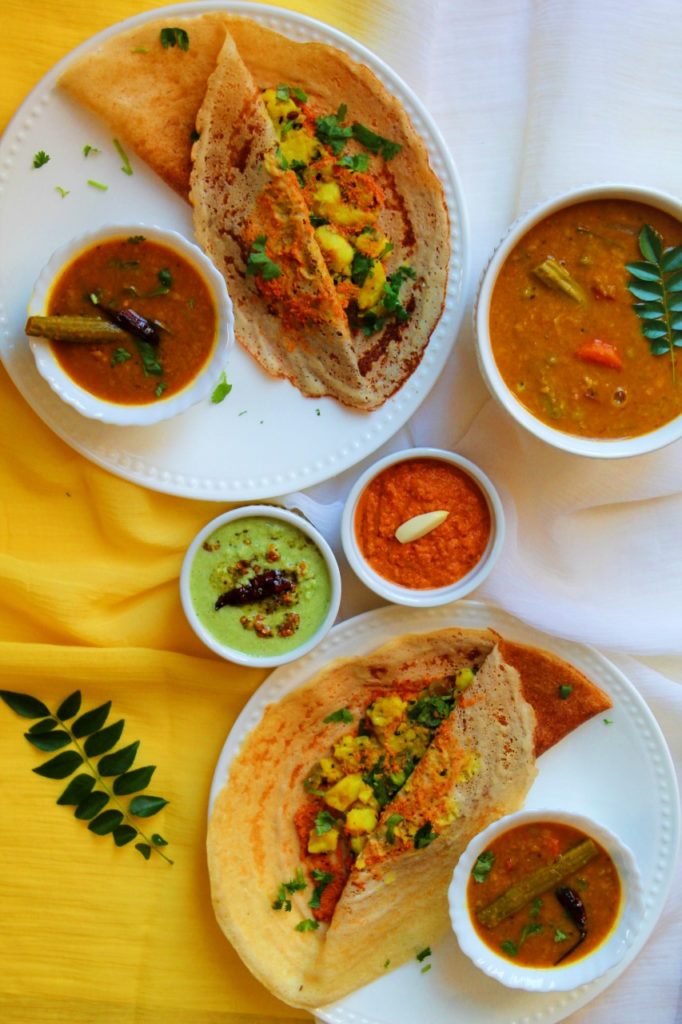
Quinoa Mysore Masala Dosa is a wholesome twist on the classic South Indian crepe, incorporating the nutritional benefits of quinoa into the traditional dosa batter. This gluten-free and nutrient-rich variation offers a delicious and healthier option for those seeking a balanced and flavorful meal.
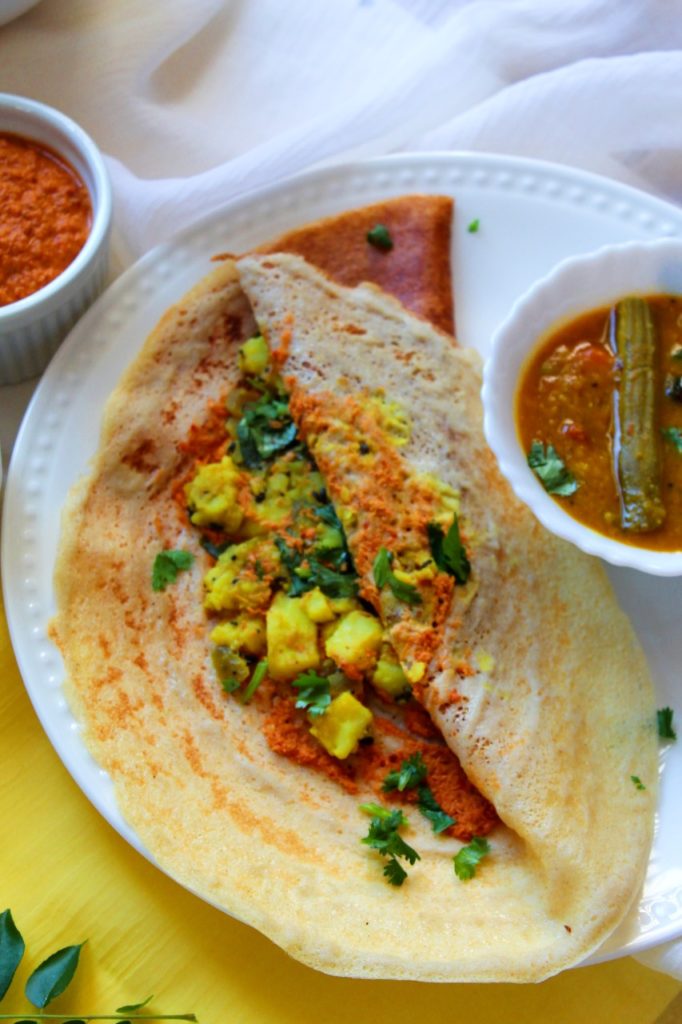
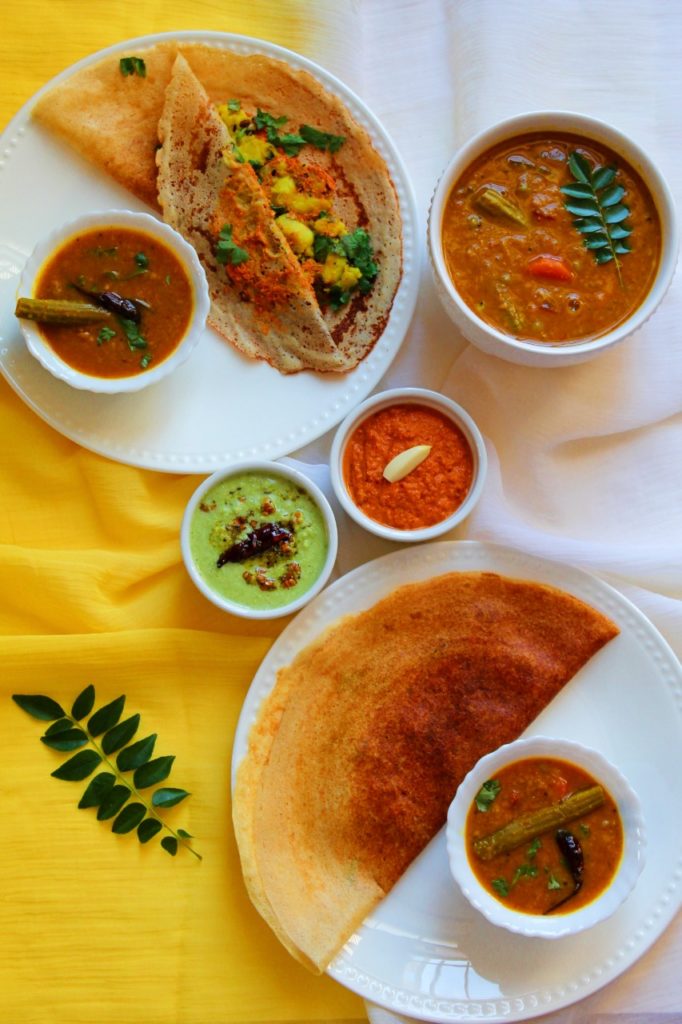
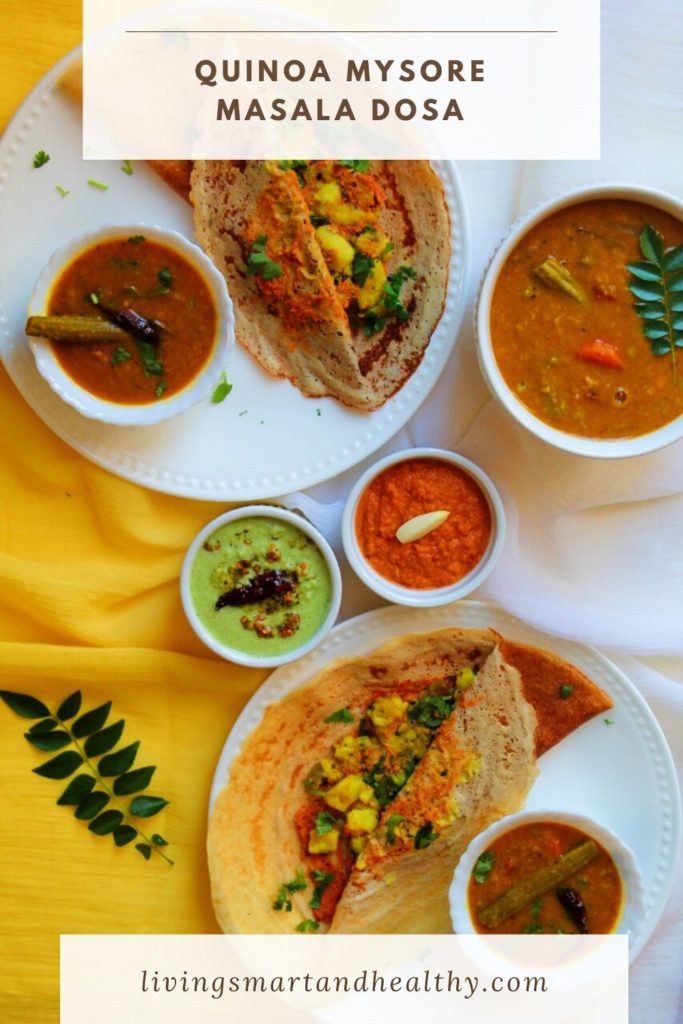
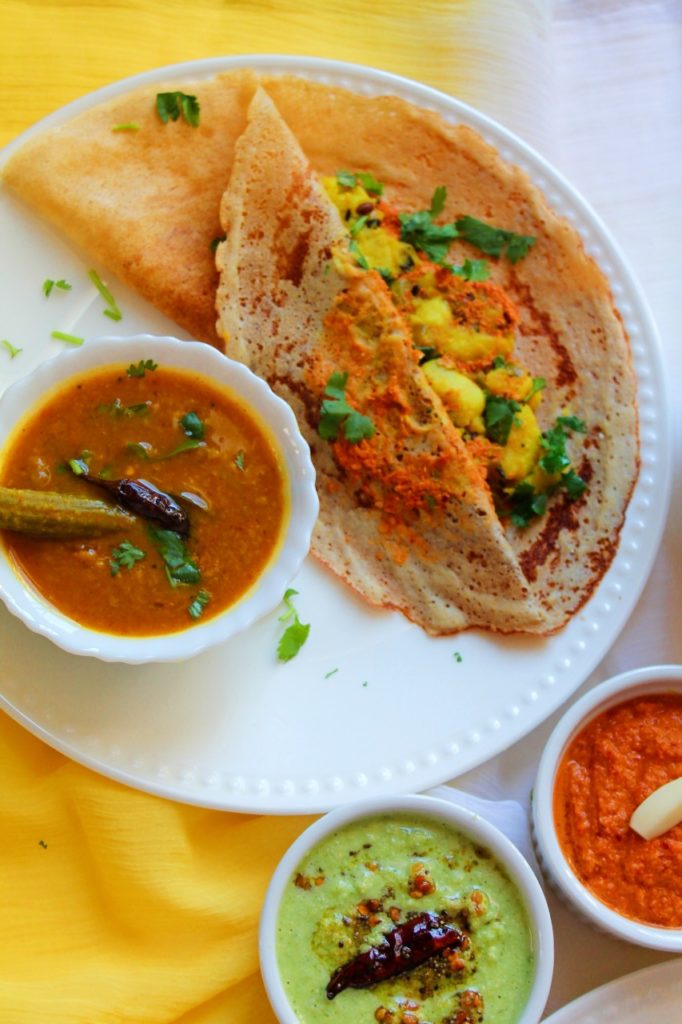
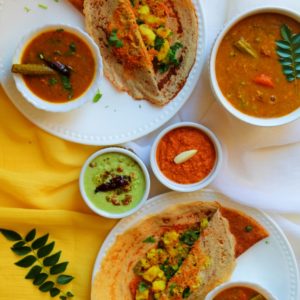
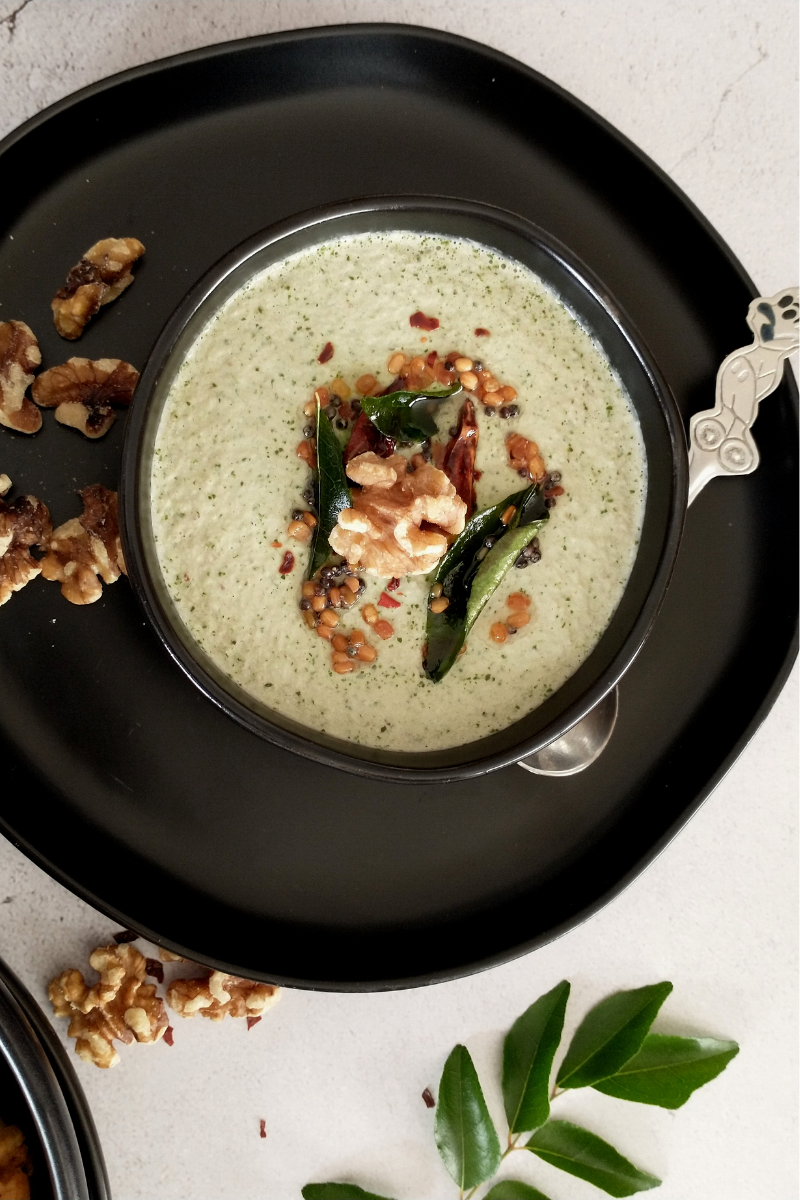
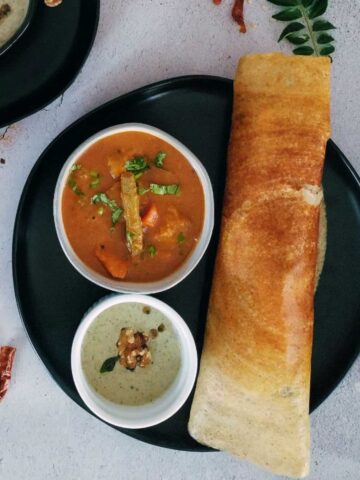
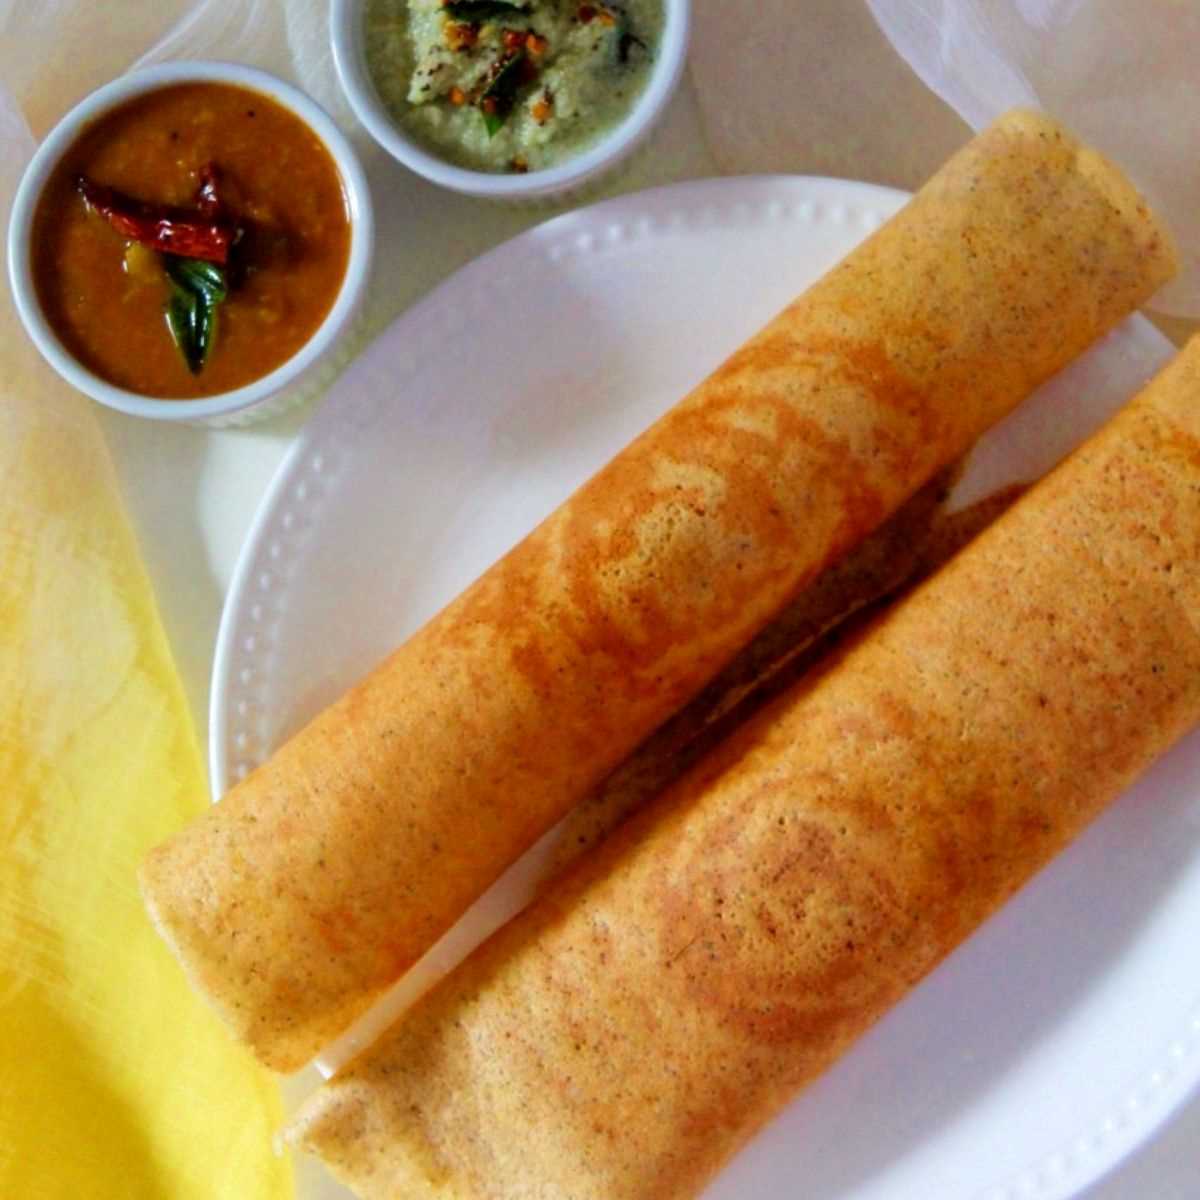
This savory crepe is made with quinoa and lentils, and no rice is added. Quinoa dosa is topped with a thin layer of red chutney and stuffed with masala (potato stuffing). Serve this protein-rich, quinoa Mysore masala dosa with some sambar and coconut chutney for a complete power-packed, healthy meal.
Jump to:
Quinoa Mysore Masala Dosa
Dosa or also known as Indian savory crepe is a popular dish in South Indian cuisine. Light, and crispy, filled with classic potato filling, served with some sambar and coconut chutney. Dosa makes an excellent breakfast/brunch, lunch, or even dinner for a completely well-balanced meal.
Dosa is served in Indian restaurants around the globe and is much loved by all ages. I grew up eating dosa, my mom used to make dosa quite often. The batter consists of basic rice and lentils, soaked overnight. The next day she would grind the rice and lentils to a smooth consistency batter, and let it ferment for a few hours or until it doubled in size. And there we had a perfect, crisp, appetizing dosa, which I could eat any time of the day.
Traditionally, Dosa is made with fermented dosa batter, made with rice and black gram lentil (urad dal). Here, I am sharing Quinoa dosa, made with a combination of quinoa and lentils, and with no rice added. Thus, making this dosa, light, healthy, fiber, and protein-rich. Quinoa dosa can be enjoyed plain or filled with classic potato stuffing. Add Red chutney to it and you have Quinoa Mysore masala dosa. Either way, this dosa tastes amazing!!
This quinoa dosa does not require to be fermented like a traditional dosa batter. However, I feel that fermenting the dosa batter improves its flavor and texture, makes it light and airy, and also fermented food is good for gut health.
Ingredients
Here's a brief description of each ingredient used in Quinoa Mysore Masala Dosa:
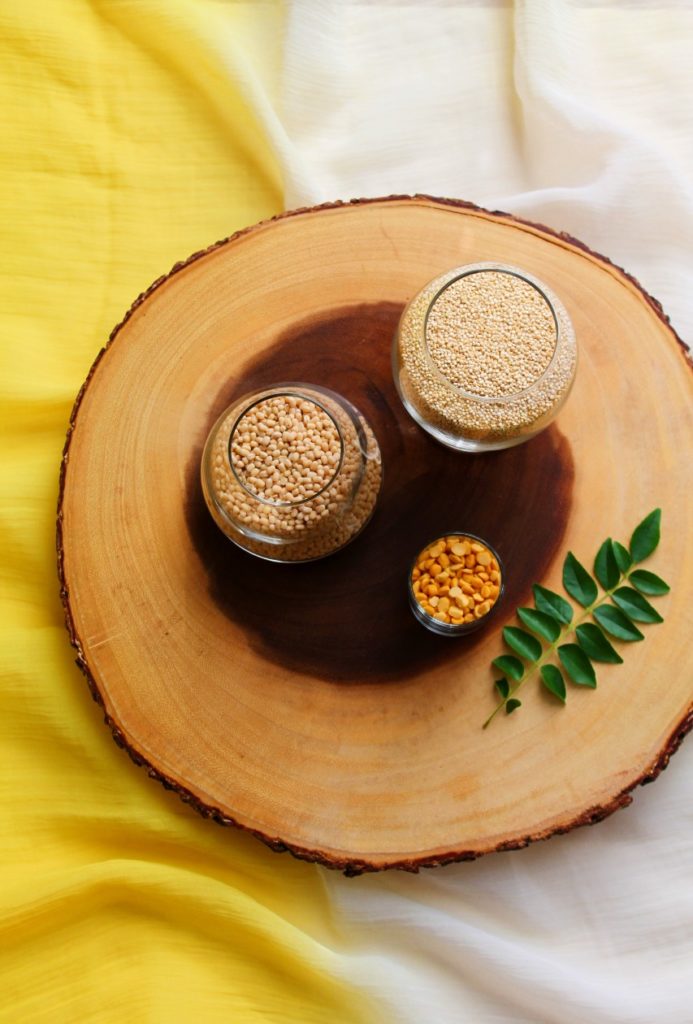
- Quinoa: Quinoa is a highly nutritious grain that is rich in protein, fiber, vitamins, and minerals. It is gluten-free and considered a complete protein source, containing all nine essential amino acids.
- Urad Dal (Split Black Gram): Urad dal is a type of lentil commonly used in Indian cooking. It is high in protein and provides a creamy texture to the dosa batter when ground.
- Fenugreek Seeds (Methi Seeds): Fenugreek seeds add a distinct flavor and aroma to the dosa batter. They also aid in fermentation and help achieve a slightly sour taste in the dosas.
- Salt: Salt is a crucial ingredient used for seasoning, enhancing the overall taste of the dosa.
- Water: Water is added to the batter during the grinding process to achieve the desired consistency for dosa making.
- Oil or Ghee: Oil or ghee is used for greasing the dosa tawa (griddle) and drizzling on the dosas while cooking. It adds flavor and prevents sticking.
- For The Filling: You can use any filling of your choice. I used classic Potato filling (aloo masala) for this recipe.
- Red Chutney: You will need the famous Mysore Masala Dosa Chutney (red chutney) to spread it inside the dosa for that fiery kick.
Instructions For Quinoa Mysore Masala Dosa
Here's a step-by-step instructions that will help you make scrumptious quinoa dosas to relish with your favorite sides.
Step 1: Soaking the Ingredients
- Rinse the quinoa, urad dal, and chana dal separately under running water to remove any impurities.
- Soak the quinoa, urad dal, chana dal, and fenugreek seeds in enough water in separate bowls.
- Allow them to soak for 4-6 hours or preferably overnight. Soaking helps soften the ingredients, making them easier to grind and aiding in fermentation.
Step 2: Preparing the Dosa Batter
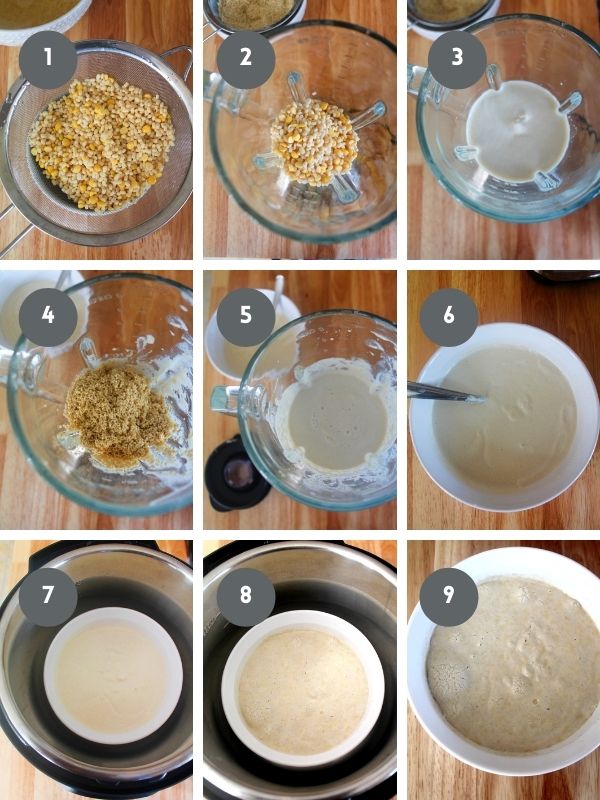
- After soaking, drain the water from the quinoa, urad dal, chana dal, and fenugreek seeds.
- In a blender or wet grinder, add the soaked quinoa, urad dal, chana dal, and fenugreek seeds.
- Grind the ingredients separately, dal and quinoa one by one. Add water gradually to form a smooth batter. The batter should have a slightly thick but pourable consistency. Grinding thoroughly ensures a smooth and uniform texture.
Step 3 (Optional): Fermenting the Batter
- Transfer the ground batter into a large bowl.
- Add salt to taste and mix it well into the batter using your hands. Salt enhances the taste of the dosa batter.
- Cover the bowl with a lid or a cloth to allow air circulation.
- Place the bowl in a warm spot in your kitchen or use a slightly warm oven with the light on to facilitate fermentation. You can also use Instant Pot for fermentation.
- Allow the batter to ferment for about 8-12 hours or until it rises and becomes slightly sour. Fermentation is crucial for the dosas to turn out light and airy.
Step 4: Checking the Fermented Batter
- Once the fermentation is complete, the batter would have risen and increased in volume. There may be small air bubbles on the surface, and it would have a slightly tangy aroma.
- Give the batter a gentle stir to mix it well. Adjust the consistency with water if it's too thick, so it's easy to spread on the tawa.
Step 5: Heating the Dosa Tawa
- Place a non-stick or cast-iron dosa tawa (griddle) on medium heat.
- Allow the tawa to get hot, but not smoking, before pouring the batter. You can test the heat by sprinkling a few drops of water on the tawa - they should sizzle and evaporate.
Step 6: Making the Quinoa Mysore Masala Dosa
- Pour a ladleful of the fermented quinoa dosa batter onto the center of the hot tawa.
- Using the back of the ladle, gently spread the batter in a circular motion to form a thin dosa.
- Drizzle some oil or ghee around the edges and a little on top of the dosa. This helps the dosa cook evenly and become crispy.
Step 7: Cooking the Dosa
- Cook the dosa on medium heat until the bottom turns golden brown and becomes crisp. The edges will start to lift slightly when it's ready to be flipped.
Step 8: Spread The Red Chutney
- Spread some red chutney evenly onto the dosa, and add the filling of your choice. Fold the dosa into half or thirds.
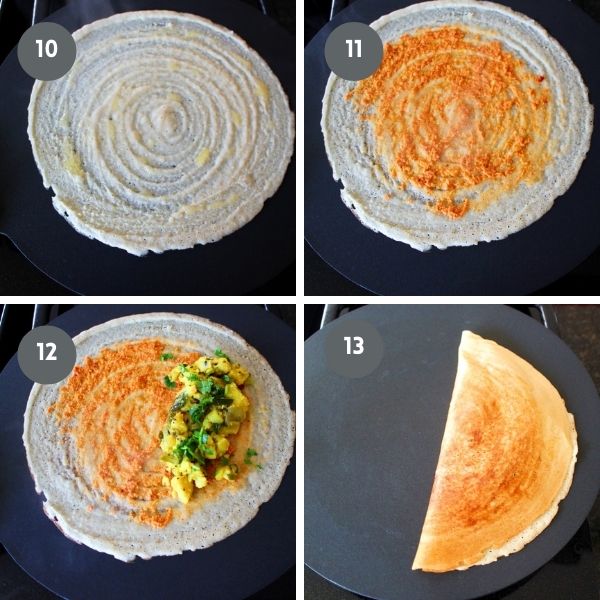
Step 9: Removing and Serving the Dosa
- Once the quinoa dosa is cooked to your desired level of crispness, remove it from the tawa and place it on a plate.
- Repeat the process with the remaining batter to make more dosas.
Step 10: Serving the Quinoa Dosa
- Serve the quinoa dosas hot with coconut chutney, sambar, or any other accompaniment of your choice. Enjoy your nutritious and delicious quinoa dosas!
Substitutions
If you want to make substitutions in the quinoa dosa recipe, here are some options you can consider:
- Quinoa: Instead of quinoa, you can use other grains like rice (regular or brown rice), millet, or even a combination of different grains. Each grain will bring its unique flavor and nutritional profile.
- Urad Dal: Urad dal can be substituted with other lentils or pulses like mung dal (split green gram) or whole. Each lentil will affect the texture and taste of the dosa differently.
- Fenugreek Seeds: Fenugreek seeds contribute to the fermentation process and add a characteristic flavor. If you don't have fenugreek seeds, you can skip them, or use a pinch of fenugreek powder as a substitute.
- Oil or Ghee: You can use any cooking oil of your choice for greasing the dosa tawa and cooking the dosas. Ghee can be replaced with clarified butter or a plant-based alternative like coconut oil.
- Salt: The amount of salt can be adjusted to your taste preferences or dietary requirements. You can also consider using low-sodium salt or other salt substitutes if needed.
Variations
Quinoa dosa is versatile, and you can create various delicious variations by incorporating different ingredients or toppings. Here are some exciting variations to try:
- Vegetable Quinoa Dosa: Add grated vegetables like carrots, zucchini, spinach, or finely chopped bell peppers to the dosa batter before cooking. This adds extra nutrition and color to the dosas.
- Cheese Quinoa Dosa: Sprinkle some grated cheese (cheddar, mozzarella, or any favorite cheese) over the dosa while it's cooking. The cheese will melt and create a cheesy, gooey filling.
- Herb-infused Quinoa Dosa: Mix finely chopped fresh herbs like cilantro, mint, or curry leaves into the batter for a burst of refreshing flavor.
- Savory Quinoa Pancakes: Make smaller, thicker dosa-like pancakes with the batter and serve them with savory toppings like avocado, salsa, or a poached egg.
Storage
To store quinoa dosa batter for later use:
- Ferment the Batter: Follow the steps for making the quinoa dosa batter as described earlier, up to the point of adding salt. Ensure the batter is well-mixed and allow it to ferment for 8-12 hours or until it rises and becomes slightly sour.
- Refrigerate the Batter: Once the batter has fermented, add salt to taste and mix it well. Transfer the batter to an airtight container. Leave some space in the container as the batter may expand during storage. Seal the container tightly.
- Refrigeration Time: The quinoa dosa batter can be stored in the refrigerator for up to 2-3 days. Beyond that, the batter may lose its optimal fermentation and may not yield the best dosas.
- Before Using the Stored Batter: When you're ready to make dosas, take out the batter from the refrigerator. You might notice that the batter has thickened a bit due to refrigeration. In this case, add a little water and mix well to achieve the desired dosa batter consistency.
Remember, freshly fermented batter produces the best dosas. If you know you won't be able to finish the entire batter within a few days, you can freeze a portion of it for later use. Here's how you can freeze the quinoa dosa batter:
- Portion the Batter: Divide the fermented dosa batter into smaller portions that you plan to use for one serving. This will make it easier to thaw and use only what you need.
- Freezer Bags or Containers: Place each portion of the batter in separate freezer-safe ziplock bags or airtight containers. Make sure to remove any excess air from the bags before sealing them.
- Label and Date: Label each bag or container with the date of freezing to keep track of its freshness.
- Freezing Time: The quinoa dosa batter can be stored in the freezer for up to 1-2 months.
- Thawing: When you want to use the frozen batter, remove it from the freezer and let it thaw in the refrigerator overnight. Before using, make sure to bring the batter to room temperature and give it a gentle stir.
Tips
You'll be able to make delicious and crispy quinoa dosas that are sure to be a hit with your family and friends. Here are some tips to help you make the best quinoa dosa:
- Fermentation is Key: Fermentation is crucial for achieving the right texture and flavor in quinoa dosa. Allow the batter to ferment in a warm place for at least 8-12 hours or until it rises and becomes slightly sour. You can place the batter in an oven with the light on or in a warm corner of your kitchen for optimal fermentation. Note: If you chose to make instant dosa, you can skip this step.
- Consistency of Batter: The batter should be slightly thicker than regular dosa batter but still pourable. If the batter is too thick, the dosas will turn out dense. If it's too thin, the dosas may stick to the tawa and become difficult to handle.
- Non-Stick or Cast-Iron Tawa: Use a good-quality non-stick or seasoned cast-iron tawa (griddle) to make dosas. This ensures that the dosas cook evenly and don't stick to the surface.
- Right Temperature: The tawa should be hot, but not smoking, before you pour the batter. Test the heat by sprinkling a few drops of water on the tawa - if they sizzle and evaporate, the tawa is ready.
- Proper Greasing: Grease the tawa lightly with oil or Ghee before making each dosa. This prevents sticking and helps in achieving a crisp dosa.
- Spread Thin and Even: Pour a ladleful of batter in the center of the tawa and quickly spread it in a circular motion to make a thin dosa. A thin dosa will be crispier.
- Layer with Chutney: For Mysore Masala Dosa, apply the spicy Red Chutney on the inner surface of the dosa before adding the potato masala. This adds an extra burst of flavors.
- Cook on Medium Heat: Cook the dosas on medium heat to ensure they cook evenly without burning.
- Serve Hot: Dosas are best enjoyed hot and fresh off the tawa. Serve them immediately with Coconut Chutney, sambar, or any accompaniment of your choice.
FAQ
Mysore Masala Dosa is made of a crispy fermented crepe (dosa) spread with a spicy and flavorful red chutney, filled with savory potato masala, and usually served with coconut chutney and sambar for a delicious South Indian breakfast or snack.
The main difference between Mysore Masala Dosa and Masala Dosa lies in the preparation and the addition of the special Mysore chutney. While both dosas consist of a fermented crepe filled with potato masala, Mysore Masala Dosa has an extra layer of spicy and tangy red Mysore chutney spread on the inner surface of the dosa, giving it a distinct flavor and vibrant color.
What's special about Mysore Masala Dosa is the addition of a unique and flavorful red chutney, made with a blend of spices and lentils, which is spread on the inner surface of the dosa. This chutney gives Mysore Masala Dosa its distinct taste, and vibrant appearance, and sets it apart from the traditional Masala Dosa.
Mysore Masala Dosa has a delightful combination of flavors - the crispy dosa imparts a mildly tangy and fermented taste, while the spicy and tangy red chutney adds a kick of heat and savory notes. The savory potato masala filling complements the dosa and chutney, resulting in a delicious and satisfying taste experience with a perfect balance of textures and spices.

Serving
Instant Quinoa Mysore Masala Dosa (With Red Chutney)
Equipment
Ingredients
INGREDIENTS FOR QUINOA MYSORE MASALA DOSA
- 1 cup quinoa
- ½ cup urad gota (black gram hulled)
- 2 tablespoon chana dal (split chickpeas)
- 10-12 fenugreek seeds (methi dana)
ADD AT THE TIME OF MAKING DOSA
- salt to taste
- ⅛ teaspoon asafoetida (hing), optional
FOR POTATO STUFFING (ALOO MASALA)
- 1 recipe aloo masala (potato stuffing)
FOR RED CHUTNEY (MYSORE MASALA DOSA CHUTNEY)
- 1 recipe red chutney (Mysore Masala Dosa Chutney)
Instructions
PREP FOR DOSA BATTER
- Rinse the lentils thoroughly, and discard any stones or debris. Soak in double the amount of water for a minimum of 4 hours.Rinse the quinoa thoroughly, and soak the quinoa in 2 cups of water for 4 hours.Note: Soak lentils and quinoa separately.
GRIND DOSA BATTER
- Grind lentils first, using just enough water grind it into a smooth batter. Transfer the lentils batter into a bowl.
- Add quinoa to the blender, using water as needed grind it into a smooth batter. Transfer the quinoa batter along with lentils batter.
- Mix lentils and quinoa batter thoroughly.Note: The consistency of this batter is similar to a pancake batter.
- Let the batter rest for 30 minutes. The batter is ready to be used for making dosa. But, I highly recommend fermenting the dosa for good reasons. Please refer to the post earlier - WHY FERMENT DOSA BATTER
FERMENT DOSA BATTER USING INSTANT POT
- Turn ON the yogurt setting, and set it to 8 hours. Cover the inner pot with a glass lid or any plate that fits on it and let it ferment.Note: I left the batter to ferment overnight, around 10-12 hours.
- Just before making dosa, add salt to the batter and mix well. The dosa batter is ready to be used.
TRADITIONAL METHOD FOR FERMENTING DOSA BATTER
- Leave the batter on a countertop or in a nice warm place, away from any vent or direct sunlight. If the weather is nice and warm, the batter ferments in no time. In summer, it only takes a few hours for the batter to ferment. In winters it may take up to a day.
OVEN METHOD FOR FERMENTING DOSA BATTER
- Warm the oven to the lowest temperature setting and turn off the oven. Place the batter inside the oven to ferment. Alternatively, if you have an oven light, you can leave the light on and the batter ferments beautifully.
HOW TO MAKE QUINOA MYSORE MASALA DOSA
- Before you start making dosa, fill a small bowl with ice-cold water, and a couple of paper towels.
- Heat a non-stick griddle or a cast iron pan. Sprinkle some water, and wipe it with a damp paper towel. Reduce the heat to low, ladle a spoonful of dosa batter into the center of the griddle.
- Starting from the center of the griddle, using a circular motion, spread the dosa batter evenly as possible.
- Turn the heat to medium and cook the dosa.
- Drizzle some ghee or oil, and spread it using a spatula.Note: For vegan use oil.
- As the dosa gets cooked, the center and the edges of the dosa start to brown.
- Apply around ½ teaspoon of Red chutney, adjust to taste.
- Spread a couple of tablespoons of potato stuffing. You can add the filling of your choice before folding the dosa. Please refer to the post for – TYPES OF STUFFING FOR QUINOA MYSORE MASALA DOSA
- Run the spatula around the edges of the dosa, and carefully fold the dosa in half.
- IMPORTANT: Before making the next dosa, reduce the heat to low. Sprinkle some cold water onto the griddle, and wipe it with a damp paper towel. Make sure to bring down the temperature of the griddle.Note: If the griddle is too hot, the batter will stick to the griddle, and will not be able to spread. To be able to spread the batter, every time you must start with a warm griddle not hot. Continue with the remaining batter.
- This recipe makes around 8, 12-inch dosa.
Notes
- Types Of Stuffing For Quinoa Mysore Masala Dosa
- Tips For Paper-Thin, Crispy Dosa
- Frequently Asked Questions
Nutrition
Disclaimer
Nutrition values are my best estimates. If you rely on them for your diet, use your preferred nutrition calculator.

Sneha Sahasrabudhe says
I tried this recipe last night and turned out really well. Thank you so much for sharing
Jyoti Behrani says
Awesome! I am so glad you liked my recipe ? Thanks for sharing your feedback!
Jazz says
Can I use Urad daal instead of Urad Gota?
Jyoti Behrani says
Hi, You can use urad dal instead of urad gota, works just fine. Thanks!