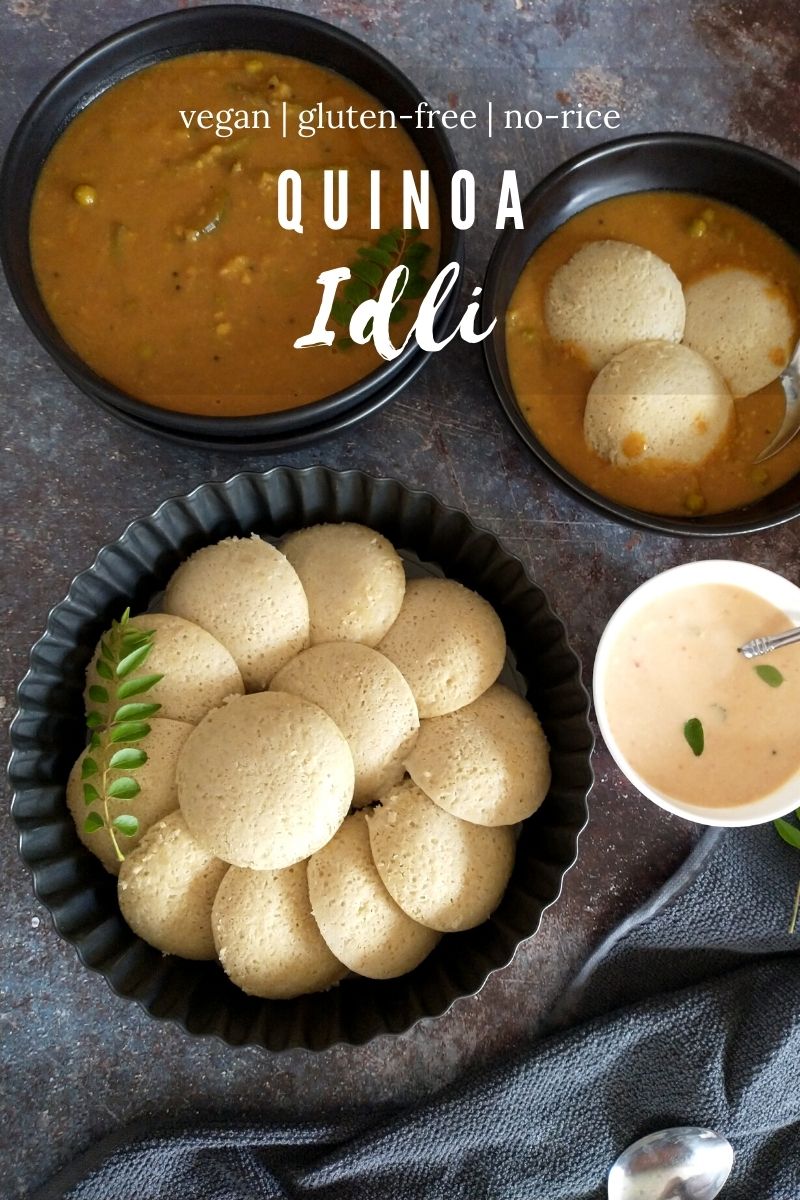
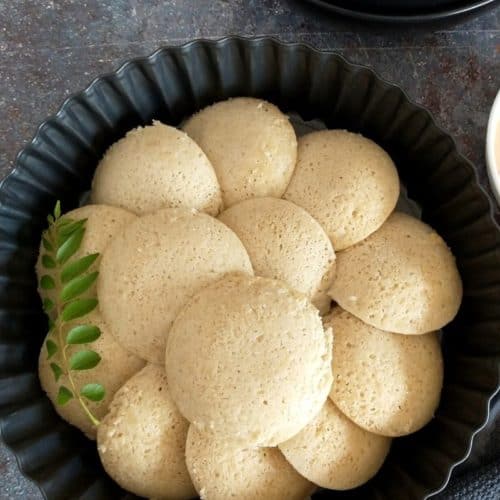
Quinoa idli recipe is a nutritious alternative to traditional idli, made without rice by blending soaked quinoa with lentils and fermenting the batter before steaming into soft, fluffy cakes, perfect for a wholesome breakfast or snack.
Enjoy this quinoa idli with some sambar and coconut chutney for a complete power-packed, healthy meal. This recipe is naturally vegan and gluten-free.
Jump to:
- About Quinoa Idli
- What is Idli?
- Traditional Idli vs Quinoa Idli
- Ingredients for Quinoa Idli Recipe
- How to make Quinoa Idli
- How to store the leftover Quinoa Idli?
- Why do you ferment Idli batter?
- What is the Fermentation Process?
- Tips for pillowy-soft Quinoa Idli
- Frequently Asked Questions
- More South Indian Recipes
- Quinoa Idli Recipe (without rice)
I grew up eating idli, my mom used to make it quite often. The batter consists of basic rice and lentils, soaked overnight. The next day rice and lentils were ground to a smooth consistency batter. Then, the batter was ready to be fermented. It took a good 8-10 hours to ferment the batter. And finally, steam the idli. And there we had pillowy, soft idli, which I could eat any time of the day.
There are several variations of idli. Traditionally, idli is made with fermented batter, made with rice, and black gram lentil (urad dal). Rava idli is made by replacing rice with semolina (sooji).
About Quinoa Idli
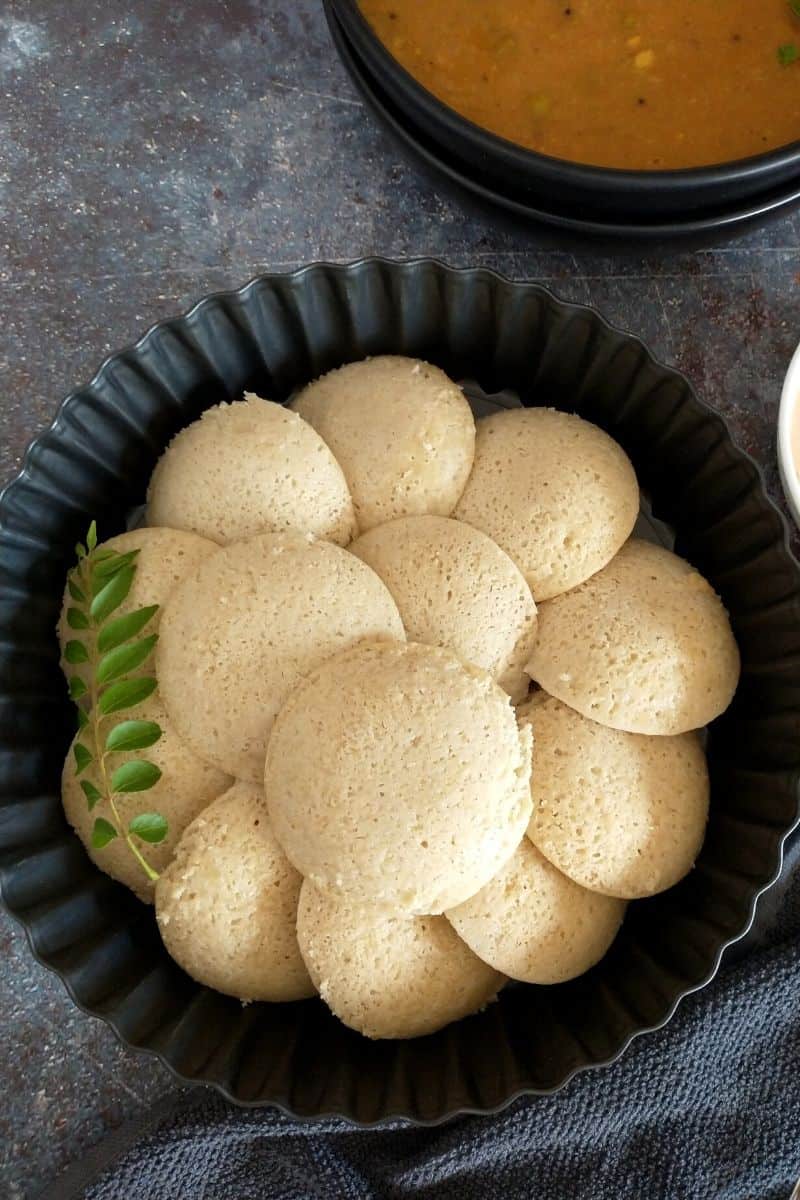
Quinoa idli is my healthier take on traditional idli. This pillowy soft idli without rice is made with a combination of quinoa and lentils.
This quinoa idli is light, fiber, and protein-rich. Quinoa idli can be enjoyed simply with some coconut chutney or with some sambar and coconut chutney. Either way, this quinoa idli tastes amazing!!
What is Idli?
Idli or idly, is a type of savory rice cake, a popular dish from South Indian cuisine. Idli is made by steaming fermented batter made with rice and lentils.
The fermentation process helps break down the starches, making them easy to digest. Pillow-y, soft idlis are served with some Sambar and Cranberry Coconut Chutney
Idli makes an excellent breakfast or brunch, lunch, and even dinner for a complete well-balanced meal.
Idli is served in Indian restaurants around the globe and is much loved by all ages.
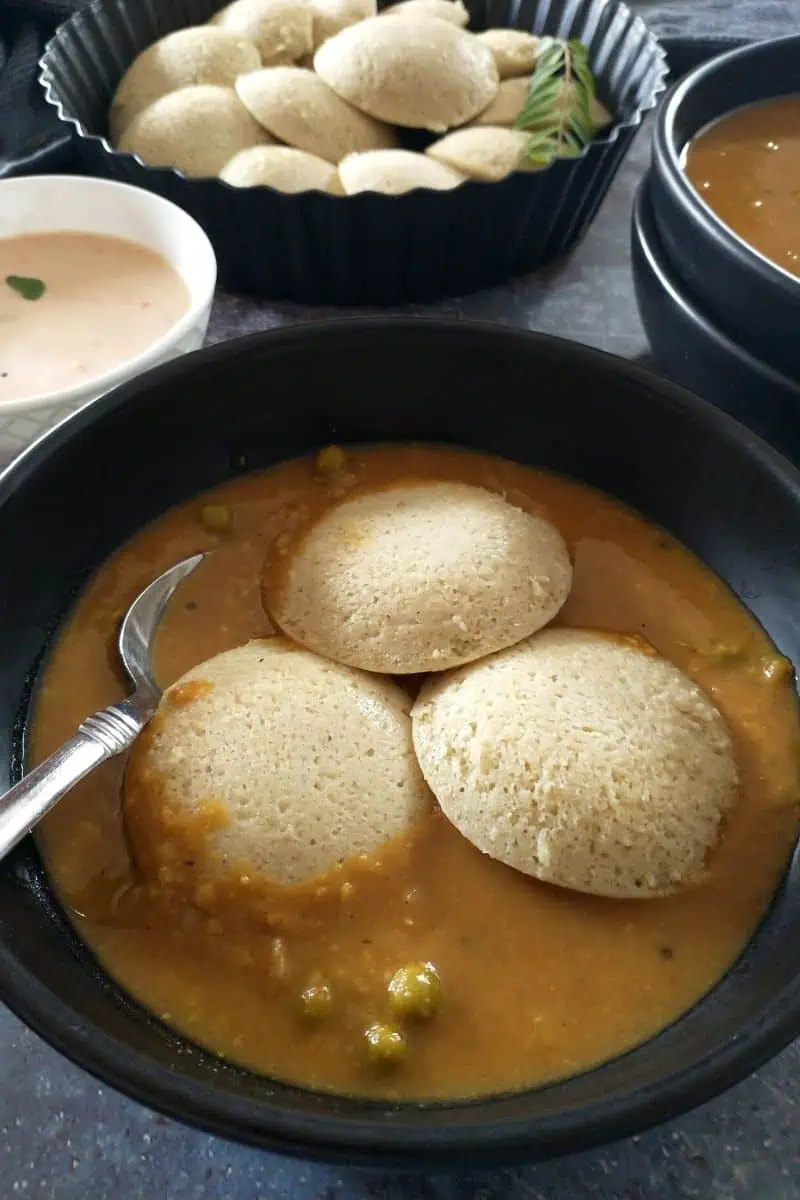
Pic Shown: Quinoa Idli, Udupi Sambar & Walnut Coconut Chutney
Traditional Idli vs Quinoa Idli
The main difference between the traditional and the quinoa idli is the batter. Traditionally, idli is made with rice and urad dal. For quinoa idli, I replaced rice with 100% quinoa and used a combination of lentils.
Idli takes the color of the grains used to make the idli batter. White rice yields white idli and quinoa yields pale yellow color idli. Quinoa and traditional idli, are equally soft and delicious.
Quinoa idli is high in fiber and protein and is a healthier option than the traditional idli.
Ingredients for Quinoa Idli Recipe
Quinoa idli is made with quinoa and a combination of lentils – urad dal (split black lentils) and chana dal. Moong (whole or split, with or without husk), masoor dal (red lentils) or chana dal can be used.
For this recipe, I have used 1 cup of quinoa, ½ cup of urad gota (black gram hulled), and 2 tablespoons of chana dal. Please feel free to use the lentils of your choice. Make sure to include urad dal (whole or split, with or without husk).
I found this combination of quinoa and lentils adds a nice flavor and texture to the idli. The idli comes out perfect, and pillowy, soft every single time!
For Idli Batter:
- white Quinoa
- Urad Gota (black gram hulled)
- Chana dal (split chickpeas)
- Fenugreek seeds (methi dana)
Add at the Time of Making Idli:
- salt to taste
- 1-2 teaspoons of oil to grease
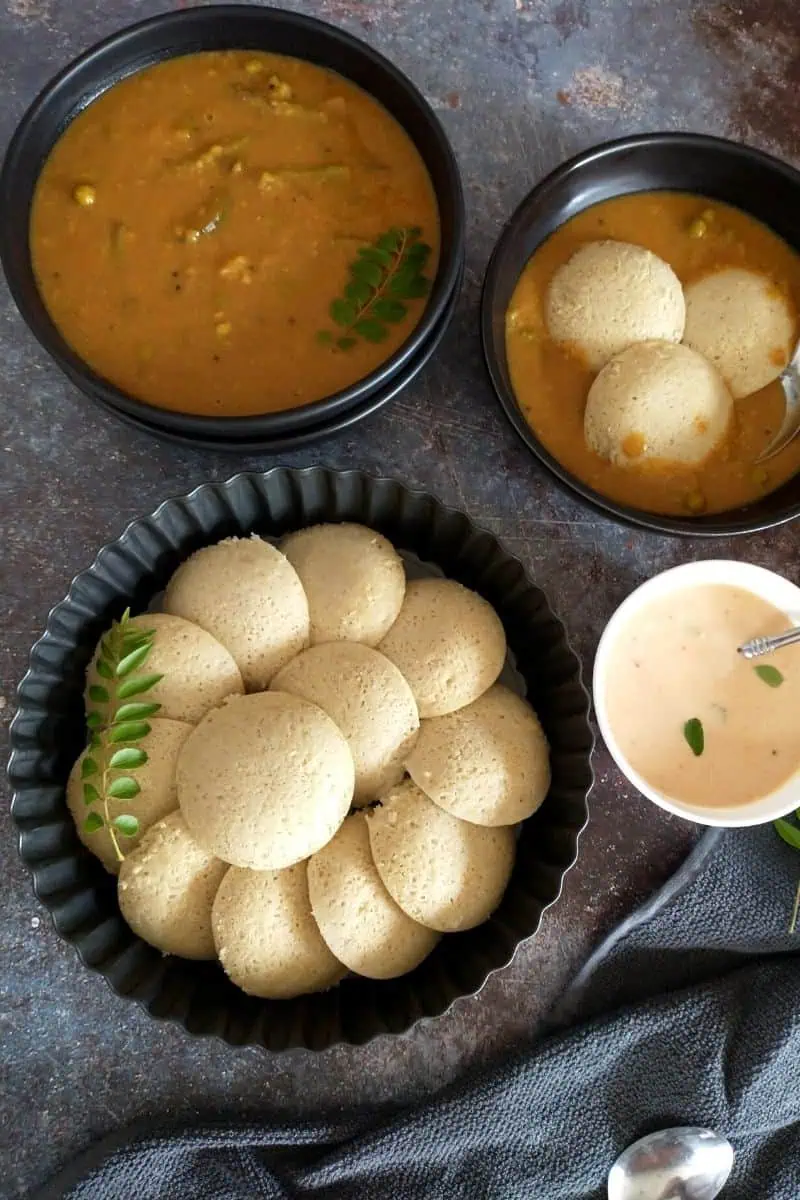
Pic Shown: Quinoa Idli served with some sambar and coconut chutney
How to make Quinoa Idli
Here’s a step-by-step guide, for a foolproof Quinoa idli, to help you make a perfect, pillowy-soft idli. Enjoy!
Making quinoa idli batter is similar to the traditional idli batter. The basic steps for preparing the idli batter remain the same. Soaking the lentils and quinoa for a few hours, grind to an idli batter consistency, and fermentation process.
Step 1: Soak the Lentils & Quinoa
Soaking lentils and quinoa for a few hours is required for a perfect idli batter consistency. Here are two ways you can soak the lentils.
Traditional Method: Rinse the lentils thoroughly, and discard any stones or debris. Soak in double the amount of water for a minimum of 4 hours. Soak one cup of lentils and 2 cups of water, and make sure there is enough water for the lentils to rehydrate.
Rinse the quinoa underwater for a few minutes. Rinsing the quinoa removes its natural coating, known as saponin. It makes quinoa taste less bitter. After, the quinoa is rinsed thoroughly soak the quinoa in 2 cups of water for 4 hours.
Quick Method: – I find this method very helpful. Here's how to quick soak:
Bring a pot of water to a boil. Remove the pot from the heat. Add lentils and cover the pot. Let it sit in hot water for two hours. After two hours, the lentils will be ready for idli batter.
Quinoa can be soaked for the same amount of time as lentils, in simply plain water.
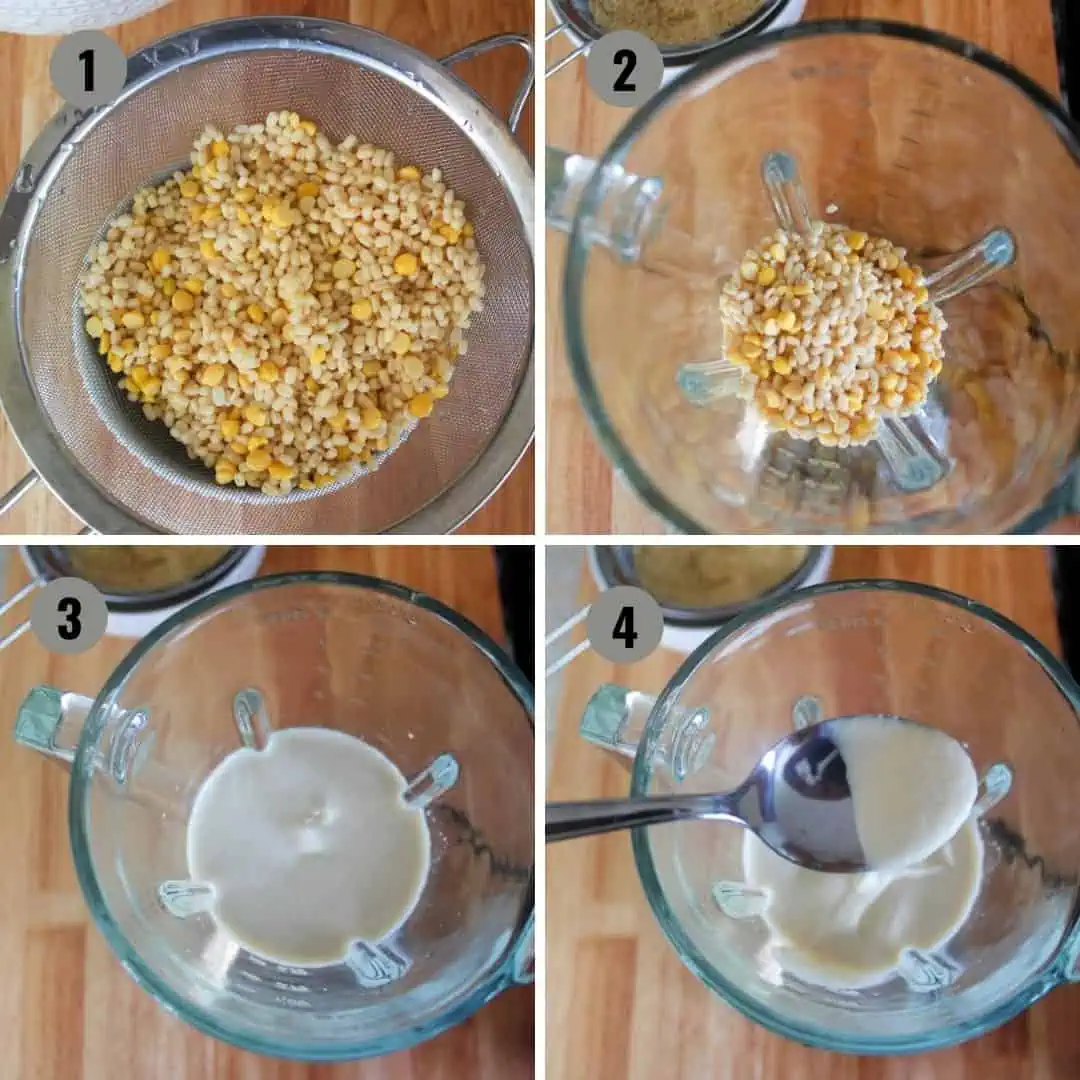
Step 2: Grind the Lentils & Quinoa
Grind the idli batter, using water as needed, into a smooth consistency batter. First, grind lentils using just enough water to grind. Transfer the lentil batter to a bowl.
Pic Shown: Grind the lentils for Quinoa Idli
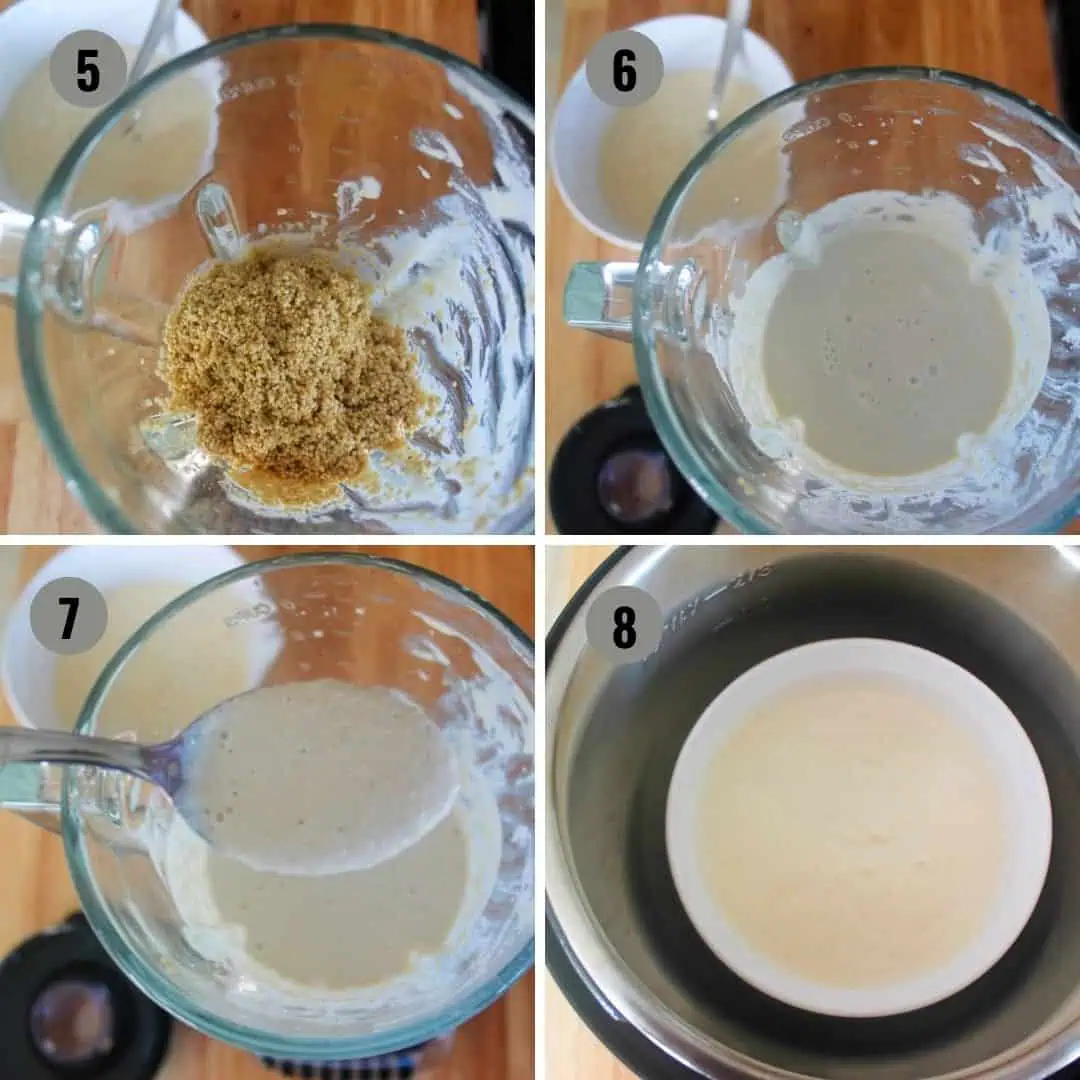
Now, add quinoa to the blender, and using water as needed grind it into a smooth batter. Transfer the quinoa batter along with the lentil batter.
Mix lentils and quinoa batter thoroughly.
The consistency of this batter is similar to a pancake batter.
Pic Shown: Grind the quinoa for Quinoa Idli Recipe
Step 3: Ferment the Quinoa Idli batter
You can ferment the idli batter the traditional way, using an Instant Pot yogurt mode, or in an oven.
Method 1: Traditional
In most homes in India, this is the method used for fermenting the idli batter. The batter is left on a countertop or in a nice warm place, away from any vent or direct sunlight.
If the weather is nice and warm, the batter ferments in no time. In summer, it only takes a few hours for the batter to ferment. In winters it may take up to a day.
Method 2: Using an Instant Pot
Add the batter directly to the inner pot or in the pot (pot-in-pot method).
Turn ON the yogurt (less) setting, and set it to 8 hours. Cover the inner pot with a glass lid or any plate that fits on it and let it ferment.
Method 3: Oven
I live in a cold place and with temperatures in the single digits, I find this method quite helpful. Fermenting the batter in an oven is efficient and failproof.
I warm the oven to the lowest temperature setting and turn off the oven. Place the batter inside the oven to ferment.
Alternatively, if you have an oven light, you can leave the light on and the batter ferments beautifully.
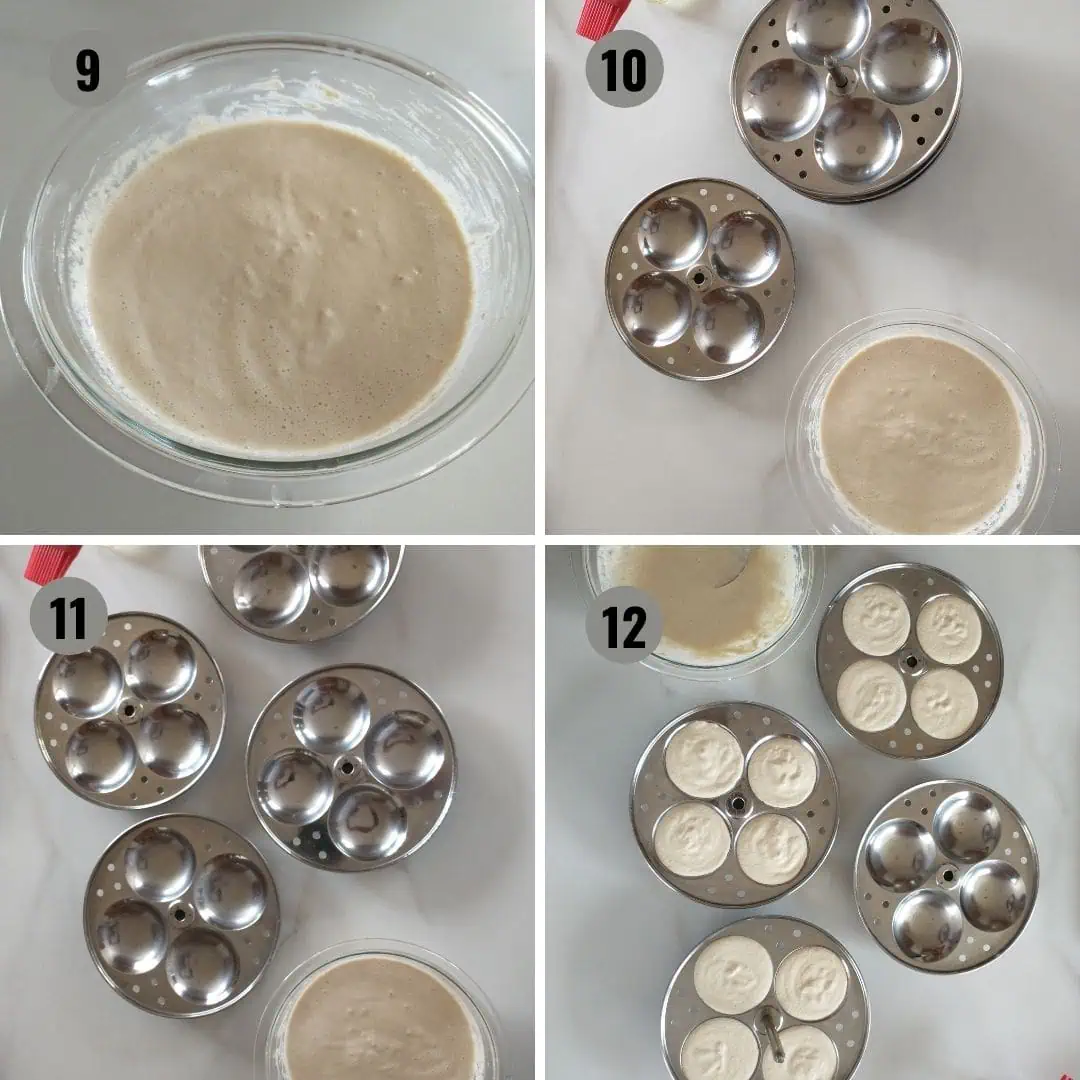
Step 4: Steam the Quinoa Idli
You will need an idli stand or mold to make the idli.
Add salt to the batter and mix well.
To make idlis, grease the idli mold with some oil. I used Instant Pot to steam the idlis. To steam the idlis, any large pot or a regular steamer works just fine. Make sure that the container is big enough to fit the idli stand.
Add 1.5 cups of water to the inner pot and select sauté (more). Cover the pot with a lid and allow the water to come to steam.
Fill the idli mold (cavity) with the batter, just up to the rim of the cavity. Do not overfill the cavity.
Pic Shown: Quinoa idli batter in the idli mold.
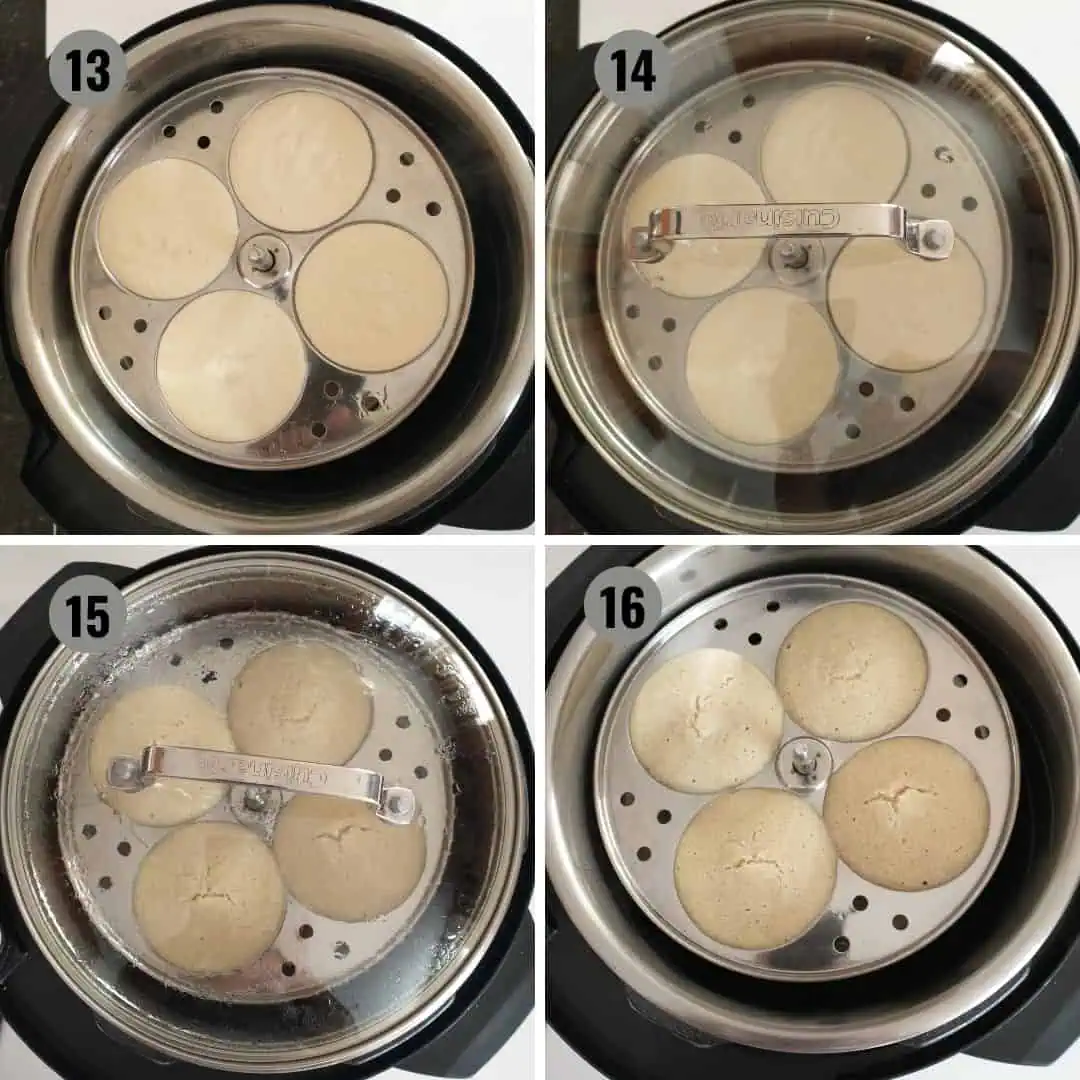
Carefully, open the lid and place the idli stand inside the inner pot. Place the lid and cover the pot.
Note: I used a glass lid that fits, to cover the inner pot. You can use the Instant Pot lid, with a pressure valve in the venting position.
Cancel the sauté. Select a steam setting and set an external timer for 10 minutes.
Note: When the pressure value is in the venting position, the Instant Pot timer does not work.
For any other steaming option (not Instant Pot), steam the idli for 10 minutes.
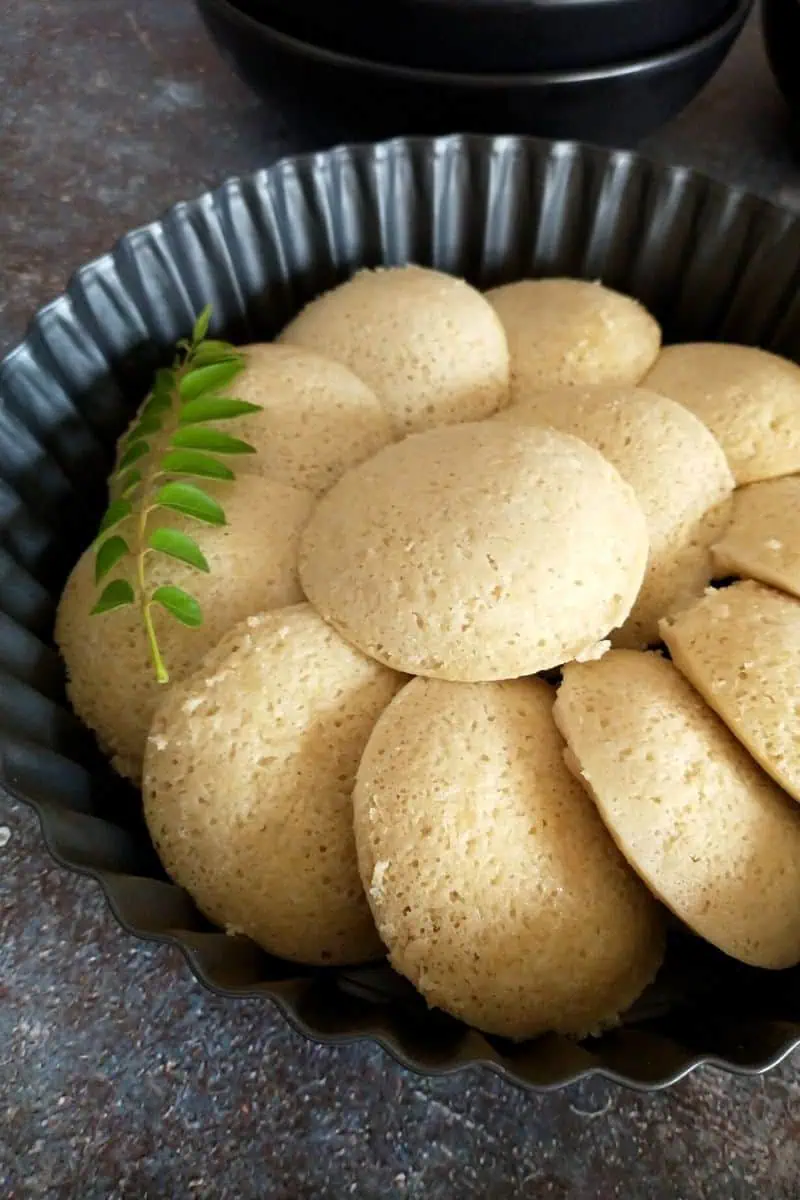
Press Cancel, once the timer goes off. Allow 10 minutes of natural pressure release. Carefully open the lid and take out the idli stand. Remove plates from the idli stand and allow the idlis to cool down for 5 minutes. Run a spoon or a knife around each idli and remove it from the cavity.
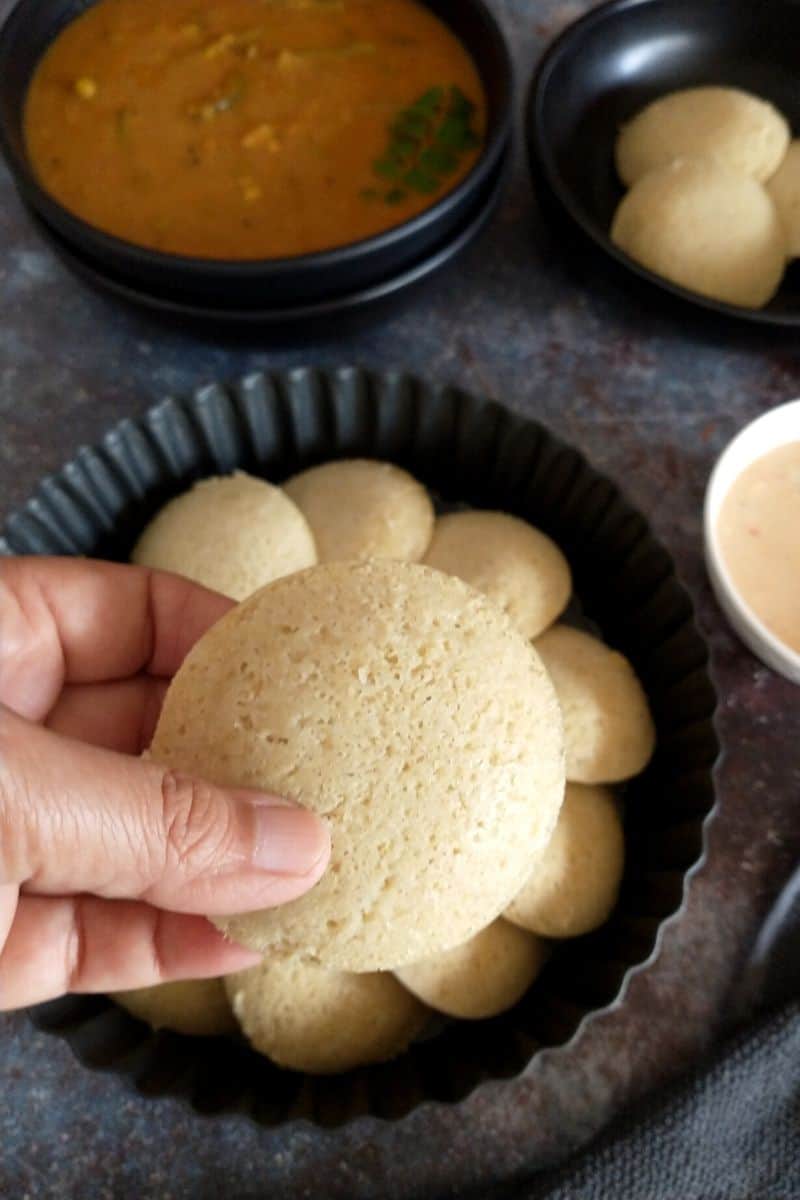
Enjoy pillowy soft, piping hot Quinoa Idli with some sambar and coconut chutney.
Pic Shown: Steam Quinoa Idli without rice
How to store the leftover Quinoa Idli?
Fermented Idli batter stays good for up to 5 days in the refrigerator. Store it in an airtight container. You can freeze the batter for up to 2 months in the freezer.
Defrost overnight in the refrigerator and use it to make idli.
Leftover idli can be refrigerated for up to 5 days. Store it in an airtight container.
Idli freezes beautifully for up to a month. Freeze it in a freezer-safe container, defrost, and reheat.
To reheat the idli, simply place a few idli in a microwave-safe bowl. Sprinkle some water and microwave for a couple of minutes.
You can reheat the Idli in an Instant Pot. Place the idli in an oven-safe or steel insert. Add a cup of water to the inner pot, and add the trivet. Place the bowl onto the trivet. Close the Instant Pot lid with the pressure valve in the venting position. Set external time for 5 minutes. Allow 10 minutes of natural pressure release.
Pic Shown: Quinoa Idli served with some sambar and coconut chutney
Why do you ferment Idli batter?
Idli is traditionally made using fermented batter. Some recipes do not require fermentation, where you can make instant idli. Instant Idli batter does not require any fermentation. Leavening agents such as baking soda or fruit salt called Eno are used instead of fermenting the idli batter. I prefer to ferment the batter for good reasons.
What is the Fermentation Process?
Fermentation is a natural process. Fermenting helps the breakdown of carbs by microorganisms such as yeast and bacteria. Fermented food has a distinct tart flavor.
Fermentation promotes good bacteria, known as probiotics. It helps improve digestive health and makes food easy to digest.
Fermenting the idli batter improves its flavor and texture, and makes it light and airy.
Tips for pillowy-soft Quinoa Idli
It is important to soak the lentils well. Soak it for 4 hours or overnight. You can easily crush the lentils between your fingers.
Rinse the quinoa thoroughly. Rinsing the quinoa helps remove its outer coating, thus making it taste less bitter.
Grind lentils and quinoa separately. Lentils must be ground to a smooth paste. Grind quinoa slightly coarse, this helps with a nice texture of idli.
You can use a wet/dry stone grinder or a simple mixer grinder to grind the lentils.
If using a mixer grinder, work in small batches. I prefer to grind the batter in batches. This helps maintain the texture of the batter. Use water as needed to grind the batter.
The consistency of the idli batter is similar to a pancake batter. It is not too thick or too thin.
Ferment the idli batter well. The fermentation process produces gas molecules or air pockets. A well-fermented idli batter has lots of air pockets and smells sour. This well-fermented batter is the key to pillowy-soft idli.
Use an external timer for steaming idli in an Instant Pot. The instant pot timer does not work in the venting position.
Pic Shown: Pillowy soft Quinoa Idli
Frequently Asked Questions
Quinoa comes in different colors – white, red, black, and tricolor. I have used white quinoa, as it is the least bitter of all.
Yes, you can use white or brown rice along with other ingredients. 2 tablespoons of uncooked rice or ⅓ cup of cooked rice, is good for this recipe. Poha (flattened rice) can be substituted for rice. Take 2-3 tablespoons of poha. Rinse and soak the poha for 10 minutes. Drain the poha and grind it along with quinoa.
The fermentation process takes a good 8-12 hours. Keep checking the batter in between to make sure that the fermentation is going well. A well-fermented batter will almost double in size, will be thick, and fluffy, and will develop small bubbles or air pockets. It has a distinct tart flavor, the batter starts to smell slightly sour.
Fermenting the batter longer can result in the batter going bad. You will notice a change in the color of the batter, from pale yellow to light pinkish. It smells unpleasant and may develop some black spots (mold). Discard the batter, it is not safe to use.
A well-fermented idli battery lasts for up to 3-5 days in the refrigerator. You can freeze the idli batter for up to a month. Store it in a freezer-safe container. Defrost the batter in the refrigerator or on a countertop. And your idli batter is ready for some delicious homemade idli.
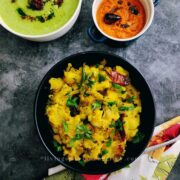
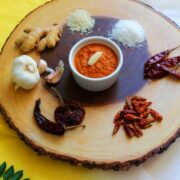
More South Indian Recipes


Quinoa Idli Recipe (without rice)
Equipment
Ingredients
For Idli Batter:
- 1 cup white Quinoa
- ½ cup Urad Gota (black gram hulled)
- 2 tablespoon Chana dal (split chickpeas)
- 10-12 Fenugreek seeds (methi dana)
Add at the Time of Making Idli:
- salt to taste
Instructions
Step 1: Soak the Lentils & Quinoa
- Rinse the lentils thoroughly, and discard any stones or debris. Soak lentils and fenugreek seeds in 2 cups of water for 4 hours.
- Rinse the quinoa thoroughly underwater for a few minutes. Soak the quinoa in 2 cups of water for 4 hours.
Step 2: Grind the Lentils & Quinoa
- Grind the idli batter, using water as needed, into a smooth consistency batter. First, grind lentils using just enough water to grind. Transfer the lentils batter into a bowl.
- Now, add quinoa to the blender and using water as needed grind it into a slightly coarse batter. Transfer the quinoa batter along with lentils batter.
- Mix lentils and quinoa batter thoroughly.Note: The consistency of this batter is similar to a pancake batter.
Step 3: Ferment the Quinoa Idli batter
- Method 1: TraditionalPlace the batter on a countertop or in a nice warm place, away from any vent or direct sunlight.If the weather is nice and warm, the batter ferments in no time. In summer, it only takes a few hours for the batter to ferment. In winter it may take up to a day.
- Method 2: Using an Instant PotAdd the batter directly to the inner pot or in the pot (pot-in-pot method).Turn ON the yogurt (less) setting, and set it to 8 hours. Cover the inner pot with a glass lid or any plate that fits on it and let it ferment.
- Method 3: OvenWarm the oven to the lowest temperature setting and turn OFF the oven. Place the batter inside the oven to ferment.Alternatively, if you have an oven light, you can leave the light on and the batter ferments beautifully.
Step 4: Steam the Quinoa Idli
- Add salt to the batter and mix well.
- To make idlis, grease the idli mold with some oil. I used Instant Pot to steam the idlis.
- Add 1.5 cups of water to the inner pot and select sauté (more). Cover the pot with a lid and allow the water to come to steam.
- Fill the idli mold (cavity) with the batter, just up to the rim of the cavity. Do not overfill the cavity.
- Carefully, open the lid and place the idli stand inside the inner pot. Place lid and cover the pot.Note: I used a glass lid that fits, to cover the inner pot. You can use the Instant Pot lid, with a pressure valve in the venting position.
- Cancel the sauté and select a steam setting and set an EXTERNAL timer for 10 minutes.Note: When the pressure value is in the venting position, the Instant Pot timer does not work.
- Press Cancel, once the timer goes off. Allow 10 minutes of natural pressure release. Carefully open the lid and take out the idli stand. Remove plates from the idli stand and allow the idlis to cool down for 5 minutes. Run a spoon or a knife around each idli and remove it from the cavity.
- Enjoy pillow-y soft, piping hot idli with some sambar and coconut chutney.
Notes
- I used Instant Pot to steam the idli. To steam the idli, any large pot or a regular steamer works just fine. Make sure that the container is big enough to fit the idli stand.
- Tips For Pillow-y Soft Quinoa Idli
- Frequently Asked Questions
Nutrition
Disclaimer
Nutrition values are my best estimates. If you rely on them for your diet, use your preferred nutrition calculator.


ami says
Hi, I tried your recipe today and it turned out so good. My hubby who does not like quinoa couldn't tell the difference. He said these are so good that he could eat it everyday. Thanks again for such an amazing recipe ?
Jyoti Behrani says
That's wonderful! I am so glad you like my recipe 🙂
Sara says
Love love love this recipe? Tried it and it was just WOW!! Huge hit with my family. Thanks for all the details and step by step pics, very helpful. I would definitely recommend your recipe! ??
Jyoti Behrani says
I am so glad you liked my recipe 🙂 Thanks for sharing your feedback! ?
Vidula Kagal says
Hi, thanks for sharing. Can you please advise which grinder did you use to grind the batter to a fine consistency?
Jyoti Behrani says
Hi, I grind the dal to a fine consistency and quinoa slightly coarse. Here's the link to mixer grinder I use to grind the idli batter: https://amzn.to/3kIqLdv
Billy says
It looks really good! However, would you be able to share the link where you used the traditional pot? Thank you.
Jyoti Behrani says
Hi, I used Idli stand to make the quinoa idli. I bought this stand from amazon. Here's the link: https://amzn.to/2Srxz3i
Kirthana says
Thanks for sharing this recipe. I made the batter yesterday . I didn't have enough gota urad, so I added in some split urad and some urad with chilka . Also threw in some cooked rice . Fermented well overnight , and then made the idlis this morning . Came out really good overall .
Jyoti Behrani says
Hi Kirthana,
I am so happy to hear that you liked my recipe. Thanks for sharing your feedback!