How To Make Ghee From Butter: Step-by-step recipe for making ghee from butter. Transforming butter into golden, aromatic ghee is a straightforward process that adds a rich, nutty flavor to your cooking.

I grew up devouring this golden liquid - Ghee. Ghee is a staple in every Indian household. Loaded with its health benefits, rich nutty flavor, nourishing and aromatic, ghee is a must-have in every Indian household.
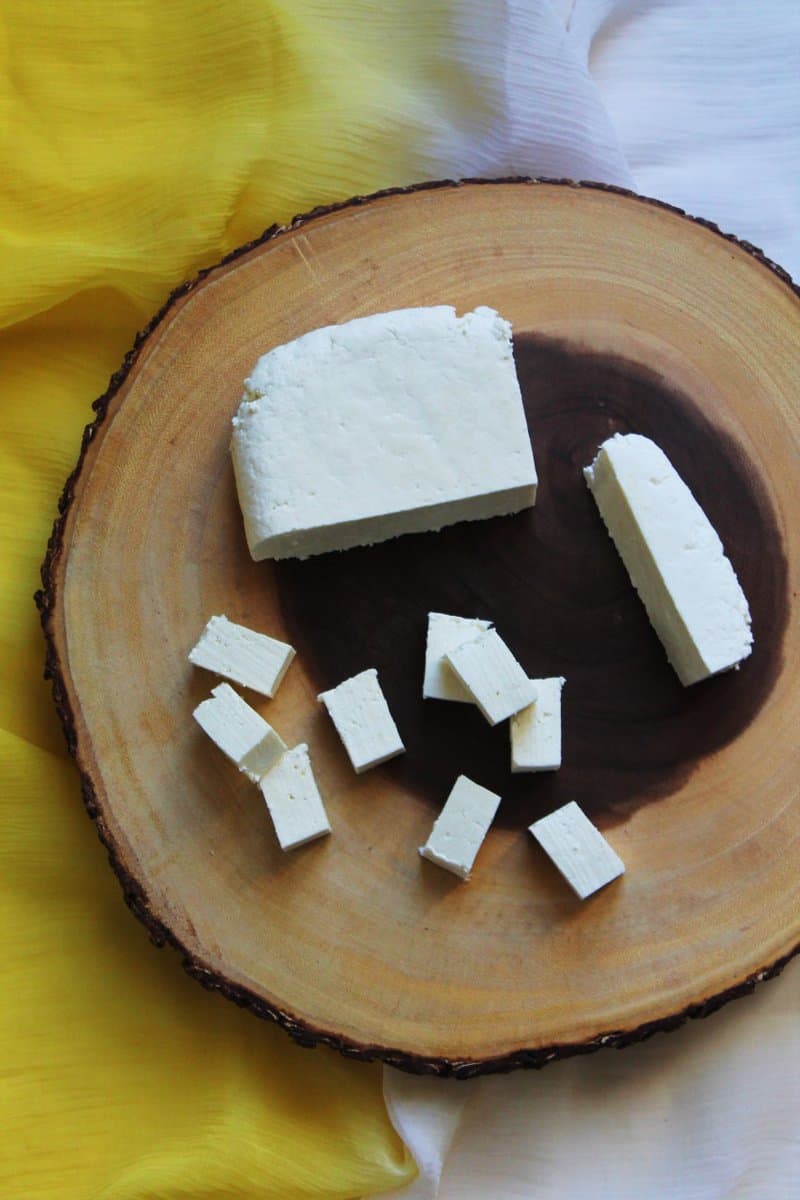
Growing up, I remember my mom used to make ghee almost every Sunday. Every morning, she used to boil the milk, then skim the cream, and store it in a container. This was like an everyday thing, first thing in the morning.
At the end of the week, she used to turn this cream into homemade butter. We used to devour this fresh, yummy homemade butter with some paratha or on a slice of a toast.
The next day, this butter was converted to Ghee, which was used throughout the week, in many different ways. From savory to sweet dishes like halwa, or even as a lip balm.
I learned to make perfect ghee from my mom. I make ghee at home, and it comes out perfect every single time!!
Homemade ghee is economical and easy to make. Learn how to make ghee step by step in this post, with all the pro tips that will help you achieve the best quality ghee, better than any store-bought. This post also includes how to store this golden liquid - Ghee and ways to incorporate it into your diet.
Jump to:
- Recipe Video - How To Make Ghee
- What Is Ghee Butter?
- Benefits - What Is Ghee Good For?
- Ghee vs Butter
- Ingredients - What Is In Ghee
- How To Make Ghee
- How To Make Ghee In Instant Pot
- Stovetop Method For Homemade Ghee
- Storage
- Tips For Making Perfect Ghee
- Frequently Asked Questions
- How To
- How To Make Ghee | How To Make Ghee From Butter
- How To Make At Home

Recipe Video - How To Make Ghee
What Is Ghee Butter?
Ghee butter, a popular ingredient in many cuisines, is a form of clarified butter that originated in India. To make ghee, butter is simmered to remove water content and separate milk solids, leaving behind a golden, pure fat with a rich, nutty flavor.
Known for its higher smoke point and potential health benefits, ghee is widely used in cooking and considered a staple in various culinary traditions.
Benefits - What Is Ghee Good For?
Ghee offers a range of health benefits, making it a popular choice in culinary practices. Due to its healing properties, ghee is used for thousands of years in Ayurvedic cooking. Some of the benefits worth mentioning are:
- With its high smoke point, ghee is excellent for cooking as it does not break down into harmful substances at high temperatures.
- Ghee is rich in butyrate (butyric acid), a short-chain fatty acid, essential for the growth and repair of new tissues in the digestive tract.
- The butyric acid in ghee helps reduce inflammation in the digestive tract and also helps decrease levels of unhealthy cholesterol.
- Ghee is easy to digest and is suitable for those who are lactose intolerant. (check with your physician)
- Additionally, ghee is rich in fat-soluble vitamins like A, E, and D, aiding in nutrient absorption. Its potential anti-inflammatory properties and the presence of conjugated linoleic acid (CLA) are believed to contribute to overall well-being, making ghee a versatile and nutritious addition to a balanced diet. See more health benefits at WebMD.com

Ghee vs Butter
Ghee and clarified butter are interchangeably used, however, ghee is not the same as clarified butter.
Ghee and clarified butter share a similar preparation method involving the removal of water and milk solids from butter, leaving behind pure butterfat. However, ghee is taken a step further by simmering the butter longer to develop a richer flavor and distinctive nuttiness.
Additionally, ghee has a slightly higher smoke point and longer shelf life due to the removal of moisture and milk solids, making it a preferred choice for frying and high-heat cooking in many culinary traditions.
Ingredients - What Is In Ghee
To make ghee at home, you need only good quality, unsalted butter, preferably grass-fed butter. The important thing here is to understand that butter needs to be simmered for a longer period, to achieve the grainy, gritty texture of ghee.
I have tried following butter, to make ghee at home with great success. The ghee turns out amazing, aromatic, grainy, gritty texture, perfect!!
- Kerrygold butter, pure Irish
- Kirkland, unsalted organic or non-organic (Costco)
- Wegmans, unsalted organic or non-organic
- Land O Lakes Butter, Unsalted
- Local butter rolls (Farmer's Market, Wegman's, Walmart)
- Homemade butter, made from heavy cream
Pic Shown: Ghee solidifies as it cools down
Important: Before You Start Making Ghee
- In the making of ghee, it is important to pick the right kind of butter. My choice of butter has always been an unsalted one. If you can get organic, well and good, if not use any good quality unsalted butter.
- Start with a clean and a dry pot, it's important, do not to use a wet pot to start making ghee.
How To Make Ghee
Simple technique but many times we end up with an undesirable end product. Though the making of ghee is a very simple process, there are a few things one needs to keep in mind while making ghee.
Time is one of the most important factors, even a few extra minutes, or I must say seconds can change the texture and color of the ghee.
This simple process of making ghee sometimes becomes very complicated, when we miss those important clues while making ghee.
Today, I will share with you all some of the important steps or clues that I find very helpful while making ghee.
Ever since I started looking for these clues while making ghee, I have never missed on making perfect ghee always. These clues will help you in making perfect ghee, that has perfect grainy texture, aroma, and color always!!
How To Make Ghee In Instant Pot
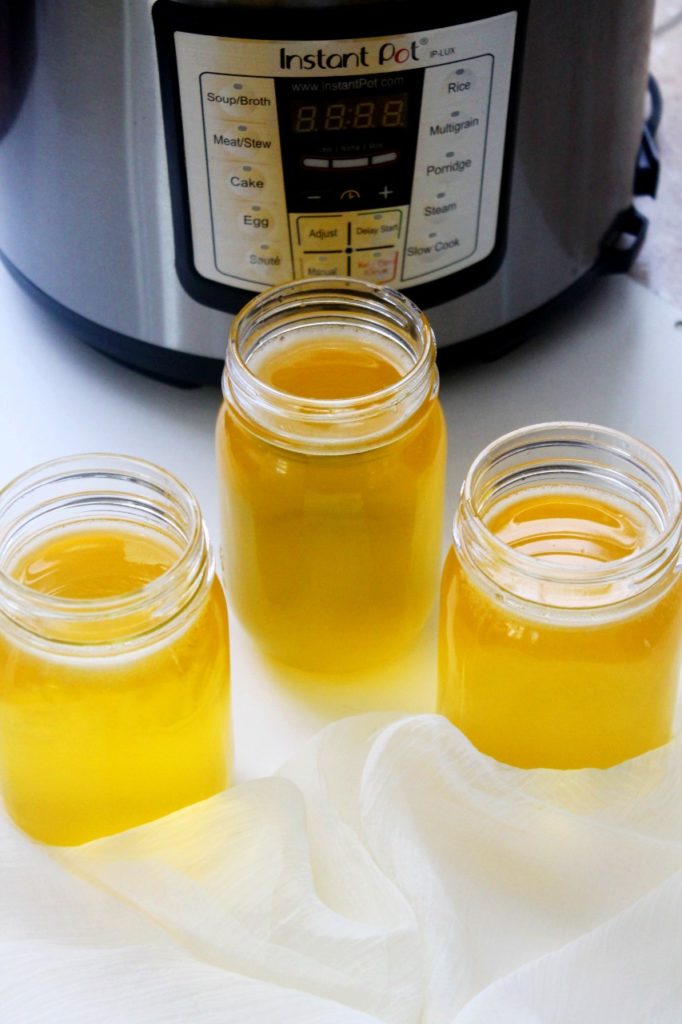
I used 4 lbs of unsalted butter to make ghee. This will yield around 48 oz of homemade ghee.
You can reduce the quantity as desired, but the process of making ghee will still remain the same. Depending upon the quantity of the butter the cooking time will vary.
- Turn on Instant Pot to Sauté mode (more), add butter to the inner pot and let it melt.

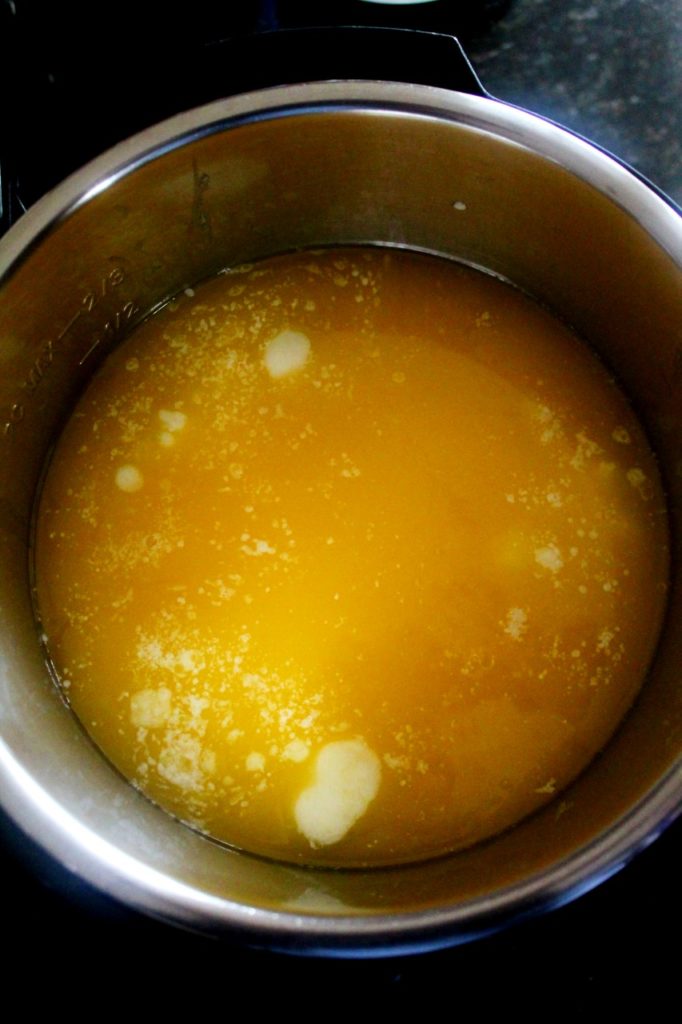
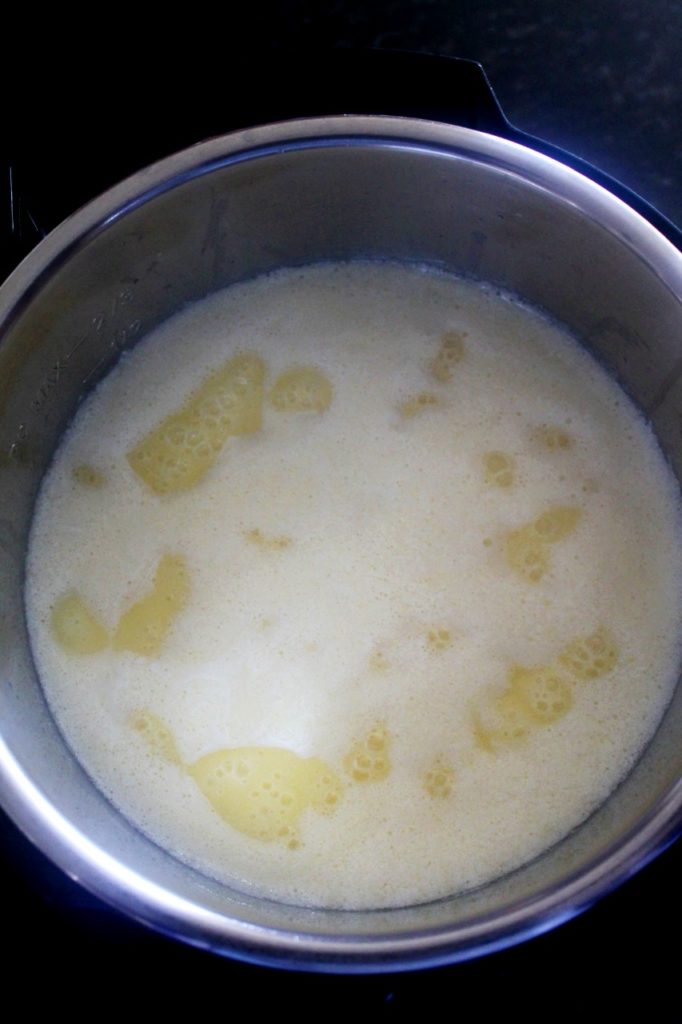
2. Once the butter has melted completely, let the melted butter come to a rolling boil, you will notice a thick dense, whitish foam/froth build-up. At this point reduce the Instant Pot setting to sauté (normal).
Pic Shown: Left - whitish foam/froth build-up. Right - gradually the froth starts to dissipate.
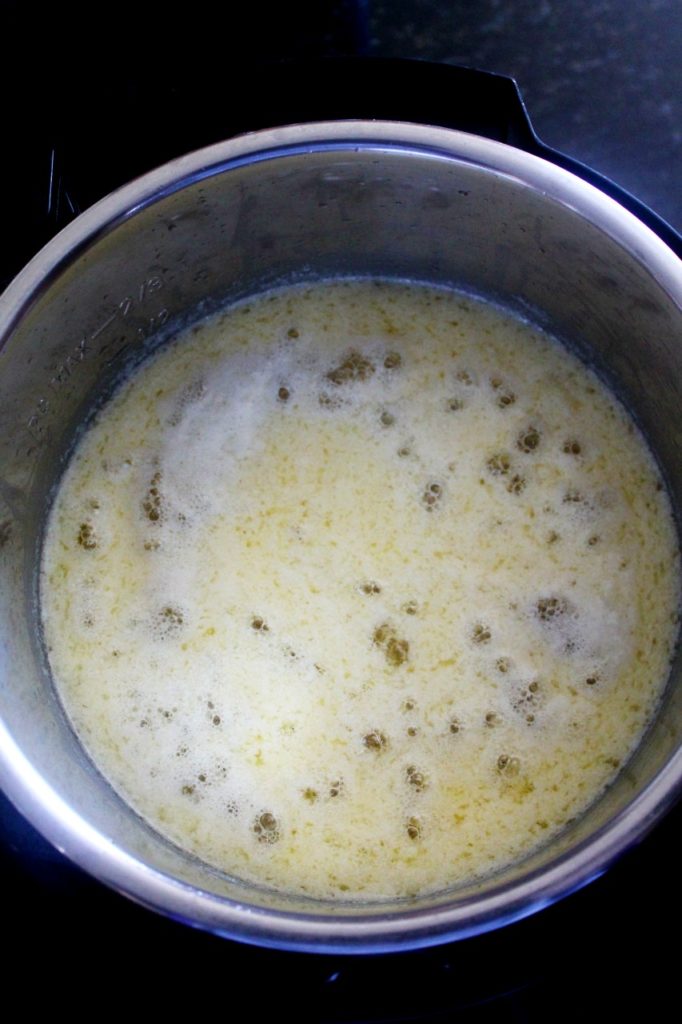
3. After a few minutes of cooking, you will notice that the foam/froth has dissipated and the liquid is more clear and thinner. This is an indication of water content or moisture has almost evaporated from the butter. Wait we are not done making ghee yet.
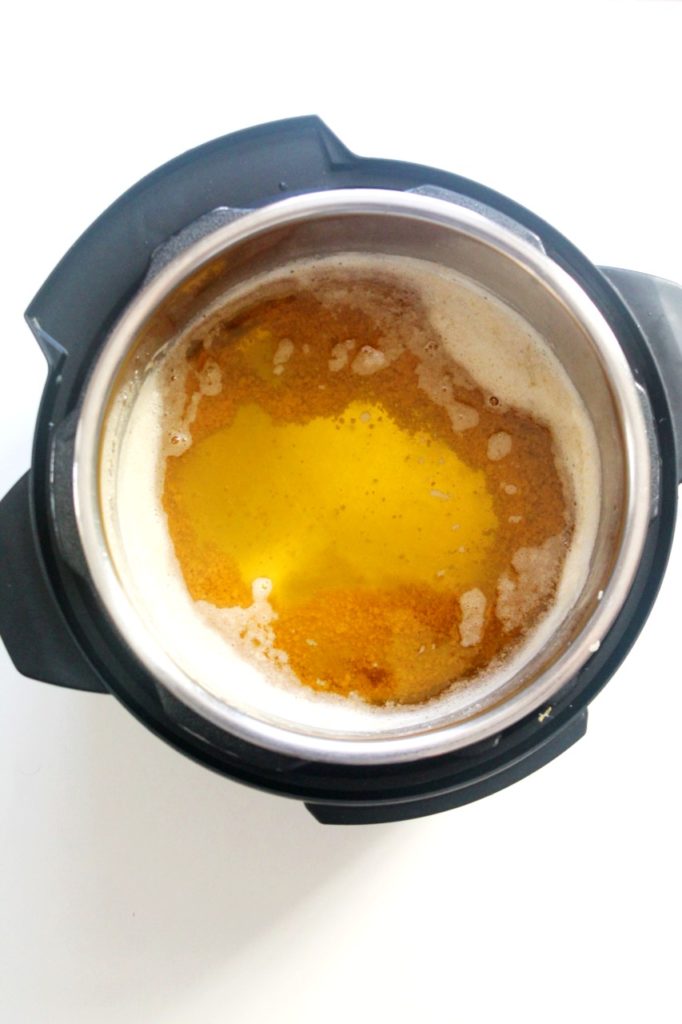
4. After cooking for a few more minutes, milk solids start to build up. Milk solids are small whitish granules you will see floating in the liquid. Continue to cook, after cooking for a few minutes, the milk solids will start to settle at the bottom of the pot. Give a gentle stir in between the process.
5. Finally, you will see the liquid is almost clear, the milk solids have settled at the bottom of the pot and have changed color from white to light brown. Also, you will notice there are fine (thin), clear bubbles on top of the liquid. At, this time ghee is ready.
Pic Shown: Milk solids have settled at the bottom of the pot, and start to turn brown.
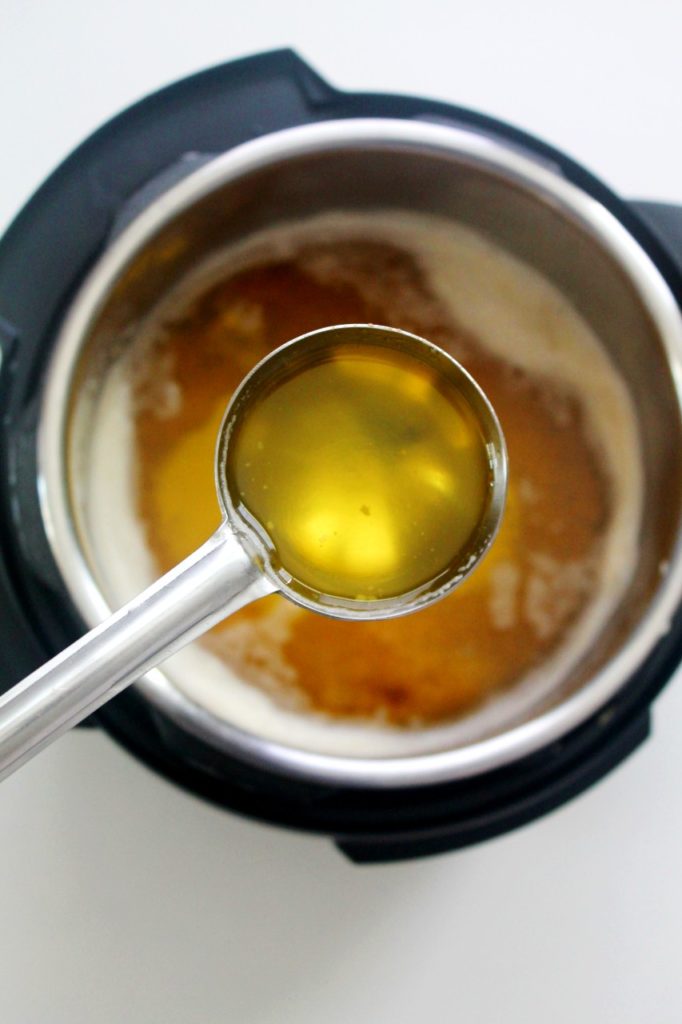
6. Turn off the sauté. After 5-10 minutes, it is OK to strain the ghee using a fine strainer or cheesecloth. Or you may choose to leave it in the inner pot to cool it further. If the ghee is left in the inner pot, it continues cooking from the liquid heat.
7. The milk solids turn dark brown, which will result in darker, nuttier, tasting ghee.
Pic Shown: Closeup - Homemade Ghee
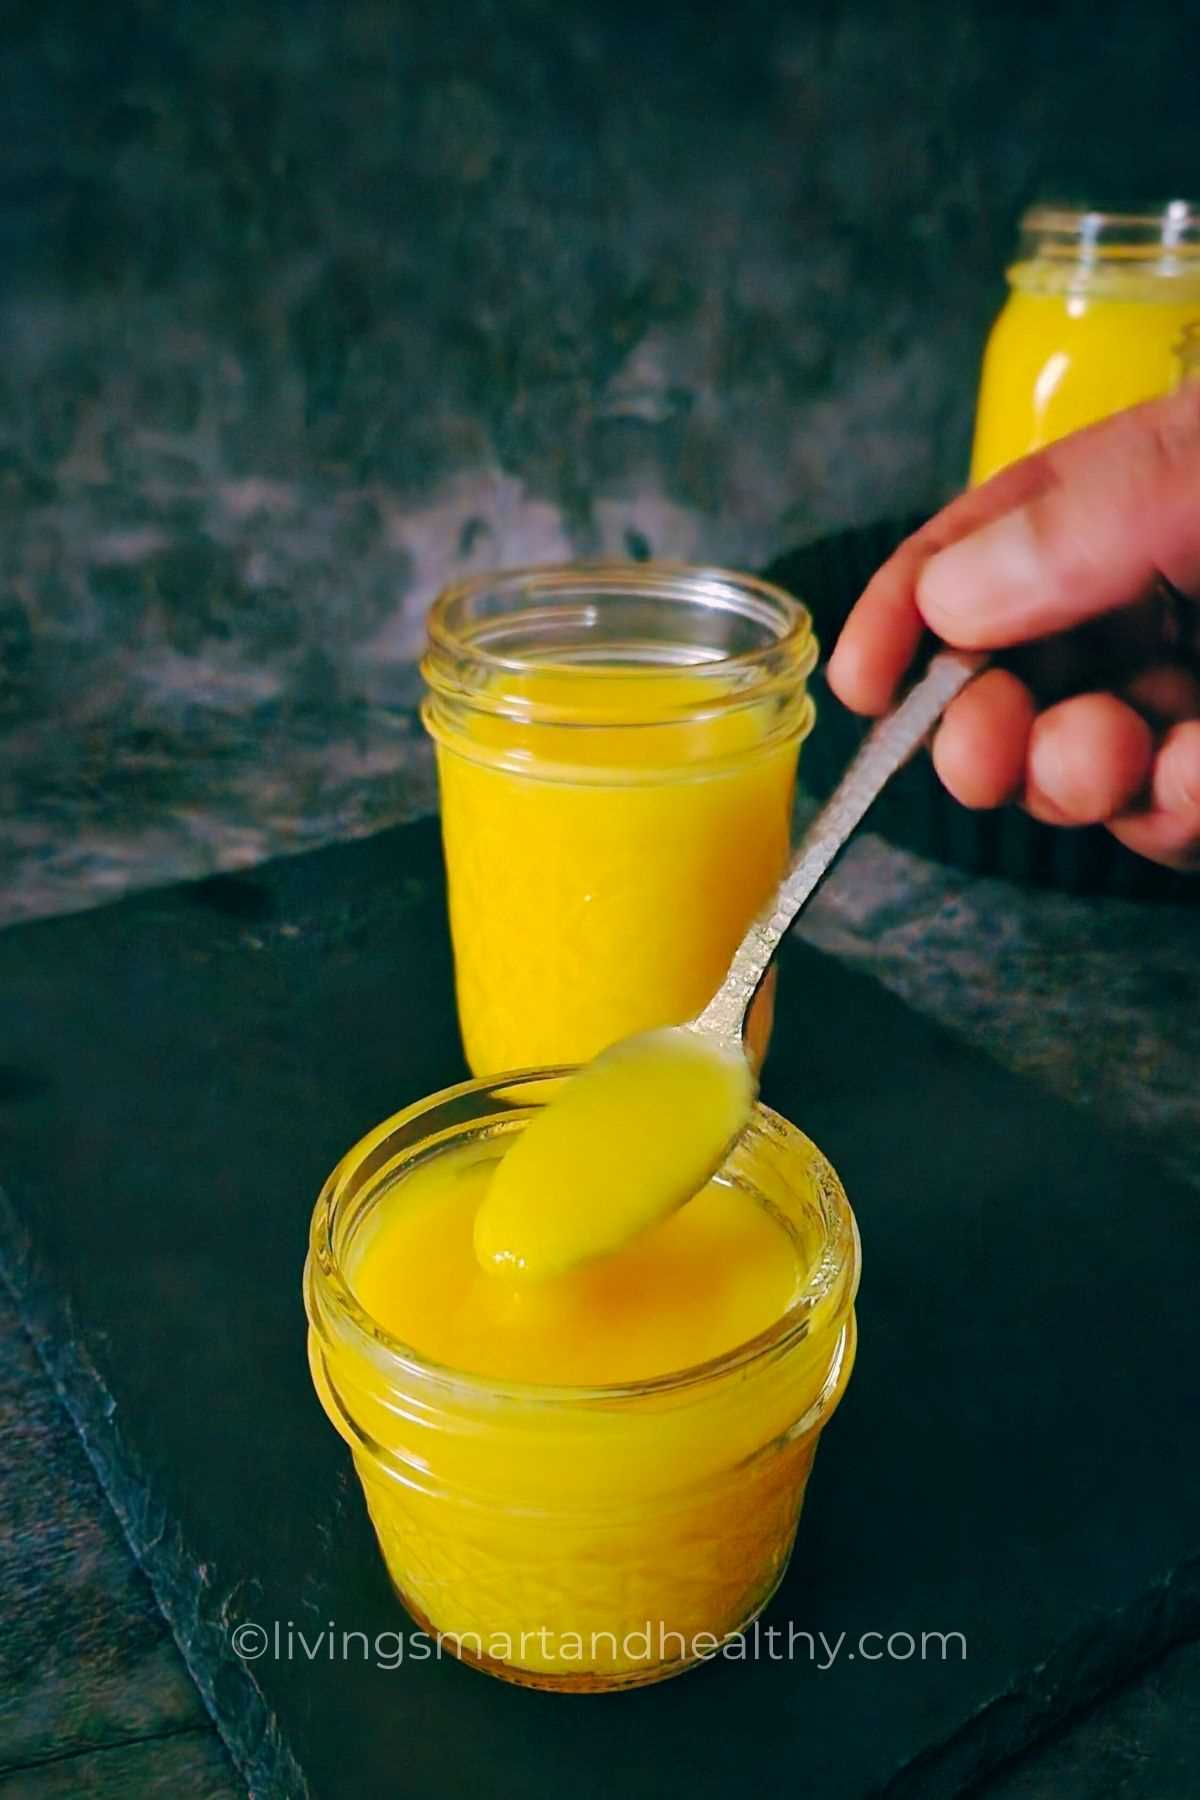
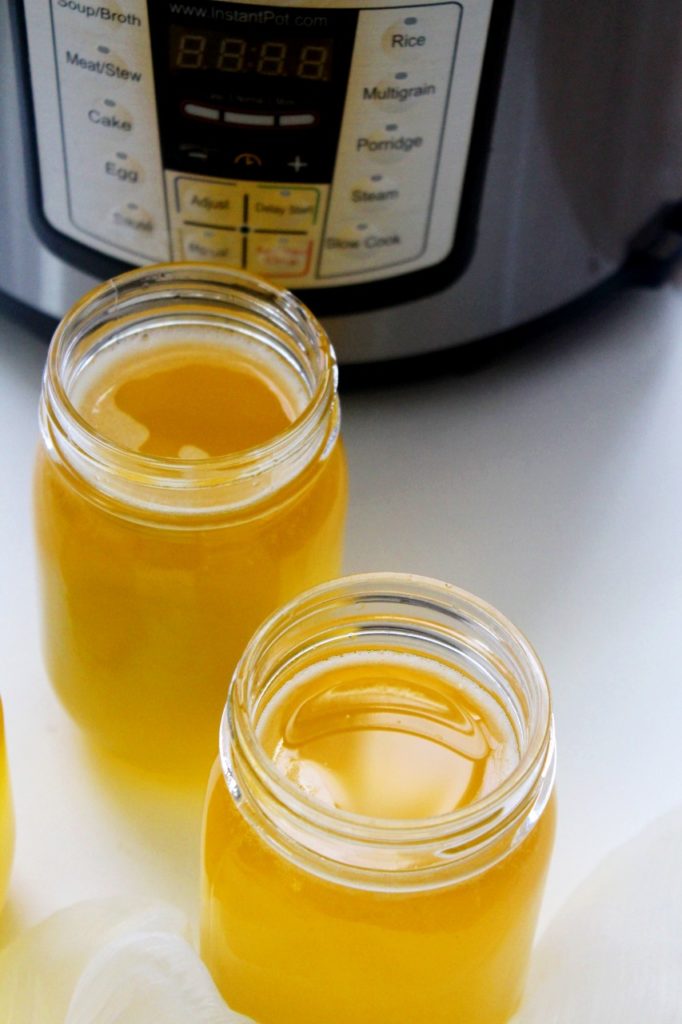
8. After the ghee is at room temperature, transfer the ghee to a clean, dry, airtight container. Depending upon how long the ghee is cooked, it will differ in texture, aroma, taste, and color.
Please check out the video, I have tried to include all the visible clues, that will be very helpful while making perfect ghee. Notice the change in sound, yes the sound changes as the butter is transformed into ghee!
Stovetop Method For Homemade Ghee
In a saucepan or pot, add butter. Once the butter is completely melted, reduce the heat to medium and cook until milk solids start to turn brown. Follow the recipe as discussed earlier.
Storage
Store ghee in a clean, air-tight glass jar, in a cool, dry, dark place, away from any kind of light (even sunlight) or any heat source (direct or indirect).
Tips For Making Perfect Ghee
Here're a few tips that you might find helpful when making homemade ghee:
- For best homemade ghee use unsalted, good-quality butter, preferably grass-fed butter.
- Once the butter is melted, simmer the butter over low heat.
- When the clarified butter stage is reached, cook the butter longer, for the nutty, grainy, gritty texture to form ghee.
- Once the milk solids settle at the bottom of the pot and start to change color from pale to golden, turn OFF the heat.
- The milk solids will turn brown with the residual heat. The longer it sits, the nuttier flavor it has.
- Strain the ghee while still warm, as ghee starts to solidify once cool. I normally, strain after 10-15 minutes of turning OFF the heat.
- You can use the brown milk solids to knead dough, and add in dals, and curries. As a kid, I remember I use to have it with some sugar, spread it over paratha, roll it and devour it!!
- Store the ghee in a clean, air-tight glass jar, in a cool, dry, dark place.
- Ghee does not require any refrigeration and has a long shelf life, up to six months.
- Always, use a dry, clean spoon each time to remove ghee from the container.
- Depending upon the temperature, you can see different forms of ghee, from solid, and semi-solid to the liquid stage. I live in cold temperatures, and during winter, ghee solidifies. During summers, or when temperatures are not so cold, ghee remains semi-solid or even turns into liquid.
What Is The Color of Ghee
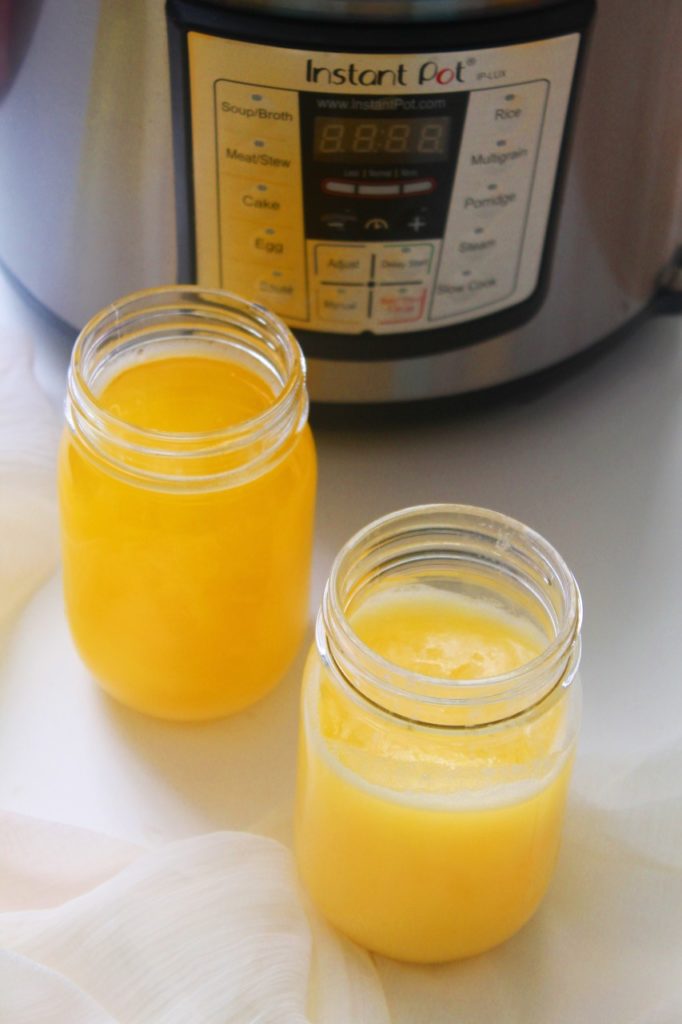
Once the ghee solidifies, it turns lighter in color. Ghee can be found in white, golden, or brown color, depending upon the type of the butter and how long it has been cooked.
White: If the butter used for making ghee is pale or white, it will yield white color ghee.
Secondly, if the ghee is under-cooked, the color of the ghee will be white. You can simmer it a little longer to get the right color of ghee. The lighter ghee will have a decreased shelf life, and will go bad soon.
It is important to cook the butter until milk solids sink to the bottom of the pot, and start to change color from pale to brown. At this stage, the ghee is perfectly cooked.
Golden: If the butter used for making ghee is deep yellow, it will yield golden color ghee.
Brown: Weather you use white or yellow butter to make ghee. If the color of the ghee is brown, don't worry. It is just fine. Ghee is cooked slightly longer resulting in a nuttier, toasted flavor.
How To Use Ghee
Ghee has a very high smoke point, and is ideal to use for cooking. I use it in almost everything. From stir fry, sautéing, rice, khichdi, lentils, over roti's, parathas, in baking,...
Ghee can be used in your routine beauty care. Use it as a lip moisturizer, rub it over the nail cuticle, and for soft nails. Soothe irritating skin, any kind of skin rashes, and apply on dry scalp.

Frequently Asked Questions
Homemade ghee has a good shelf. Homemade ghee stays good for up to six months on a counter top or can be refrigerated for up to a year.
Store the ghee in a clean, air-tight glass jar, in a cool, dry, dark place.
Always, use a dry, clean spoon each time to remove ghee from the container.
Yes, just like any other food, ghee can also go bad. The main culprit is the moisture, moisture in any form can lead ghee to go bad. For example, if a wet spoon is used to remove ghee from the jar, it will cause ghee to go bad. If ghee is stored in a loose-fitting jar (not air-tight), the moisture in the atmosphere can cause ghee to go bad.
If the ghee has gone bad it will smell and taste sour, and rancid. It loses its grainy texture and beautiful golden color.
Ghee is known for its aromatic, nutty flavor. Traditionally, ghee does not have any added flavorings. However, herbs like curry leaves, moringa leaves, and spices like turmeric, cloves, bay leaf can be used to infuse flavors.
A grainy, gritty texture makes perfect ghee. Ghee simmered over for a long time and acquires this nice grainy texture. Grainy texture ghee means ghee is cooked to perfection!!!
How To

How To Make Ghee | How To Make Ghee From Butter
Equipment
Instructions
Instructions for Instant Pot Cooking:
- Turn on Instant Pot on Saute mode (more). Add butter, butter will start to melt. This will take around 8-10 minutes.
- Once when the butter is completely melted and it starts to boil vigorously. Switch to Saute mode (normal). Continue to cook the butter.
- After 5-7 minutes, you will notice some foam/froth developing. Continue cooking.
- After 5-6 minutes of cooking, the foam/froth will dissipate and you will see more clear butter. Continue cooking.
- After few more minutes of cooking, the milk solids (whitish granule) will start to build up. You will start to notice whitish granules or milk solids floating in the liquid. Slowly once the ghee is cooked, these milk solids will start to settle at the bottom of the inner pot. Gently stir between the process.
- Once the milk solids have settled at the bottom of the inner pot and you notice a change in color (both the liquid and milk solids start to turn light brown). It's time to switch of saute mode. Ghee is ready.
- After 5-10 minutes, strain the ghee using a fine strainer or cheesecloth to a clean, dry, airtight container.
- Enjoy homemade ghee!!
How to make ghee from butter - Stovetop
- Follow the recipe as discussed earlier. Once the butter is completely melted, reduce the heat to medium and cook until milk solids start to turn brown. Since the entire process is done on saute mode, follow the same steps as Instant Pot.
Notes
- Unsalted butter is preferred in the making of ghee.
- You can use organic butter or any good quality unsalted butter works just fine.
- Depending upon the quantity of the butter, the cooking time will vary.
- Depending on how long the butter is cooked, the texture, taste, and color will be different.
- It is important to start with a clean and dry pot for making ghee.
- Once the ghee is done, if left in the pot for longer, the milk solids turn dark brown in color, resulting in dark-colored ghee.
- This recipe yields around 48 oz of homemade ghee.
- Please refer to the post earlier - Tips on How to Make Ghee
- Please refer to the post earlier - Frequently Asked Questions


Terri Baker says
My first batch of ghee came out perfect. I thought the second one had also, until the one left on the counter molded in 3 days. I’m thinking I didn’t cook it long enough to get the dairy out. The ghee that I refrigerated is fine, no mold. What do you think?
Jyoti Behrani says
Hi Terri, Any moisture in the ghee will result in mold formation. Ghee needs to be cooked until all the milk solids settle at the bottom of the pot, and start to turn brown in color. Also, ghee does not require any refrigeration. You can cook the ghee little longer and see if it helps. Thanks!