Love café style dining at home? Homemade bread bowls are ideal for a creamy soup, chili, or dip. Make these incredibly easy homemade bread bowls with this easy recipe.
The post includes step-by-step directions plus a recipe video to make these perfect café style bread bowls at home.
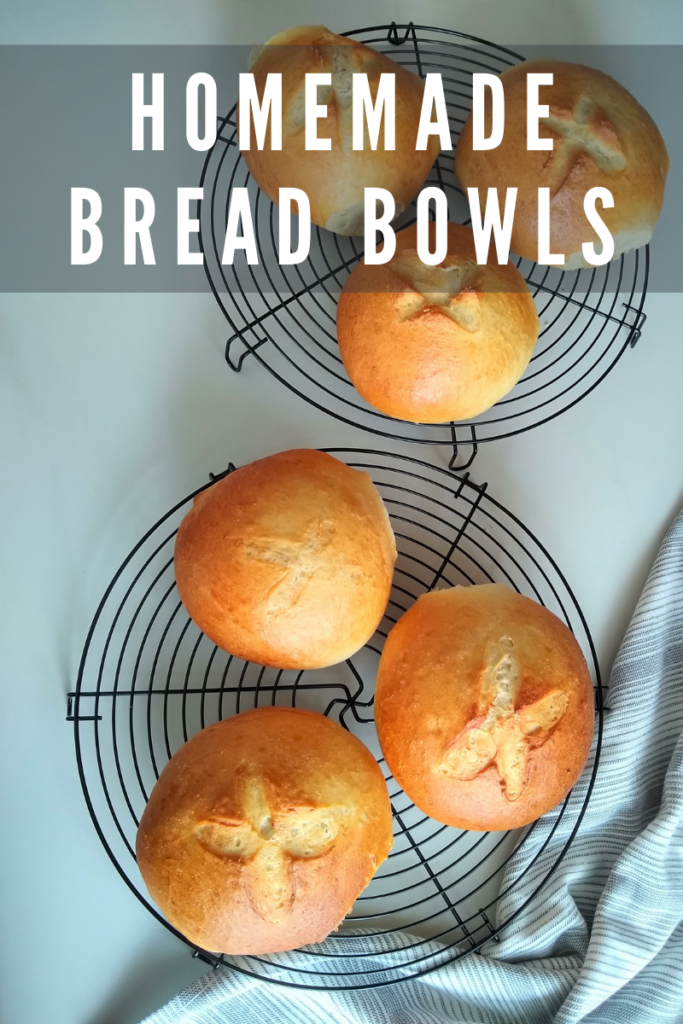
HOMEMADE BREAD BOWL
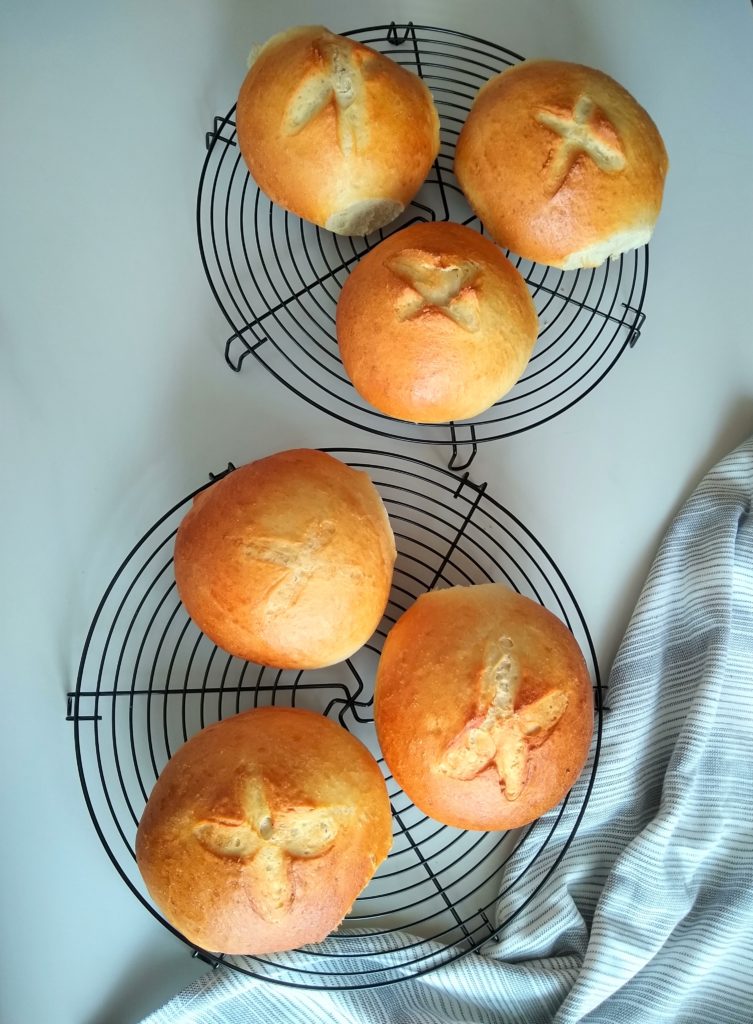
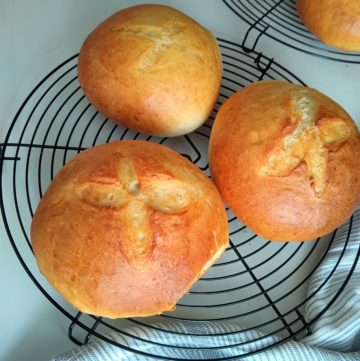
Homemade Bread Bowl, crusty on the outside, soft and fluffy inside. A perfect accompaniment to your favorite soup, chili, dips!!
These homemade bread bowls are the best. Make these gorgeous bread bowls, with this easy, just 5 steps, recipe and enjoy the experience of the best dining at home.
There's nothing quite as comforting as a bowl of piping hot soup, served in a homemade bread bowl! These homemade bread bowls are so good, that I can eat soup all year round.
Try this recipe once, and you will be hooked on these homemade bread bowls. They are delish and darn easy to make!! Check out the recipe video for step-by-step directions and all the tips and tricks!
A homemade bread bowl tastes even better with these homemade soups. My family loves Broccoli Cheddar Soup, Cream of Mushroom Soup, Tomato Bisque, or Corn Chowder with these homemade bread bowls. What's your favorite soup to fill your bread bowl?
Let me know in the comments section how these homemade bread bowls turned out. Tag me on Instagram @livingsmartandhealthy or #livingsmartandhealthy, I would love to see your creations. Happy baking!!
INGREDIENTS FOR BREAD BOWL
3 ½ cups (450 g) bread flour, spoon & leveled;
3 ½ cups (465 g) all-purpose flour, spoon & leveled; plus 1-2 tablespoons as needed
2 ½ cups (592 ml) lukewarm water [100 F – 110 F]
4 ½ teaspoon (14 g)Active Dry Yeast
1 tablespoon (12.5 g) sugar
2 tablespoon olive oil
2 teaspoon salt
FOR EGG WASH
1 egg white + 1 tablespoon water
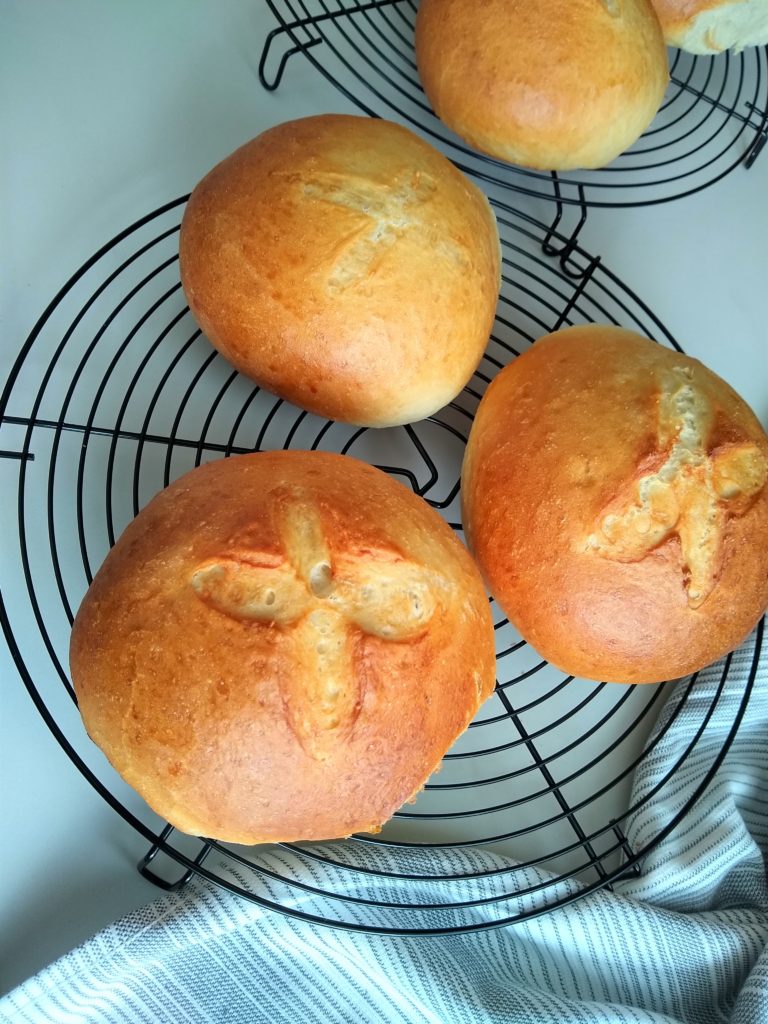
Pic Shown: Homemade Bread Bowl
DIRECTIONS FOR BREAD BOWL
STEP 1: PROOF YEAST
In a cup, stir in lukewarm water [100*F – 110* F], sugar, and yeast. Let the mixture stand for 10 minutes, or until it turns frothy, and doubles in volume.
Note: If the yeast is active, the mixture turns frothy, and doubles in volume. If the mixture does not double in size, start the process again with fresh yeast.
STEP 2: PREPARE THE DOUGH [BY HAND OR USING A STAND MIXER]
Into the bowl of a stand mixer, add bread flour, all-purpose flour, and salt. Mix the dry ingredients.
To the flour, add olive oil and yeast mixture. Using a dough hook attachment, knead the dough for 5-7 minutes, or until the dough is soft and pliable (dough will start to leave the sides of the bowl and form into a smooth ball).
Note: If you are kneading by hand, mix the dough with the back of a spatula until all the ingredients are just combined. Transfer the dough to a lightly floured work surface. Knead the dough until it is soft, pliable, springs back when pressed, and is not sticky around 8-10 minutes.
OPTIONAL: If the dough feels too sticky, add some flour, one tablespoon at a time. If it is too dry, add 1-2 teaspoons of warm water, and knead the dough, until it is nice and soft.
STEP 3: FIRST PROOFING USING INSTANT POT
Place the dough in the greased inner pot. Place the lid, and cover the pot. Turn ON YOGURT (normal) for 30 minutes. After 30 minutes, the dough will have risen and doubled in volume.
Note: I used a glass lid that fits, to cover the inner pot.
Note: First Proofing Using Traditional Method - Shape the dough into a ball and place it in a greased bowl. Cover the bowl with a kitchen towel and place it in a warm place, for 60-90 minutes or until it doubles in volume.
STEP 4: SHAPE THE BREAD BOWL
Lightly grease a ( 9 * 12 ) inch baking sheet.
Transfer the dough onto a work surface and deflate it.
Using a bench cutter, divide the dough into 6 equal pieces. Cover the pieces with a damp kitchen towel, while you work with a single piece.
Take a piece of the dough ball, and roll it into a tight ball. Stretch and tuck the edges in the center. Turn the dough, seam side down, and roll it into a smooth ball.
Note: This is an important step, roll the dough into a tight ball. If the ball is rolled loosely, it may lose its shape during baking.
Place the ball, seam side down, onto a baking sheet. Cover with a damp kitchen towel while you shape the rest of the balls.
Using a sharp knife, score an X into the top of each dough ball.
Cover the balls with a damp kitchen towel and place them in a warm place to rise again for around 30-45 minutes, or until double in size.
STEP 5: BAKE BREAD BOWLS
Towards the end of the second rise, place an empty broiler tray on the top shelf and pre-heat the oven to 400 F.
In a small bowl, combine egg white and water. Using a pastry brush, apply the egg wash to the balls.
Place the baking sheet in the center of the oven. Pour 1 cup of hot water into the broiler tray.
Bake for 25-30 minutes, or until deep golden brown. Remove from the oven, and transfer the bread bowls to a cooling rack. Cool completely.
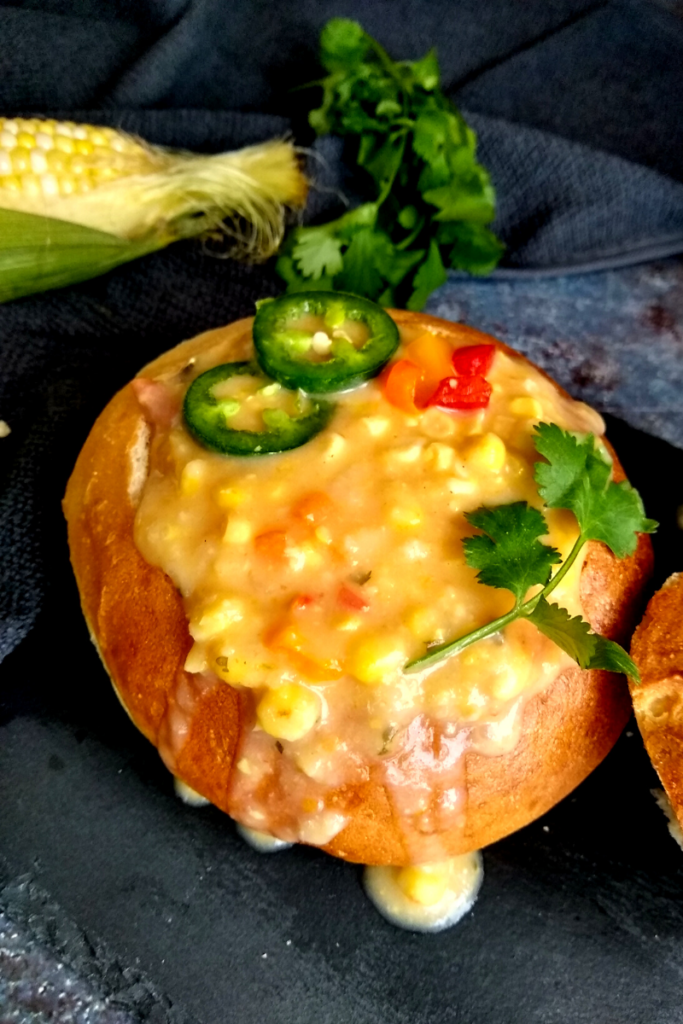
When you are ready to serve, cut the top ⅓ off each bowl, and scoop out the bread from the inside. Fill the bread bowl with your favorite soup or dip. Serve immediately.
Pic Shown: Serving Corn Chowder in Homemade Bread Bowl
DIRECTIONS FOR MAKE-AHEAD DOUGH
Follow STEP1 & STEP2 and prepare the dough. Place the dough in a lightly greased, air-tight container and place it in the refrigerator. The dough will rise slowly overnight in the refrigerator. In the morning, remove the dough and let it sit at room temperature for around 30 minutes or until doubles in volume. Continue with STEP 4.
DIRECTIONS TO FREEZE THE DOUGH
Follow the recipe through STEP 3. After first proofing, deflate the dough, wrap it tightly in plastic wrap, and then with aluminum foil. Place it in a freezer-safe, Ziploc bag and freeze it for up to 3 months. Thaw overnight in the refrigerator, or on the kitchen counter. Continue with STEP 4.
DIRECTIONS FOR FREEZING BREAD BOWLS
You can freeze the baked bread bowls for up to 3 months. Thaw in refrigerator or on the kitchen counter. Allow the bread to come to room temperature or warm it up in the oven for 1-2 minutes, before serving.
PRO TIPS FOR THE BEST HOMEMADE BREAD BOWLS
For measuring the flour, do not scoop the flour, instead, lightly fill the measuring cup with the flour, and level it with the back of the spoon. See FAQ – HOW TO MEASURE FLOUR THE RIGHT WAY
If the yeast is active, the mixture turns frothy and doubles in volume. If the mixture does not double in size, start the process again with fresh yeast.
Use a combination of bread flour and all-purpose flour for the right structure and texture of the bread bowl. You can increase the amount of bread flour in the recipe, i.e. instead of a 1:1 ratio, you can use a 2:1 ratio, of bread flour to all-purpose flour.
Check the consistency of the dough after kneading it for 4-5 minutes. If it feels too sticky, add some flour and if it is too dry, add 1-2 teaspoons of warm water, and knead the dough, until it is nice and soft.
Do not over-knead the dough. As soon as the dough is soft, elastic, springs back when pressed, and is not sticky. You know the dough is kneaded well.
Proof the dough until it becomes double in volume, do not overproof it.
Cover the dough with a damp kitchen towel at all times. The dough dries out very quickly.
For a good height of the bread bowl, roll the dough balls tight, or else you might end up with a flatbread bowl or bun.
Don't forget to score the bread with an X on top before baking or it might crack at unexpected places, leaving undesirable results.
Grease the baking sheet or else the bowls might stick to the baking sheet.
Use egg wash for nice glossy, deep brown crusty bread bowls.
Don't forget to fill a broiler tray with hot water, just before baking. This helps create a nice, moist atmosphere, allowing bread to expand, and rise freely. Also, gives the bread a nice, crusty look.
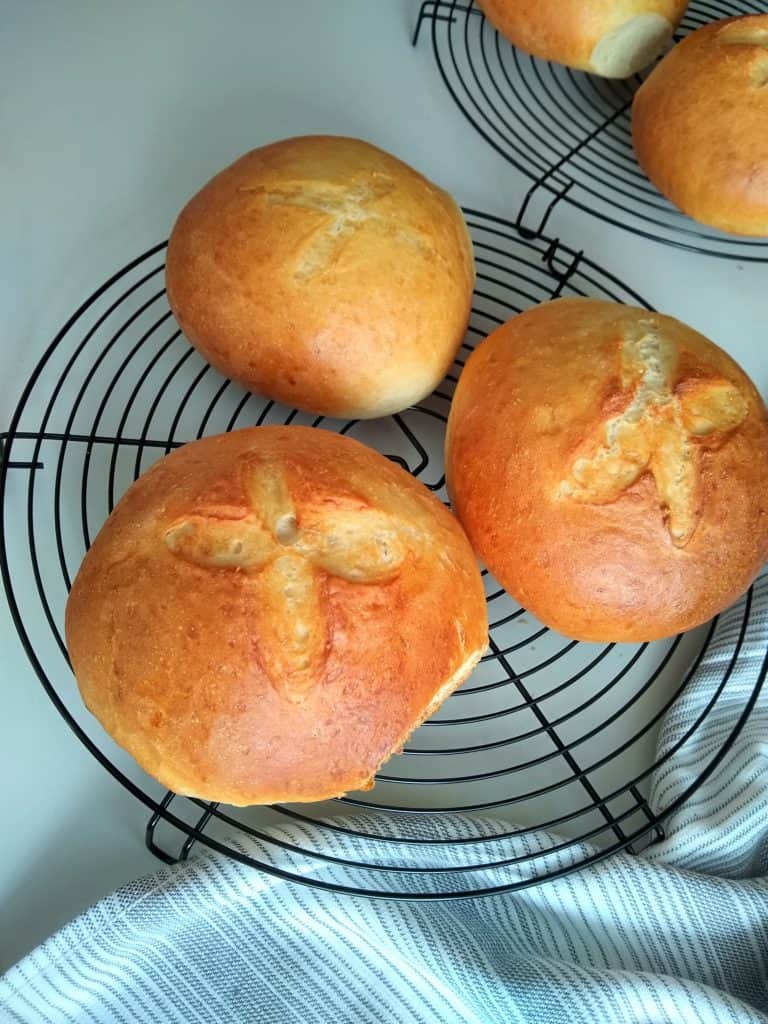
Pic Shown: Homemade Bread Bowl
FREQUENTLY ASKED QUESTIONS
WHY USE BREAD FLOUR
Bread flour has a higher protein content, than all-purpose flour. This extra protein produces more gluten and gives bread the right structure and texture. Because of this high protein content, bread flour can absorb more liquid, thus it holds its shape and rises upwards instead of sideways.
WHY USE A MIX OF FLOURS
I found the combination of bread flour and all-purpose flour, which gave me the right structure and texture for the bread bowls. The bread bowls have good height, and are crusty from the outside, while soft from the inside. Makes them perfect to serve in some soups or dips.
I used half bread flour and half all-purpose flour for this recipe. This ratio has worked for me and I get consistent results every single time.
HOW TO MEASURE THE FLOUR RIGHT WAY
It is important to measure the flour using the right method. To avoid over-measuring, do not scoop the flour straight from the container. First, loosen the flour by giving it a good stir with a spoon or a spatula. Next, spoon the flour into the measuring cup, fill the cup slightly over the rim. Now, level the flour using the back of the spoon or a knife.
CONSISTENCY OF THE DOUGH
The consistency of the dough is soft, elastic, and non-sticky. When you poke the dough, it springs back and does not stick.
Check the consistency of the dough after kneading it for 4-5 minutes. If it feels too sticky, add some flour and if it is too dry, add 1-2 teaspoons of warm water, and knead the dough, until it is nice and soft.
HOW LONG DO YOU KNEAD DOUGH
Depending upon the method used for kneading, the time will vary. If you are using a stand mixer to knead the dough, it takes somewhere from 5-7 minutes to knead the dough. If kneading the dough by hand, it takes around 10-15 minutes for a soft, pliable dough.
HOW DO I KNOW IF THE DOUGH IS KNEADED ENOUGH
A well-kneaded dough will be soft, elastic, springs back when you poke your finger, and won’t be sticky. If the dough does not pass this simple test, it means it needs more kneading.
Here are a few ways you can tell that the dough is kneaded well:
First, it forms into a nice smooth dough, the dough will start to leave the sides of the bowl.
Secondly, poke a finger, and if the dough springs back, and is not sticky, the dough is kneaded well.
Lastly, you can also do a windowpane test. Take a small piece of dough, and stretch it as thin as possible. If the dough does not tear, and you can see a thin layer of dough, it means the dough is kneaded well.
WHY DO YOU KNEAD THE DOUGH
It is important to knead the dough before rising, as kneading develops the gluten in the dough. Gluten is made of long strands of protein, which makes the dough stretchy. The stretchy dough can hold the bubbles created by the yeast, thus making the dough rise.
WHY IS MY DOUGH TOO STICKY
Too much liquid can cause sticky dough. Also, if you used cold, or room temperature milk, it can result in the leaking of glutens, causing the dough to be sticky.
MY DOUGH IS TOO TIGHT
When using a stand mixer chances are that you overworked the dough. The change in the composition of gluten molecules results in a non-stretchy dough.
Overworked dough often feels too tight, and tough and breaks when you try to pull, or roll.
WHY DO YOU SCORE THE BREAD BOWL
Scoring the bread in terms of baking means, cutting or splitting the dough with a blade or a sharp knife. Scoring helps control the direction in which the bread will expand during the baking, this is called "oven spring".
WHAT HAPPENS IF I FORGOT TO SCORE THE BREAD
As soon as the dough goes into the hot oven, it starts to expand, causing the bread to rise. If the dough is not scored, then the bread will crack in unexpected places, leaving an undesirable loaf of bread.
WHY ROLL THE DOUGH A INTO TIGHT BALL
This is a very important step, rolling the dough into a tight ball. The tighter the dough ball, the better upwards rise it will have. If the dough is not rolled into a tight ball, it may rise outwards instead of upwards, resulting in a flatbread bowl.
WHY USE WATER DURING BAKING
I am standing outside the bakery shop, and looking at the most gorgeous, beautifully doomed loaves of bread, with that glossy brown crusts. The secret to professional bakers loaf is steam.
It is important to create a moist environment in the first few minutes of baking. As soon as the dough goes into the hot oven, it starts to expand, causing the bread to rise. Steaming within the first few 5-10 minutes helps keep the crust soft while allowing the bread to expand freely.
The steam that builds upon the surface of the bread, helps dissolve the sugars in the dough. As the bread stops rising, the steam evaporates, leaving behind the sugars to caramelize and give a nice glossy crust.
HOW TO STORE BREAD BOWLS
Once the bowl cools completely, place it in a Ziploc bag, or an air-tight container. Bread bowls last for a few days at room temperature or up to a week in the refrigerator.
Bread bowls freeze beautifully. Store it in a freezer-friendly storage bag or container, and it will last for a couple of months. Defrost, toast, and enjoy a homemade bread bowl with your favorite soup.
Pic Shown: Homemade Bread Bowl
★ If you tried this recipe, I would love to hear your feedback. Please rate the recipe and/or leave a comment below.
Follow me on Facebook, Pinterest, Instagram for all the latest on my blog!! Subscribe to my Youtube Channel for easy and delicious video recipes. Happy Baking!!
BEST SOUPS TO SERVE IN HOMEMADE BREAD BOWLS
Olive Garden Inspired Chicken Gnocchi Soup
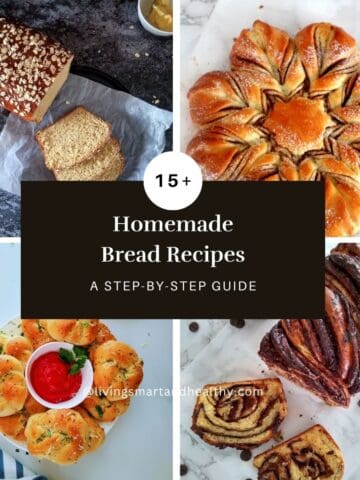
Enjoy baking, here are some more recipes from the blog!
Chocolate Babka -post includes 16 different sweet and savory filling ideas
Star Bread -post includes 16 different sweet and savory filling ideas
Homemade Bread Bowls
Ingredients
INGREDIENTS FOR BREAD BOWL
- 3 ½ cups (450 g) Bread flour, spoon & leveled;
- 3 ½ cups (465 g) all-purpose flour, spoon & leveled; plus 1-2 tablespoon as needed
- 2 ½ cups (592 ml) lukewarm water [100 F – 110 F]
- 4 ½ teaspoon (14 g) Active Dry Yeast
- 1 tablespoon (12.5) g sugar
- 2 tablespoon olive oil
- 2 teaspoon salt
FOR EGG WASH
- 1 egg white + 1 tablespoon water
Instructions
DIRECTIONS FOR BREAD BOWL
STEP 1: PROOF YEAST
- In a cup, stir in lukewarm water [100*F – 110* F], sugar, and yeast. Let the mixture stand for 10 minutes, or until it turns frothy, and doubles in volume.Note: If the yeast is active, the mixture turns frothy, and doubles in volume. If the mixture does not double in size, start the process again with fresh yeast.
STEP 2: PREPARE THE DOUGH [BY HAND OR USING STAND MIXER]
- Into the bowl of a stand mixer, add bread flour, all-purpose flour, and salt. Mix the dry ingredients.
- To the flour, add olive oil and yeast mixture. Using a dough hook attachment, knead the dough for 5-7 minutes, or until the dough is soft and pliable (dough will start to leave the sides of the bowl and form into a smooth ball).Note: If you are kneading by hand, mix the dough with the back of a spatula until all the ingredients are just combined. Transfer the dough to a lightly floured work surface. Knead the dough until it is soft, pliable, springs back when pressed, and is not sticky around 8-10 minutes.
- OPTIONAL: If the dough feels too sticky, add some flour, one tablespoon at a time. If it is too dry, add 1-2 teaspoons of warm water, and knead the dough, until it is nice and soft.
STEP 3: FIRST PROOFING USING INSTANT POT
- Place the dough in the greased inner pot. Place the lid, and cover the pot. Turn ON YOGURT (normal) for 30 minutes. After 30 minutes, the dough will have risen and doubled in volume.I used a glass lid that fits, to cover the inner pot.Note: For the traditional proofing method - Shape the dough into a ball and place it in a greased bowl. Cover the bowl with a kitchen towel and place it in a warm place, for 60-90 minutes or until it doubles in volume.
STEP 4: SHAPE THE BREAD BOWL
- Lightly grease a ( 9 * 12 ) inch baking sheet.
- Transfer the dough onto a work surface and deflate it.
- Using a bench cutter, divide the dough into 6 equal pieces. Cover the pieces with a damp kitchen towel, while you work with a single piece.
- Take a piece of the dough ball, and roll it into a tight ball. Stretch and tuck the edges in the center. Turn the dough, seam side down, and roll it into a smooth ball.Note: This is an important step, roll the dough into a tight ball. If the ball is rolled loosely, it may lose its shape during baking.
- Place the ball, seam side down, onto a baking sheet. Cover with a damp kitchen towel while you shape the rest of the balls.
- Using a sharp knife, score an X into the tops of each dough ball.
- Cover the balls with a damp kitchen towel and place it in a warm place to rise again, around 30-45 minutes or until double in size.
STEP 5: BAKE BREAD BOWLS
- Towards the end of the second rise, place an empty broiler tray on the top shelf. Pre-heat the oven to 400 F.
- In a small bowl, combine egg white and water. Using a pastry brush, apply the egg wash on the balls.
- Place the baking sheet in the center of the oven. Pour 1 cup of hot water into the broiler tray.
- Bake for 25-30 minutes, or until deep golden brown. Remove from the oven, and transfer the bread bowls on a cooling rack. Cool completely.
- When you are ready to serve, cut the top ⅓ off each bowl, and scoop out the bread from the inside. Fill the bread bowl with some Corn Chowder or your favorite soup. Serve immediately.
Video
Notes
- Pro Tips For Best Homemade Bread Bowls
- Directions For Make Ahead Dough
- Directions To Freeze The Dough
- Directions For Freezing Bread Bowls
- Frequently Asked Questions
Disclaimer
Nutrition values are my best estimates. If you rely on them for your diet, use your preferred nutrition calculator.

Renee says
I don’t see the amount of water or olive oil in either recipe section.
Jyoti Behrani says
Hi, Sorry about it. I just fixed the recipe section. Thanks!
Laurie says
Love café bread bowl soup. Tried your bread bowls today and they came out amazing. My hubby said these are the best bread bowl he has ever had! Thanks for posting such a great , easy to follow recipe!
Jyoti Behrani says
I am so glad to hear that you liked my recipe! Thanks for trying my recipe 🙂
Tina says
Hi, Just made your bread bowls and broccoli cheddar soup. It was a huge hit!! Everyone in my family loved it. Thank you so much for sharing such amazing recipes! Definitely on my rotation now 🙂
Jyoti Behrani says
Awesome! Bread bowl with broccoli soup sounds delish!! I am so glad you like my recipes 🙂 Thanks for sharing your feedback!
Nicole Nelson says
These turned out perfect, thank you!
Jyoti Behrani says
Hi Nicole, I’m so happy to hear this! You’re so welcome!