How To Make Yogurt: Making homemade yogurt is a relatively simple process that involves fermenting milk with yogurt cultures. Here's a fail-proof recipe to making creamy yogurt at home.
Jump to:
How To Make Yogurt
Homemade yogurt is made by fermenting milk with live bacterial cultures in a home setting. It's a popular and traditional way of making yogurt without the need for commercial production facilities.
The process involves introducing beneficial bacteria (such as Lactobacillus bulgaricus and Streptococcus thermophilus) into milk, which then ferments and transforms the milk into yogurt.
The milk is heated to a specific temperature, usually around 180°F (82°C), and then allowed to cool to around 110°F (43°C). This heating step helps denature the proteins in the milk, leading to a thicker consistency in the final yogurt.
A small amount of either store-bought plain yogurt with live active cultures or a yogurt starter from previous batch of yogurt is mixed with the cooled milk. This introduces the live bacteria needed to kick-start the fermentation process.
The milk and starter culture mixture is then left to incubate at a warm temperature, typically around 110°F (43°C), for several hours. During this time, the beneficial bacteria consume the lactose (milk sugar) and produce lactic acid, which thickens the milk and gives yogurt its characteristic tangy flavor.
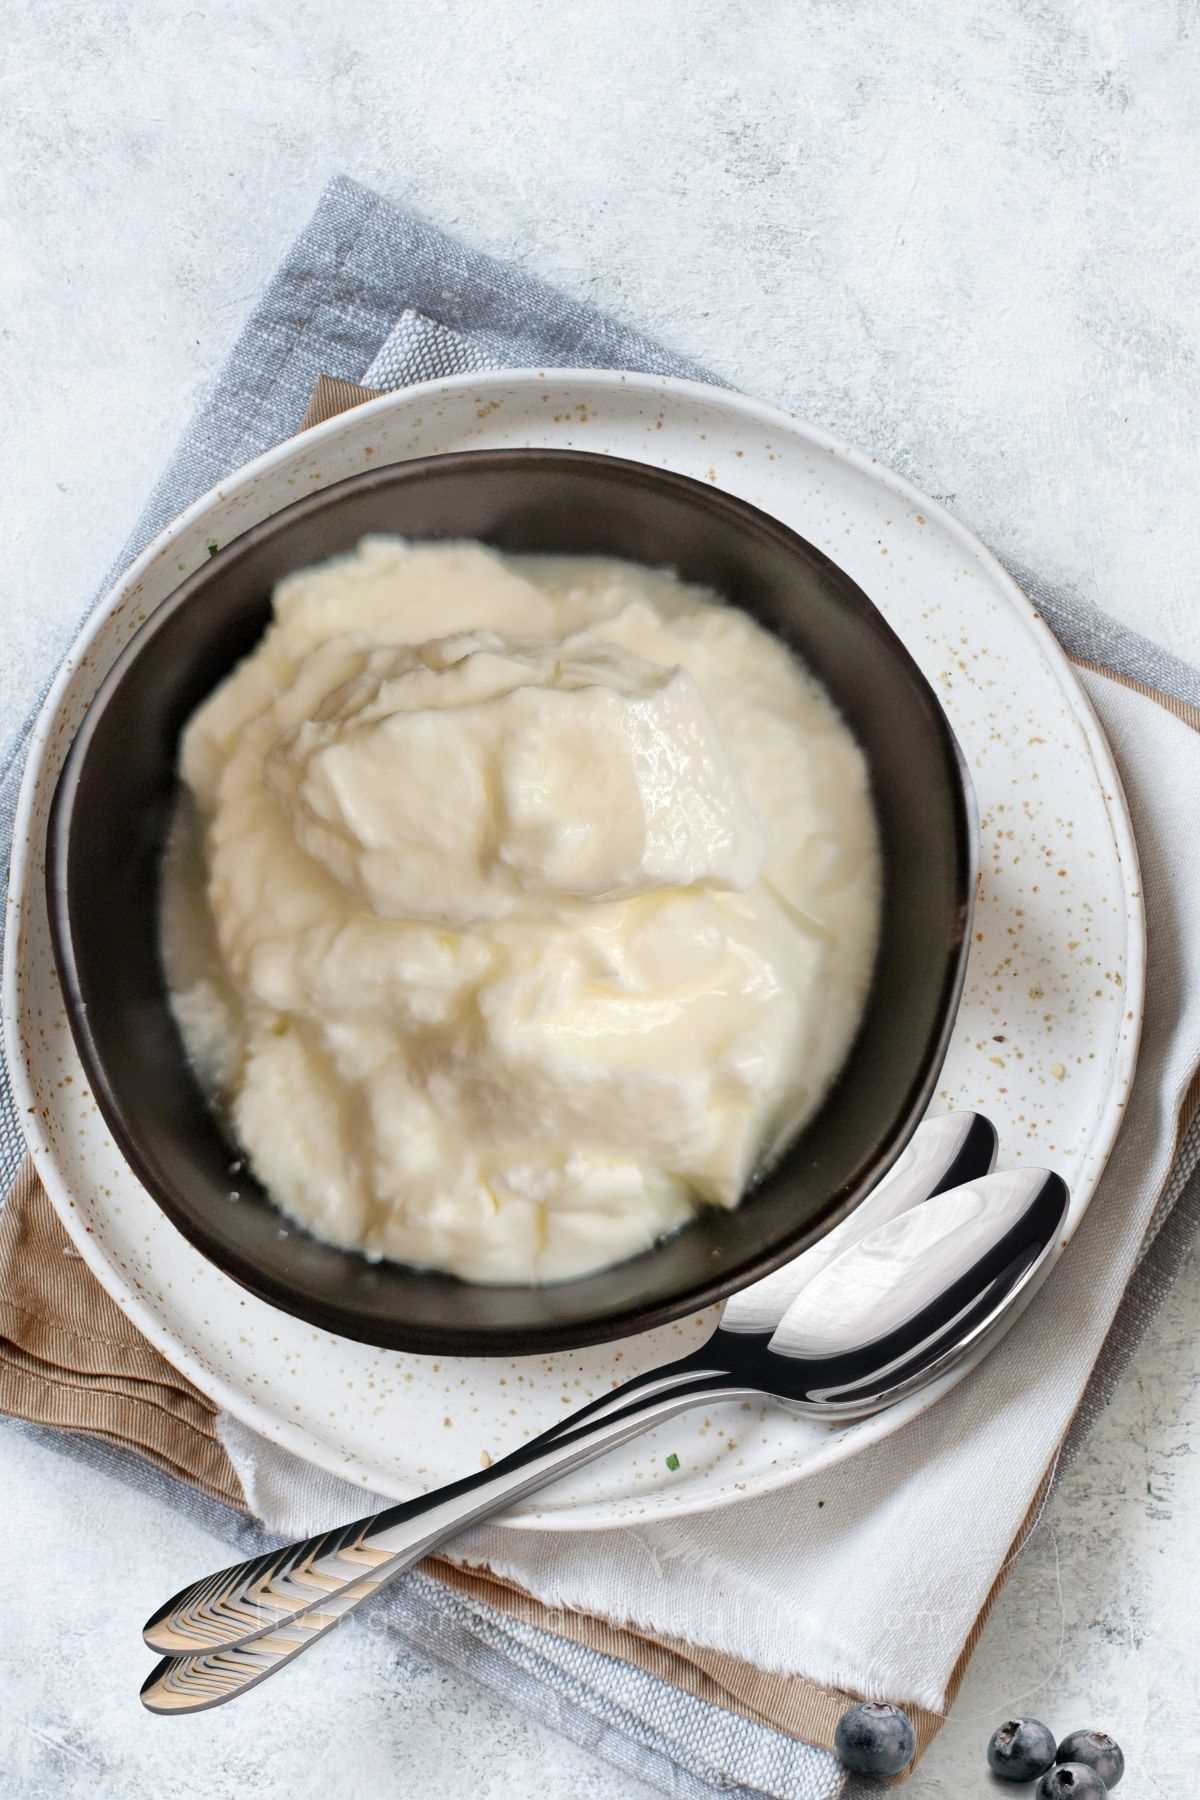
After the desired incubation period, the yogurt is refrigerated to halt the fermentation process and allow it to set further. The longer the incubation, the thicker and tangier the yogurt will become.
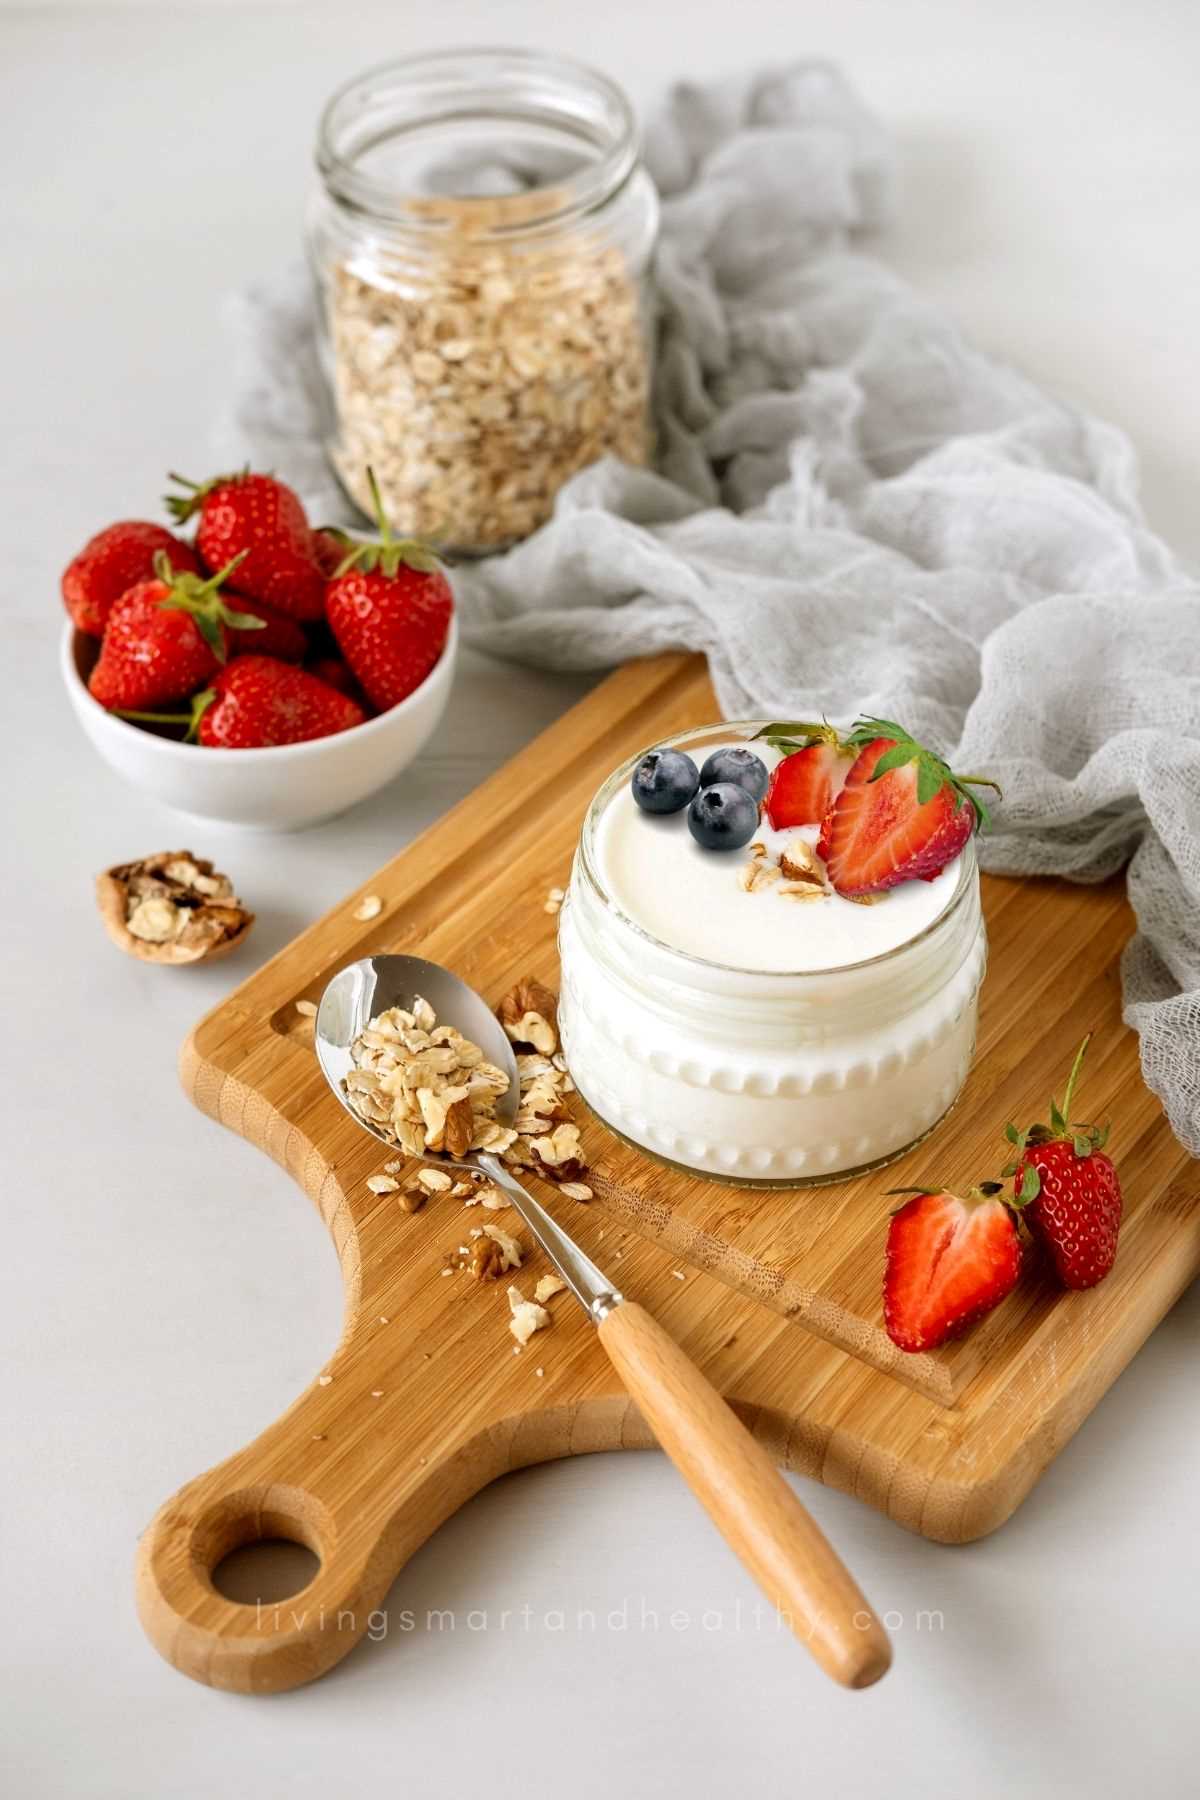
Homemade yogurt can be enjoyed as a healthy and nutritious snack, or breakfast, or used in cooking and baking as a substitute for sour cream or other dairy products. Homemade yogurt can be customized in terms of flavorings, sweeteners, and thickness based on personal preferences.
Why You'll Love This Recipe Yogurt
control over the quality of ingredients
cost-effective compared to store-bought
customize to suit your preferences
contribute to gut health and digestion
minus the additives and stabilizers often found in store-bought yogurt
Ingredients For Homemade Yogurt
Milk (whole milk works best, but you can use low-fat milk (2%))
Yogurt starter culture (store-bought plain yogurt with live active cultures, or yogurt starter from previous batch)
Optional: Sweeteners, flavorings, or additives like vanilla extract or honey
How To Make Yogurt At Home
Making homemade yogurt is a relatively simple process that involves fermenting milk with yogurt cultures. Here's a basic guide to making yogurt at home:
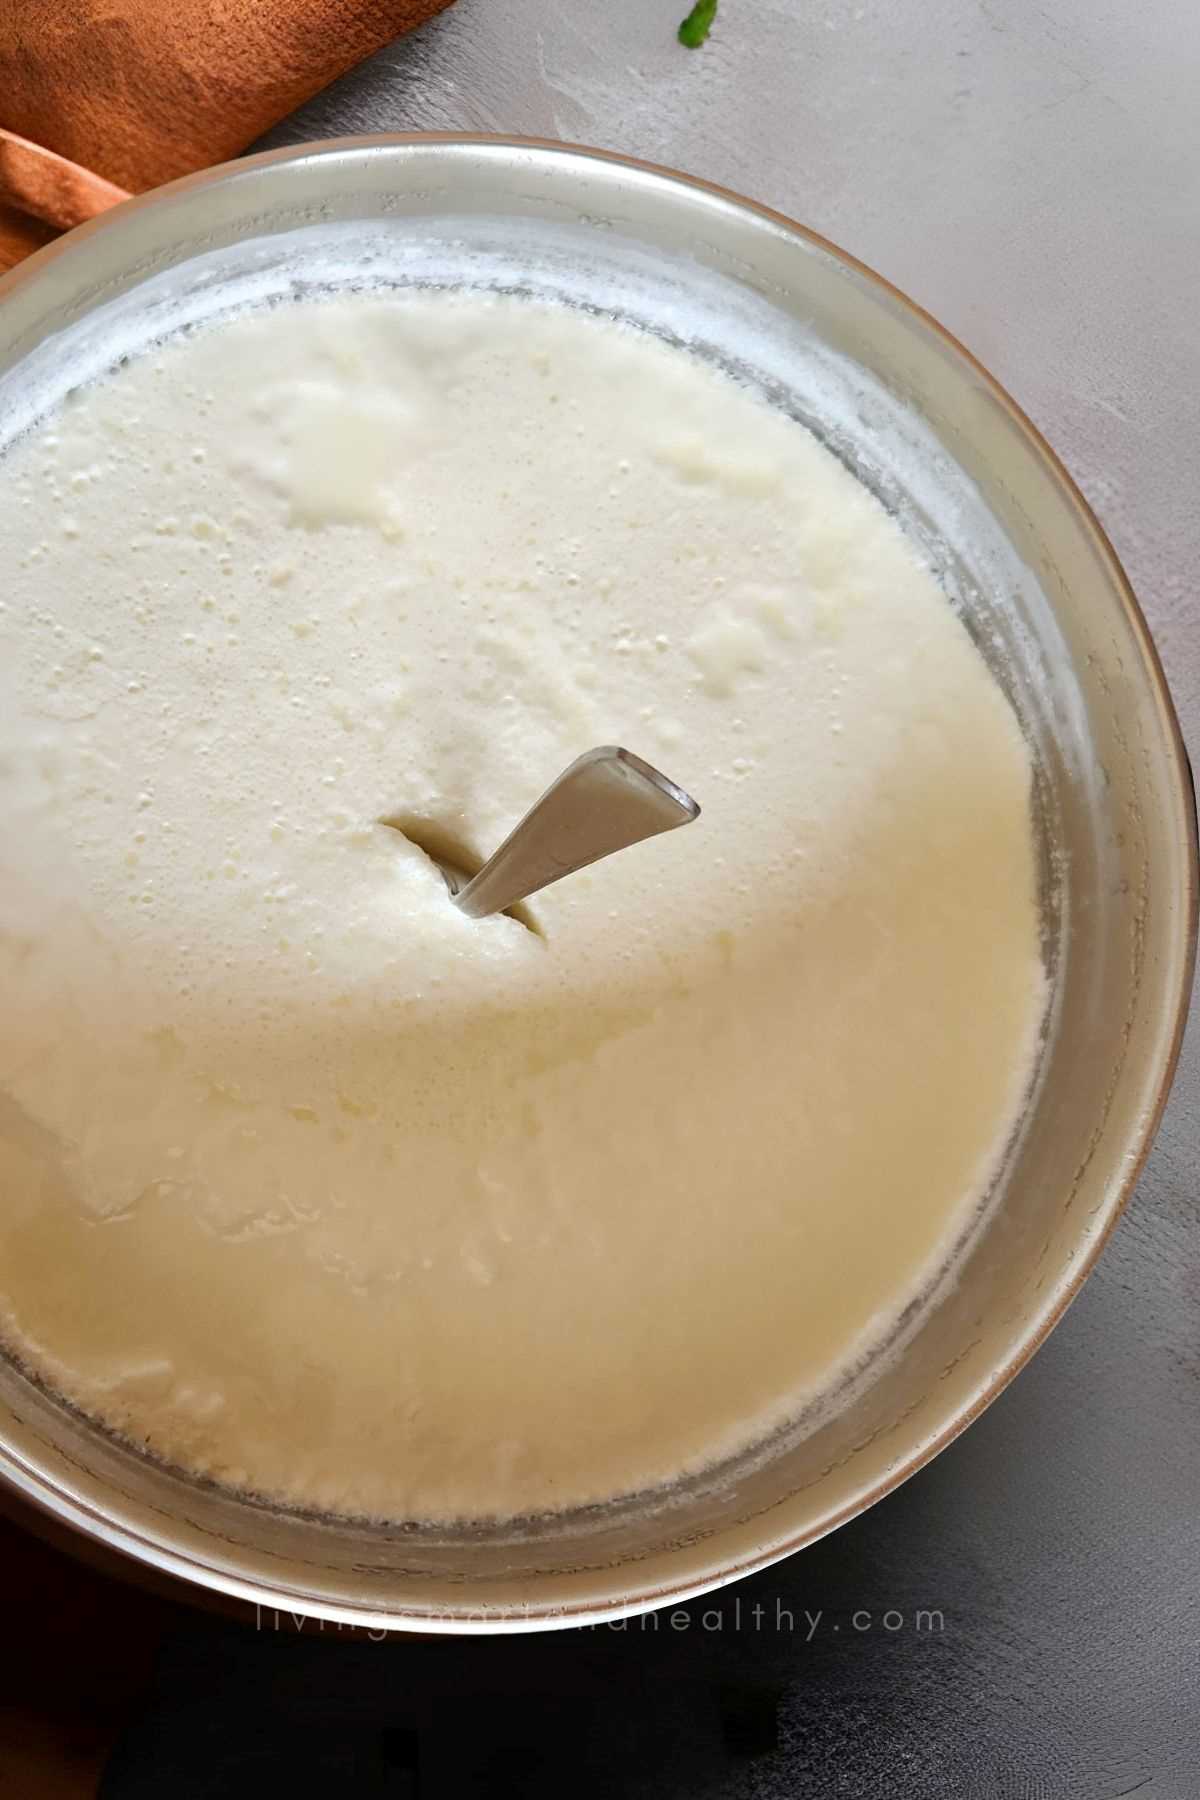
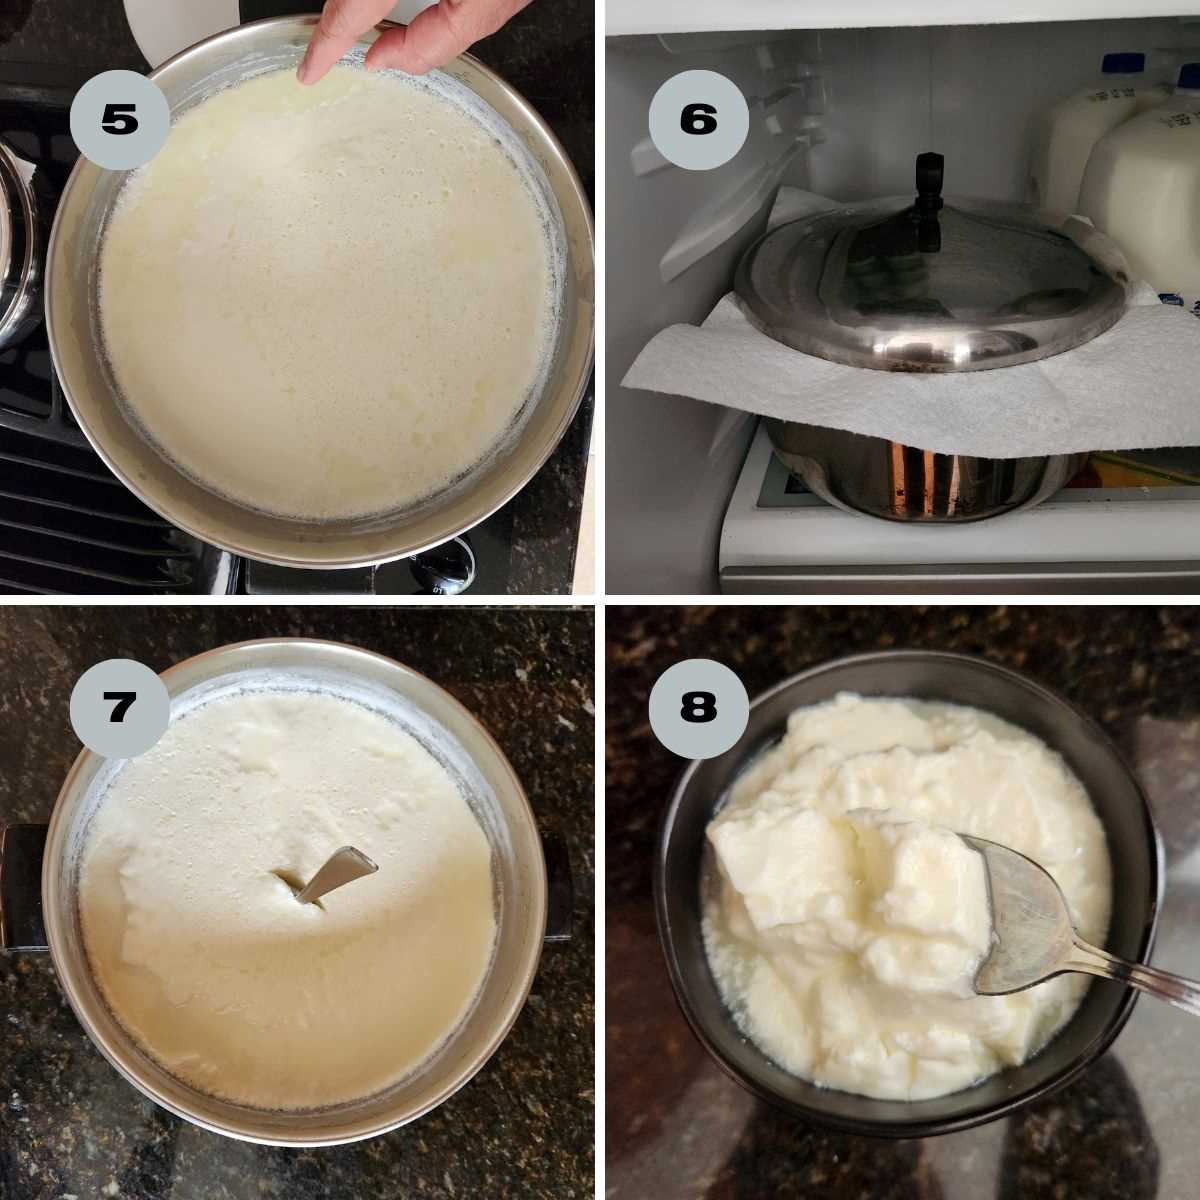
Heat The Milk: Pour the desired amount of milk into a cooking pot. The more milk you use, the more yogurt you'll end up with.
Heat the milk over medium heat, stirring frequently to prevent scorching. Use a thermometer to monitor the milk's temperature.
Heat the milk to around 180°F (82°C) and then remove it from heat.
Cool The Milk: Allow the milk to cool to around 110°F (43°C).
To test the temperature of milk using your finger, gently dip the tip of your finger into the milk and touch it briefly. If the milk feels lukewarm or slightly warm, it's likely around 110°F (43°C), suitable for adding a yogurt starter; if it feels uncomfortably hot or scalding, it's too hot and needs to cool down.
Add The Starter Culture: In a separate bowl, mix a small amount of the cooled milk with the yogurt starter culture until it's well combined.
Pour the starter mixture back into the pot of cooled milk. Gently whisk to evenly distribute the starter culture.
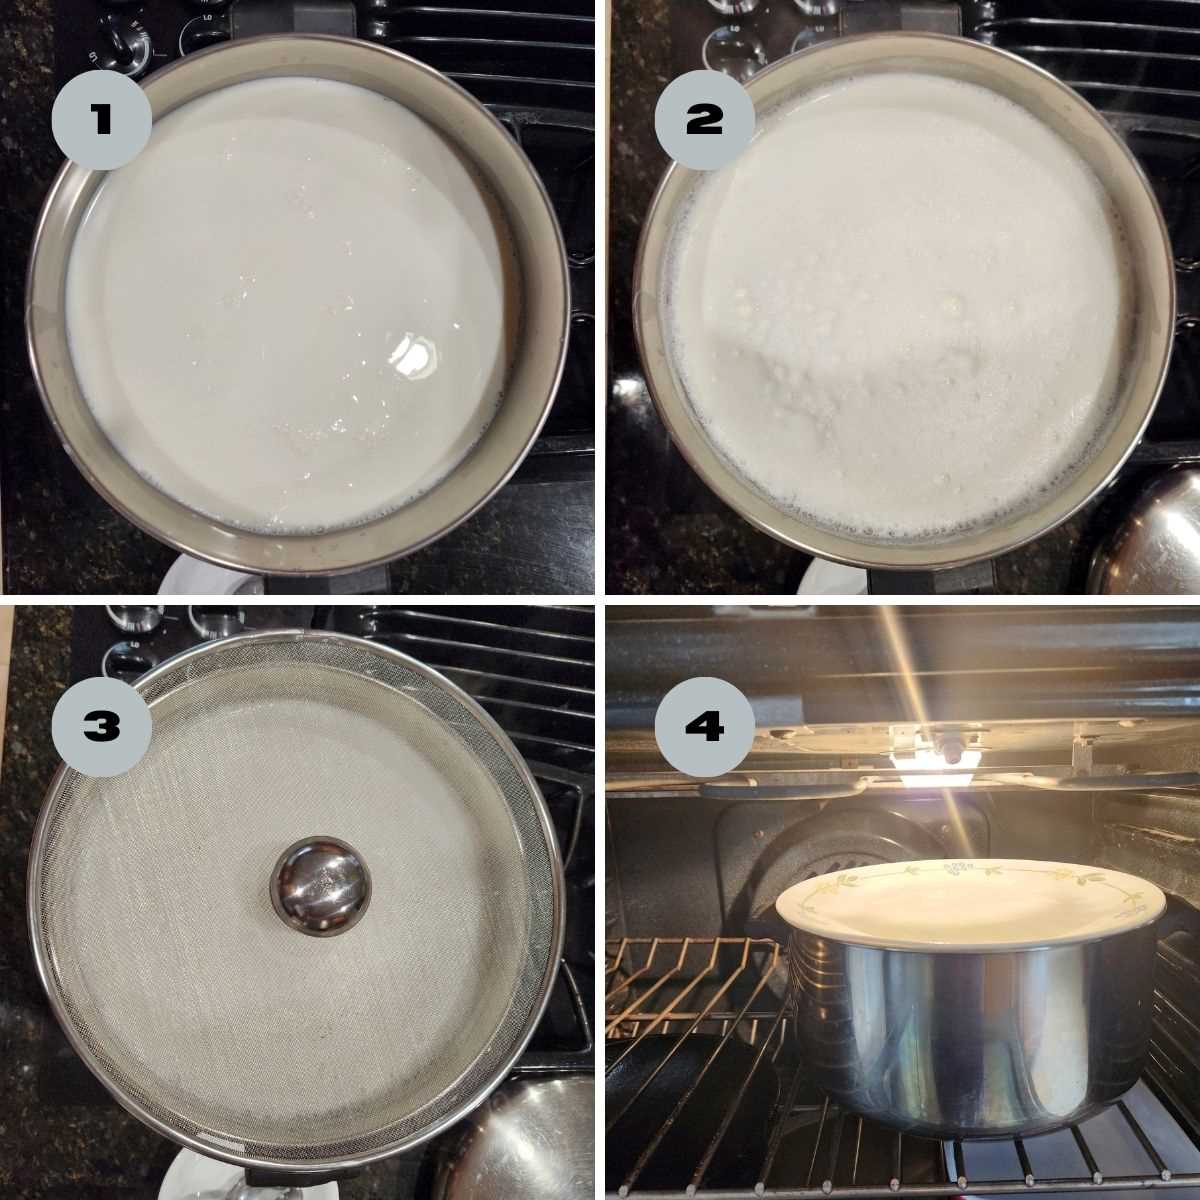
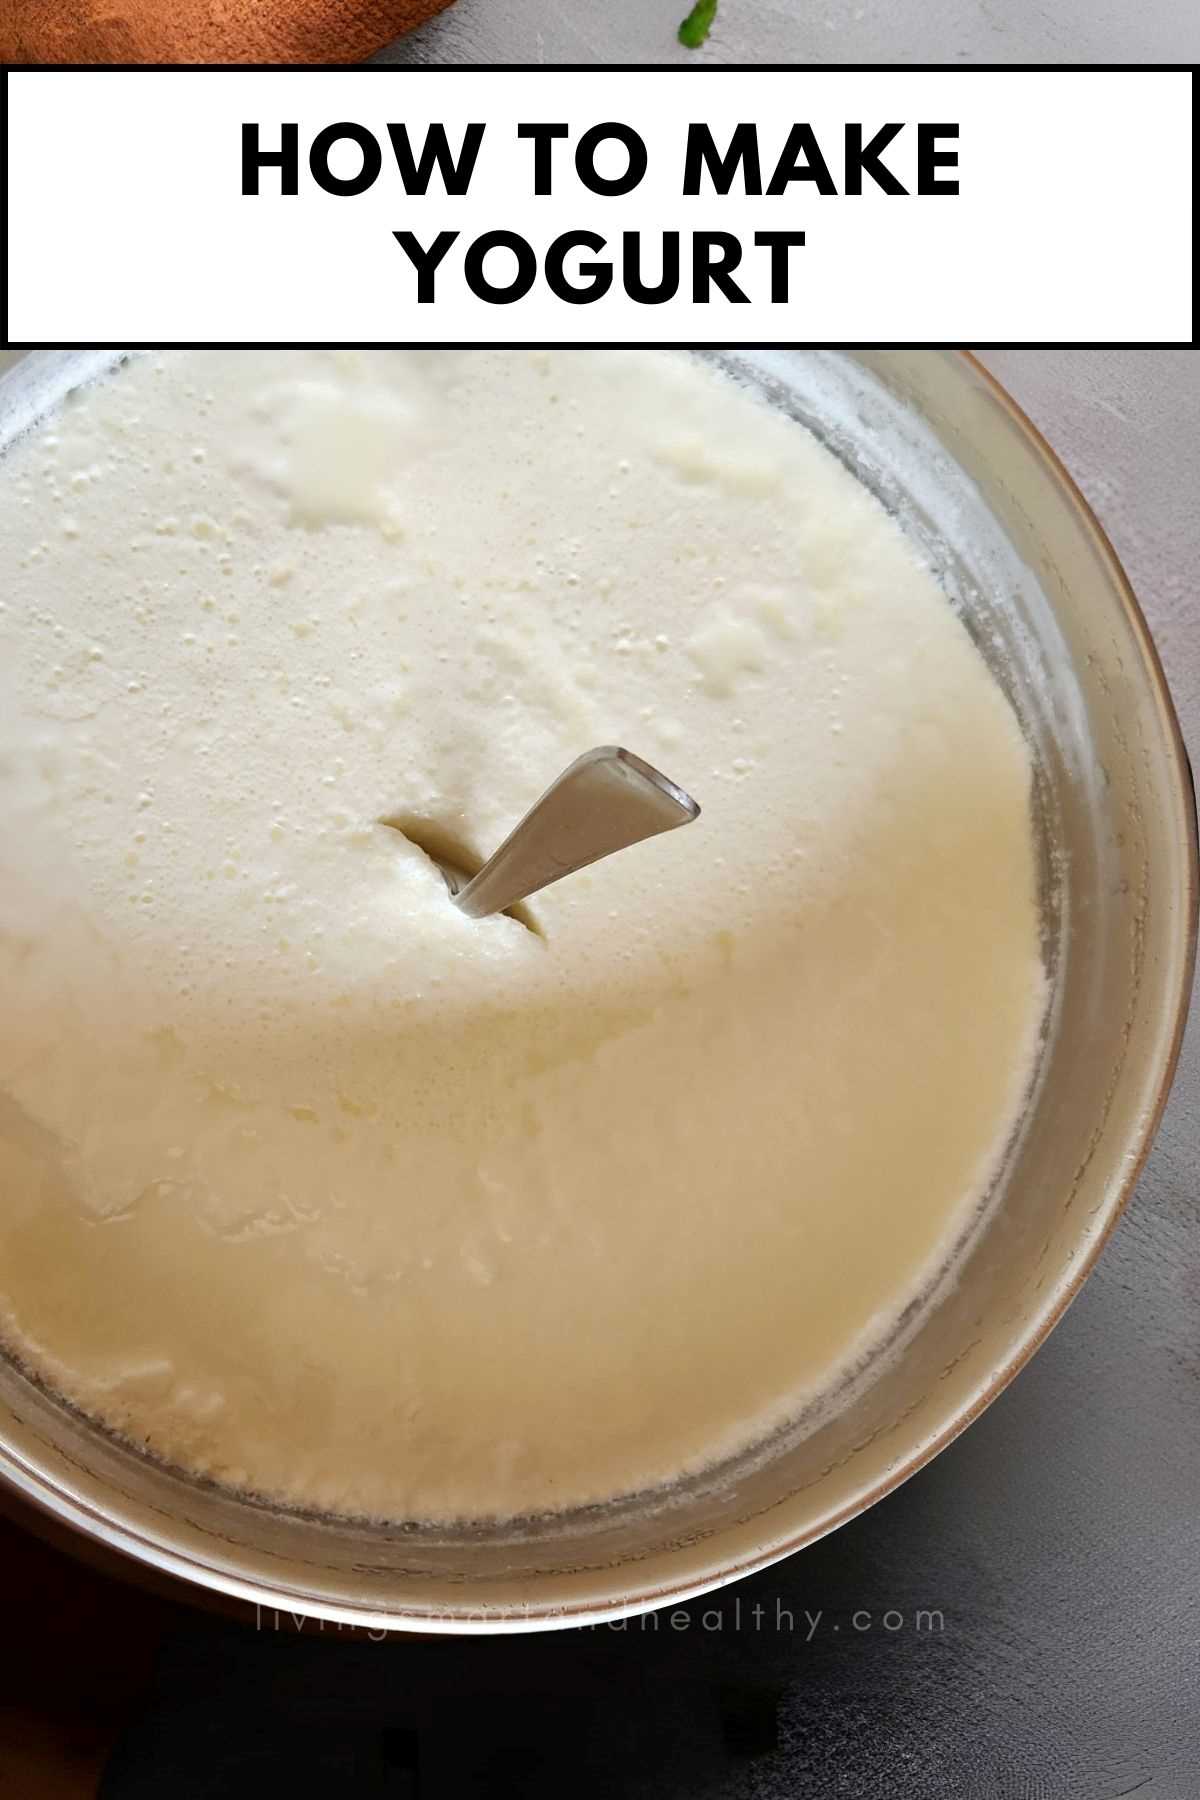
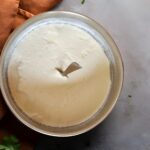
Incubation: Pour the milk mixture into a clean container with a lid. You can use individual jars or a larger container. Cover the container with a lid.
To maintain a consistent warm temperature for the fermentation process, place the container in a warm spot. You can use an oven with the light on, a yogurt maker, or an Instant Pot.
Fermentation: Let the yogurt incubate for about 4 to 8 hours. The longer it ferments, the tangier and thicker it will become. Check the yogurt after 4 hours to see if it has reached your desired taste and consistency.
Check and Store: After the incubation period, check the yogurt's consistency and taste. It should be thicker and have a tangy flavor.
Once you're satisfied with the yogurt, refrigerate it to stop the fermentation process. It will continue to thicken as it cools.
Enjoy Your Homemade Yogurt: Your homemade yogurt is now ready to be enjoyed as is, or you can add sweeteners, fruits, or flavorings to customize it according to your preferences.
Remember that the quality of your homemade yogurt will depend on factors like the quality of the milk and the temperature during fermentation. Once you've successfully made your first batch, you can use some of it as a starter for your next batch.
Flavoring Homemade Yogurt
Flavoring homemade yogurt is a creative way to enhance its taste. Here are several ways to add delicious flavors to your homemade yogurt:
Fruit: Add fresh or frozen fruits like berries, sliced bananas, peaches, or mangoes to your yogurt. You can either blend them into a smooth fruit puree or layer them on top for added texture. I love to make this Mango Shrikhand [Indian Mango Dessert] with homemade yogurt.
Honey or Maple Syrup: Drizzle natural sweeteners like honey or maple syrup over your yogurt for a touch of sweetness and flavor.
Nuts and Seeds: Add crunch and flavor by mixing in chopped nuts (such as almonds, walnuts, or pistachios) or seeds (like chia, flax, or pumpkin seeds).
Spices: Sprinkle in a pinch of spices like cinnamon, nutmeg, cardamom, or vanilla to give your yogurt warm and aromatic undertones.
Granola: Layer your yogurt with granola for added texture and a combination of flavors. Homemade or store-bought granola can bring in elements of oats, nuts, and dried fruits.
Chocolate: Incorporate cocoa powder or melted dark chocolate for a decadent chocolate-flavored yogurt. You can also add chocolate chips or cacao nibs for extra texture.
Extracts: Use natural extracts like almond, coconut, or mint to infuse your yogurt with unique and refreshing flavors.
Dried Fruits: Mix in chopped dried fruits such as raisins, cranberries, or apricots to provide bursts of sweetness and chewiness.
Storage
Proper storage of homemade yogurt is essential to maintain its freshness, flavor, and quality. Here's how to store homemade yogurt:
Airtight Containers: Use airtight containers to store your yogurt. Glass or plastic containers with secure lids work well.
Refrigeration: Once your homemade yogurt has reached your desired level of tanginess and thickness during incubation, transfer it to a clean container with a lid.
Seal the container tightly and place it in the refrigerator immediately. Refrigeration slows down the fermentation process and helps the yogurt set further.
Use within a Reasonable Time: Homemade yogurt doesn't have the preservatives and stabilizers that commercial yogurts often contain, so it's best to consume it within a reasonable time frame to ensure the best quality.
Typically, homemade yogurt can be stored in the refrigerator for about 1 to 2 weeks.
Starter Culture: If you plan to make another batch of yogurt, save a small amount of your homemade yogurt to use as a starter for your next batch. This helps maintain the bacterial cultures and ensures consistency in your yogurt-making process.
Whey Separation: It's normal for some whey (the liquid portion of yogurt) to separate from the yogurt over time. You can either drain off the whey or gently stir it back into the yogurt before consuming.
Tips For How To Make Homemade Yogurt
Here are some tips to help you successfully make homemade yogurt:
Choose Fresh Ingredients: Use fresh, high-quality milk for the best results. Whole milk usually yields creamier yogurt, but you can use low-fat milk(2%) if you prefer.
Use a Starter Culture: Choose a high-quality plain yogurt with live active cultures as your starter. Look for yogurt that mentions containing "live and active cultures" on the label.
Maintain Cleanliness: Ensure all utensils, containers, and surfaces are clean and sanitized to prevent the growth of unwanted bacteria during the fermentation process.
Monitor Temperatures: Use a kitchen thermometer to accurately monitor the temperatures of the milk during heating and cooling, as well as the incubation temperature. Consistent temperatures are crucial for proper yogurt formation.
Heat Gradually and Stir: When heating the milk, do so gradually over medium heat while stirring constantly to prevent scorching at the bottom of the pot.
Cool the Milk: Allow the milk to cool gradually after heating.
Use a Warm Incubation Spot: Find a warm, draft-free spot to incubate your yogurt. If you're using an oven with a light on, ensure the light generates enough warmth without overheating the yogurt.
Incubation Time: The incubation time can vary depending on your desired thickness and tanginess. Generally, a shorter incubation (around 4-6 hours) results in milder yogurt, while a longer incubation (8-12 hours) yields tangier yogurt. Experiment to find your preferred taste.
Use a Yogurt Maker or Instant Pot: If you're having trouble maintaining a consistent incubation temperature, consider using a yogurt maker or an Instant Pot designed for this purpose.
Stir Gently: Once the incubation is complete, avoid stirring the yogurt too vigorously, as this can break down its structure.
Save Starter for Next Batch: Save a small amount of your homemade yogurt to use as a starter for your next batch. This helps maintain the bacterial culture's integrity.
Refrigerate Before Consuming: After incubation, refrigerate the yogurt to stop the fermentation process and allow it to set fully before consuming.
Experiment with Add-Ins: After the yogurt is made, you can add sweeteners, fruit, flavorings, or other additives to customize the taste and texture.
FAQ's
To make yogurt at home, bring milk to a boil, cool it to 110°F (43°C), mix in a starter culture of plain yogurt, then incubate the mixture at a consistent warm temperature, such as using an oven light, for 4 to 8 hours. Finally, refrigerate the yogurt until it sets before enjoying.
The main ingredient for a yogurt starter is plain yogurt with live active cultures, typically purchased from a store.
The best starter for homemade yogurt is plain store-bought yogurt that contains live active cultures and lists "live and active cultures" on its label. You can also use a small amount of your previously made homemade yogurt as a starter for subsequent batches.
Whole milk is often considered the best milk for making yogurt due to its higher fat content, which contributes to a creamier and thicker texture. However, you can also use low-fat or skim milk if you prefer a lighter yogurt, adjusting the incubation time for the desired thickness.
Recipes Using Homemade Yogurt


How To Make Yogurt
Ingredients
- 1 gallon Milk whole milk works best, but you can use low-fat milk (2%)
- 2 tablespoon Yogurt starter culture store-bought plain yogurt with live active cultures, or yogurt starter from previous batch
- Optional: Sweeteners flavorings, or additives like vanilla extract or honey
Instructions
- Heat the milk in a cooking pot over medium heat until it comes to a boil. Stir frequently to prevent scorching.
- Remove the pot from the heat and let the milk cool to around 110°F (43°C).
- To test the temperature of milk using your finger, gently dip the tip of your finger into the milk and touch it briefly. If the milk feels lukewarm or slightly warm, it's likely around 110°F (43°C), suitable for adding a yogurt starter; if it feels uncomfortably hot or scalding, it's too hot and needs to cool down.
- In a small bowl, mix ¼ cup of the cooled milk with the 2 tablespoons of yogurt starter to create a smooth mixture.
- Gently whisk the starter mixture back into the pot of cooled milk to evenly distribute the cultures.
- To maintain a consistent warm temperature for the fermentation process, place the container in a warm spot, or an oven.
- Place the pot containing the milk and starter mixture in the oven.
- Turn on the oven light. The heat generated by the light should create a warm environment ideal for yogurt incubation.
- Cover the pot with a lid to prevent moisture loss and maintain a consistent temperature.
- Let the yogurt incubate for about 4 to 8 hours, depending on your desired thickness and tanginess. The longer the incubation, the tangier the yogurt will become.
- After the desired incubation period, check the yogurt's consistency and taste. It should be thicker and tangy.
- Place a paper towel and then cover the pot with the lid. Refrigerate the yogurt preferably overnight to stop the fermentation process and allow it to set further.Note: Paper towel helps absorb extra moisture from the yogurt. Thus, making the yogurt thicker.
- Enjoy Homemade Yogurt!
Notes
- Tips For Fail-proof Yogurt Recipe
- FAQ's


Leave a Reply
You must be logged in to post a comment.