
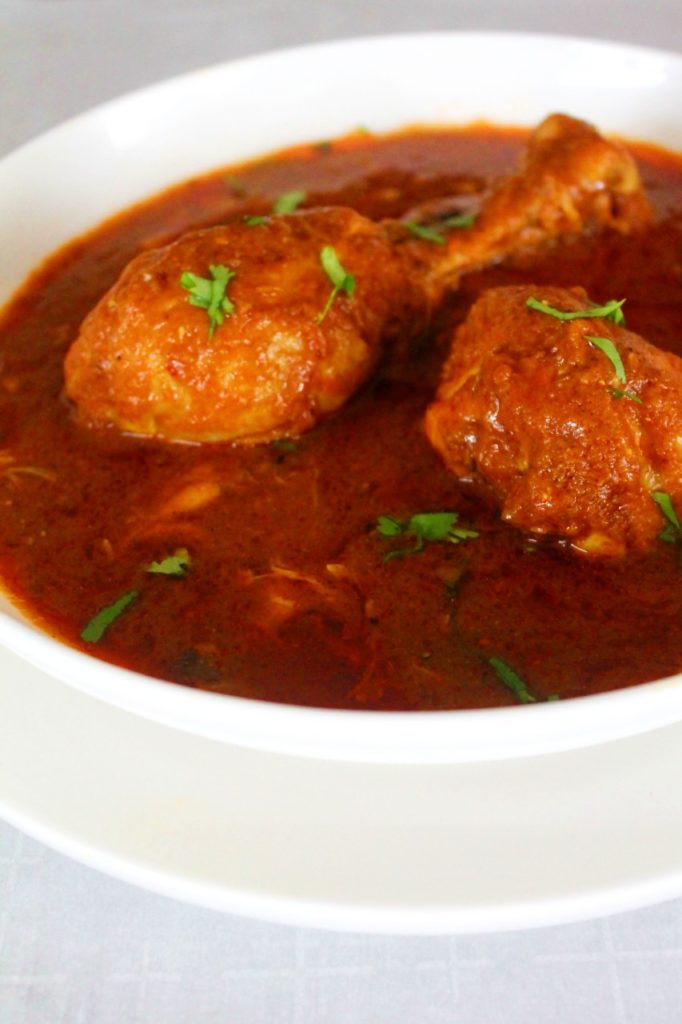
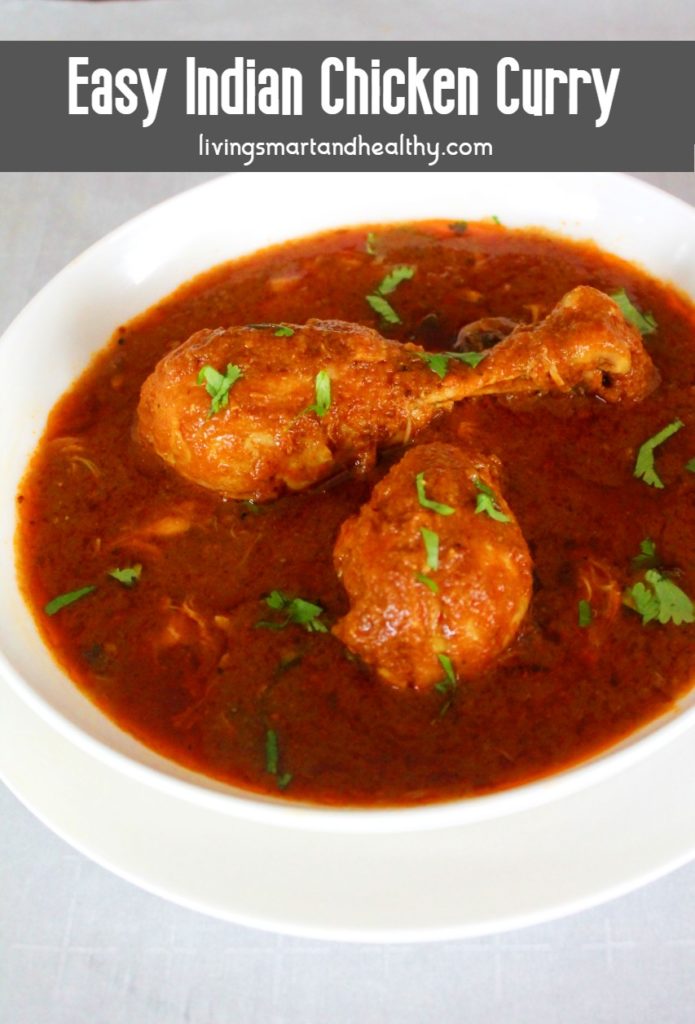
This Instant Pot Indian chicken curry is the recipe I grew up eating - warm, deeply spiced, and built on a technique my mother never skipped: the bhuna masala. That's the practice of cooking down the onion-tomato base until the oil separates and the sauce turns brick-red and glossy. It sounds fussy, but it takes less than 10 minutes, and it's the single thing that separates a flat weeknight curry from something that tastes genuinely homemade.
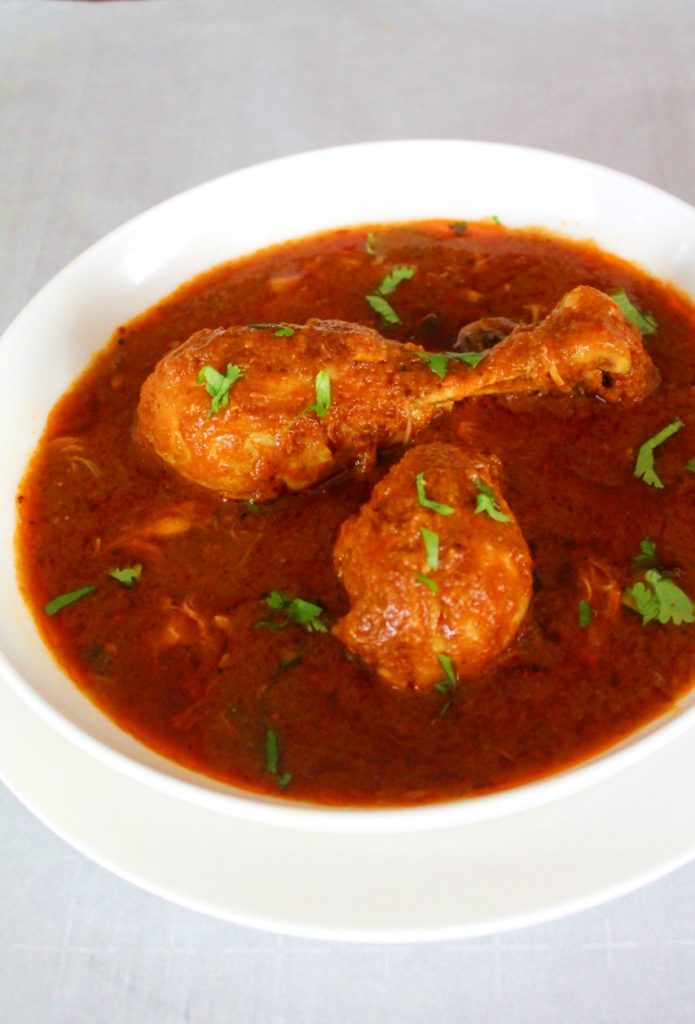
The Instant Pot makes the whole process even faster. A quick sauté to build the masala, then pressure cook on high for just 10 minutes, and you end up with fall-off-the-bone tender chicken in a rich, fragrant sauce. No marinating required, no standing at the stove stirring, just layered flavor with minimal effort. The stovetop and conventional pressure cooker methods are included too, so you can use whatever you have.
This is a North Indian-style chicken curry made with bone-in drumsticks, a classic onion-tomato gravy, and dry whole spices. It's naturally gluten-free, dairy-free, and easy to scale. Whether you're new to Indian cooking or just looking for a reliable weeknight curry that delivers every time, this is that recipe.
You may also like: Homestyle Chicken Curry, Achari Chicken, Coconut Chicken Curry, Methi Chicken
Jump to:
Why You’ll Love This Recipe
- Ready in 30 minutes - from prepping onions to serving, including pressure cook time
- One pot, minimal cleanup - sauté and pressure cook in the same Instant Pot insert
- Three cooking methods - Instant Pot, stovetop, and conventional pressure cooker all covered
- Authentic bhuna masala technique - the oil-separation method that gives Indian curries real depth
- Naturally gluten-free and dairy-free - no cream, no curry powder shortcuts
- Flexible - works with bone-in drumsticks, thighs, or boneless chicken (see notes for timing)
- Better the next day - freezes well and meal preps beautifully
This recipe is ideal for busy weeknights, meal prep, or whenever you're craving a cozy Indian meal without spending hours in the kitchen.
Key Ingredients Explained
Bone-in vs. boneless chicken
Bone-in chicken (drumsticks, thighs, or a mix) gives the curry far better flavor - the bones release collagen as they cook, which thickens the sauce naturally and adds body. That said, boneless chicken thighs work well and are more convenient. If using boneless thighs cut into large pieces, reduce the Instant Pot cook time to 8 minutes with a natural pressure release. Boneless breasts tend to dry out, if using them, cut into large chunks and reduce to 6 minutes.
The bhuna masala technique
Bhuna masala means cooking the sauce - onions, tomatoes, and spices, until the oil visibly separates and pools on the sides and surface of the mixture. This happens because the water in the tomatoes has fully evaporated and the starch has broken down. At that point, the spices are fully bloomed, the raw onion smell is gone, and the base has caramelized into a deep red paste. Don’t skip this step - it’s what makes this taste like restaurant-quality Indian food.
Dried mango powder (amchur)
Amchur is made from dried unripe mango and adds a fruity, tangy note without any liquid. It's common in North Indian curries and gives this dish a subtle brightness that lemon juice doesn't quite replicate (though lemon works fine as a substitute). Find it at any Indian grocery store or online.
Garam masala
Garam masala is always added at the end - not at the beginning with the other spices. It's a finishing spice blend with fragrant, warm notes (cinnamon, cloves, cardamom, black pepper). Adding it early causes the delicate aromatics to burn off. Stir it in right after pressure cooking, during the final simmer.
Step-by-Step Instructions
Step 1: Blend the aromatics
- In a small blender, combine the onion and garlic with 2 tablespoons of water. Blend to a smooth paste. Set aside.
- In the same blender, blend the tomatoes, green chilies, and ginger with 2 tablespoons of water into a smooth puree. Set aside.
- Remove the skin from the chicken drumsticks. Pat them dry with a paper towel.
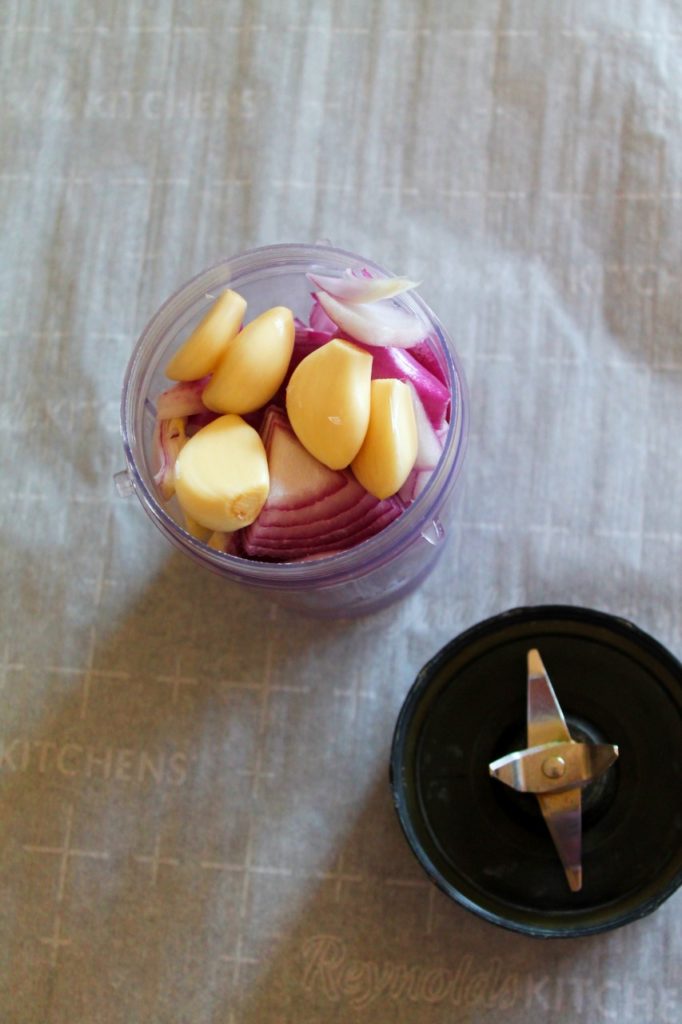
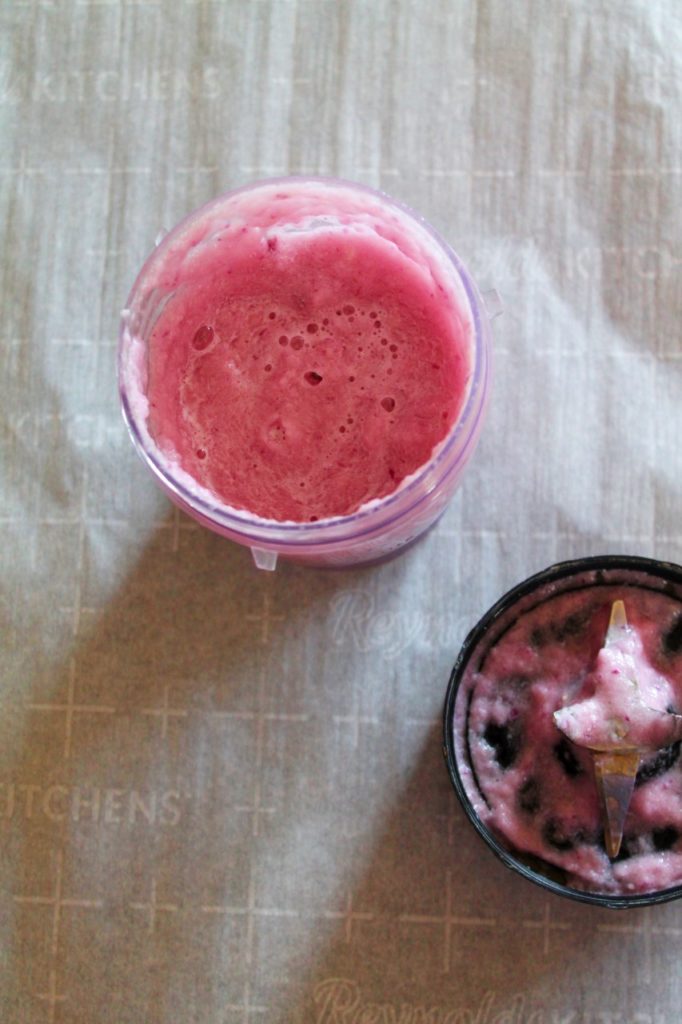
Pro Tip: Using a paste rather than chopped aromatics creates a silkier, more restaurant-style sauce. Just make sure to cook the paste thoroughly, it needs more stirring than chopped onions since it sticks easily.
Step 2: Sauté the aromatics (Instant Pot)
- Set the Instant Pot to Sauté (High). When the display reads HOT, add the oil.
- Add the cumin seeds and bay leaf. Sauté for 15-20 seconds, stirring constantly, until the seeds sizzle and turn golden (not brown).
- Add the onion-garlic paste. Cook for 3-5 minutes, stirring frequently, until most of the moisture has evaporated and the paste turns a pale golden color.
Step 3: Build the bhuna masala
- Add the tomato-ginger-green chili puree to the pot.
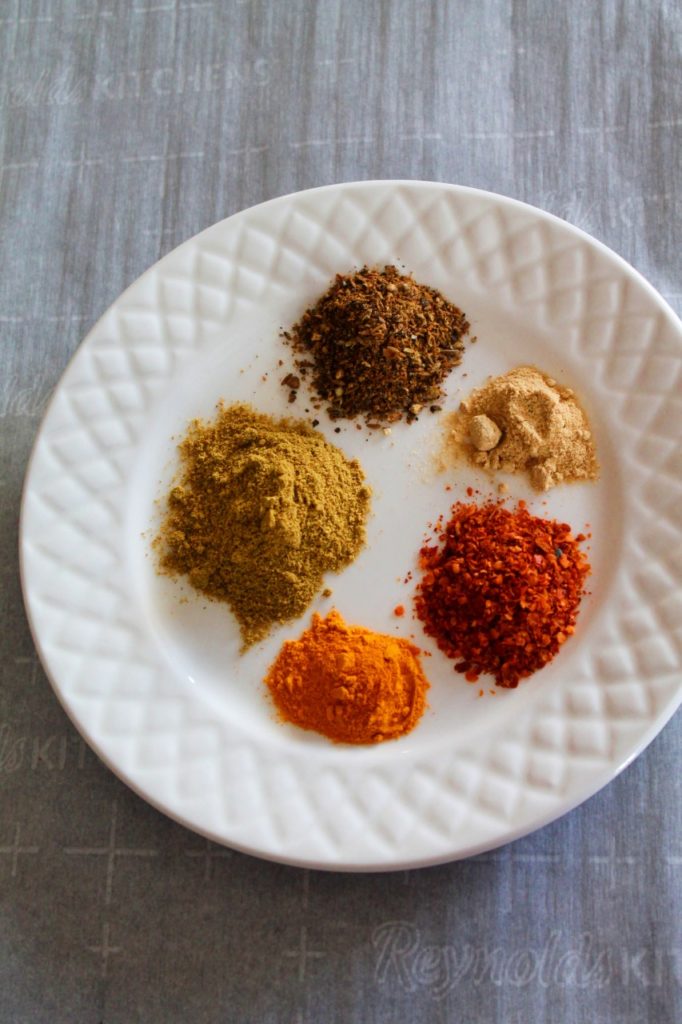
- Add coriander powder, red chili powder, turmeric, dried mango powder (or skip for now if using lemon), and salt.
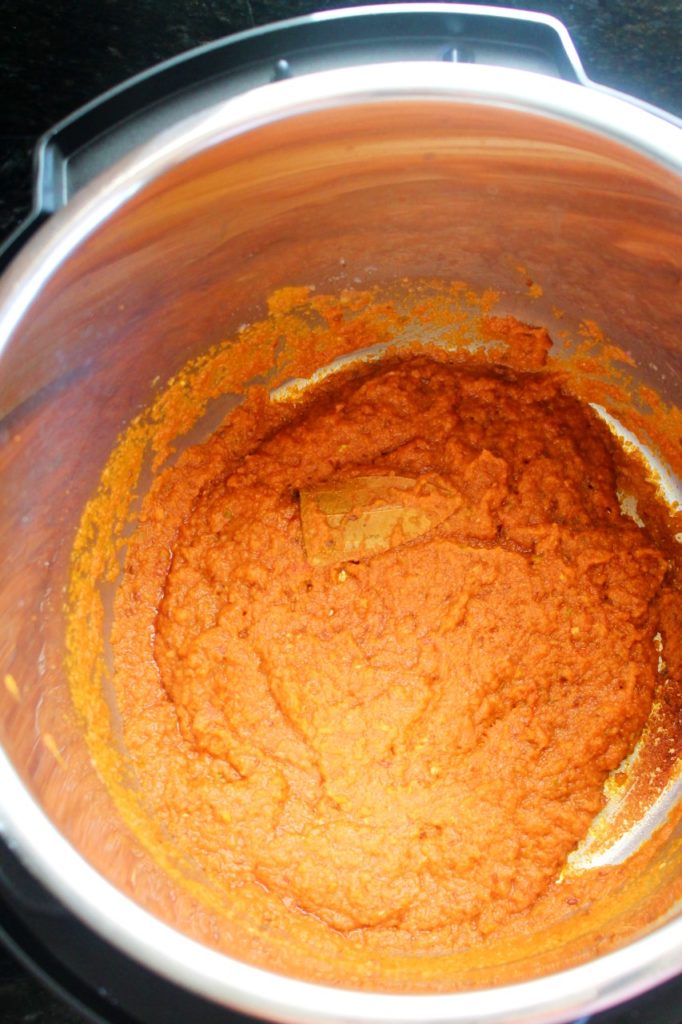
- Cook for 5-7 minutes, stirring frequently and scraping the bottom of the pot. The masala is ready when the oil separates and floats to the sides - the sauce will look glossy and thick, and the color will deepen to a rich brick-red. This is the bhuna stage.
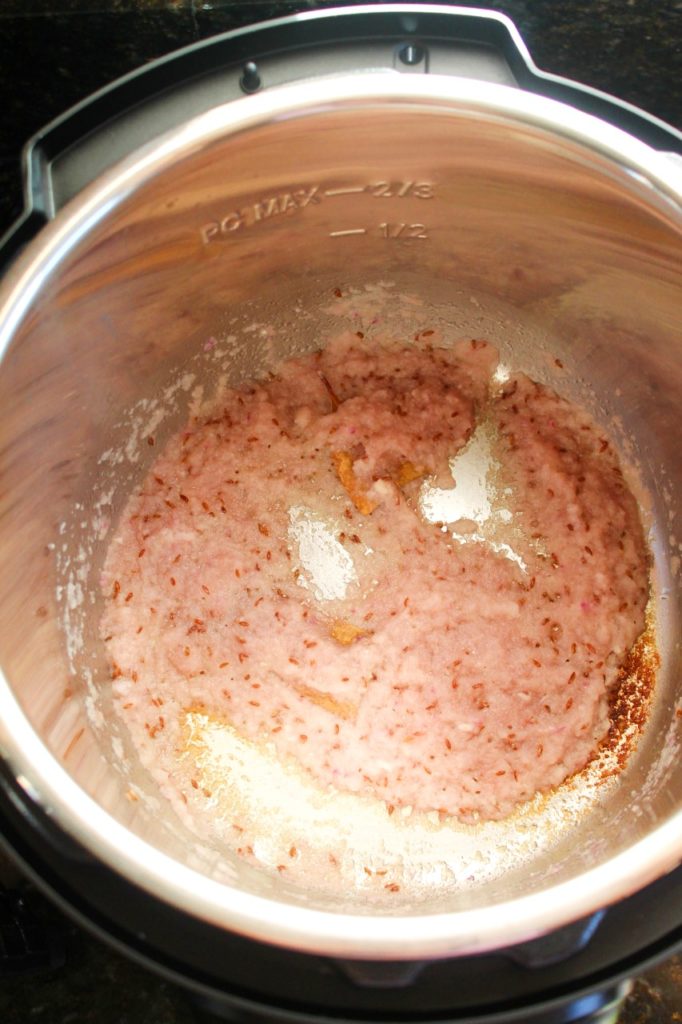
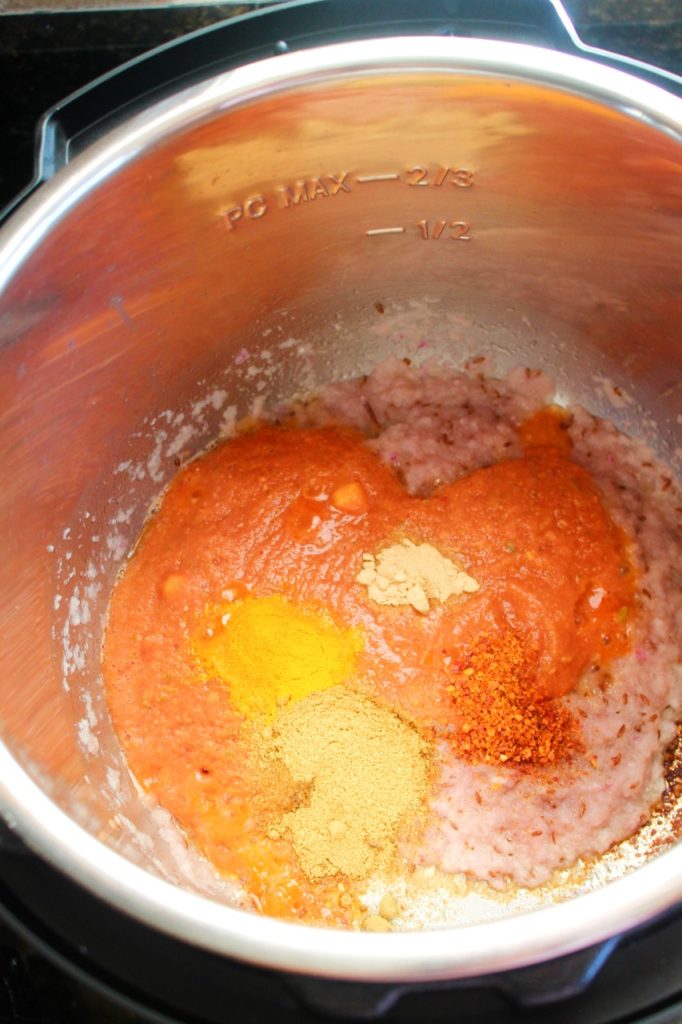
Don't rush this step. If the masala is sticking, add a tablespoon of water and keep cooking. The flavors are building here - this is the foundation of the entire curry.
Step 4: Add the chicken
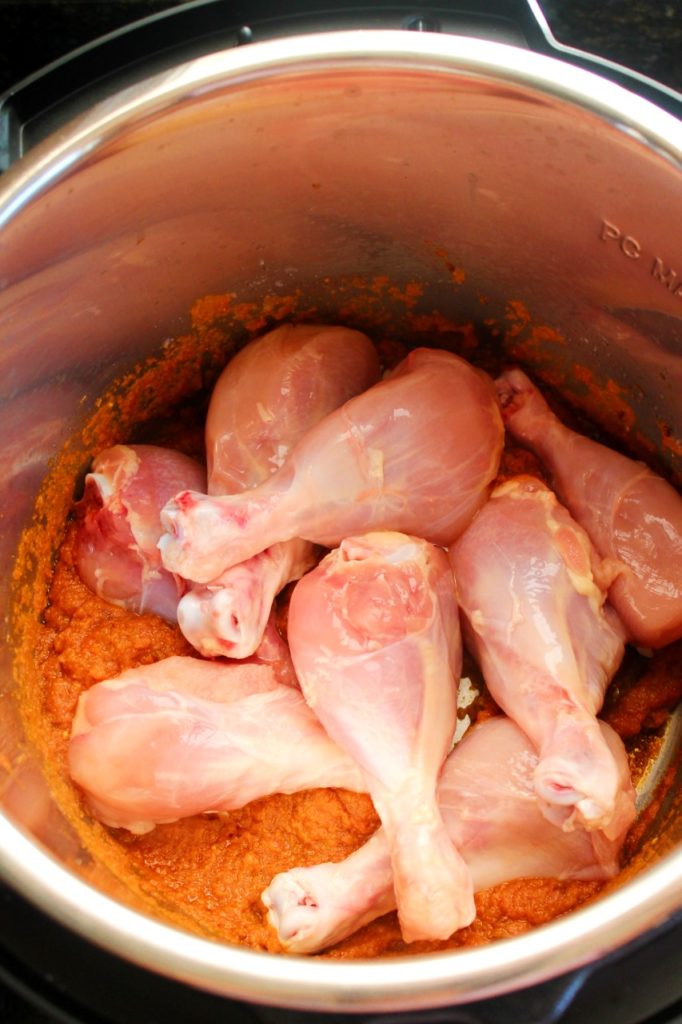
- Add the chicken drumsticks to the pot. Toss to coat them in the masala. Sauté for 1-2 minutes so the chicken picks up color.
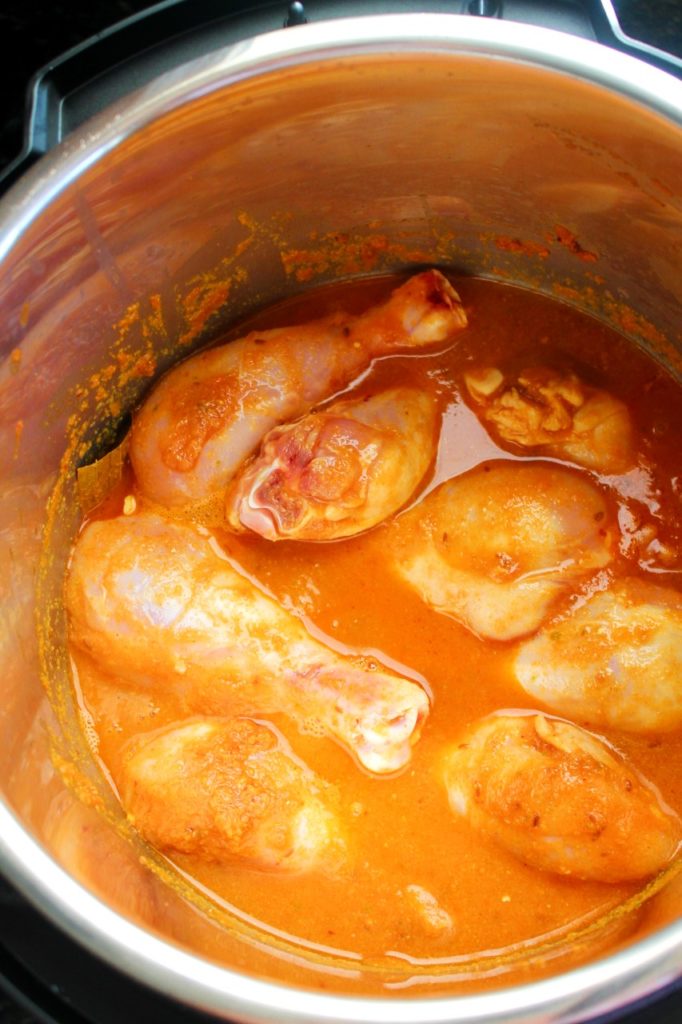
- Add ½ cup of water - just enough to loosen the masala and cover the bottom of the pot. Use a wooden spoon to scrape any browned bits off the bottom (this prevents the BURN warning).
Step 5: Pressure cook
- Cancel Sauté mode. Seal the lid and set the pressure release valve to Sealing.
- Select Pressure Cook / Manual on High for 10 minutes.
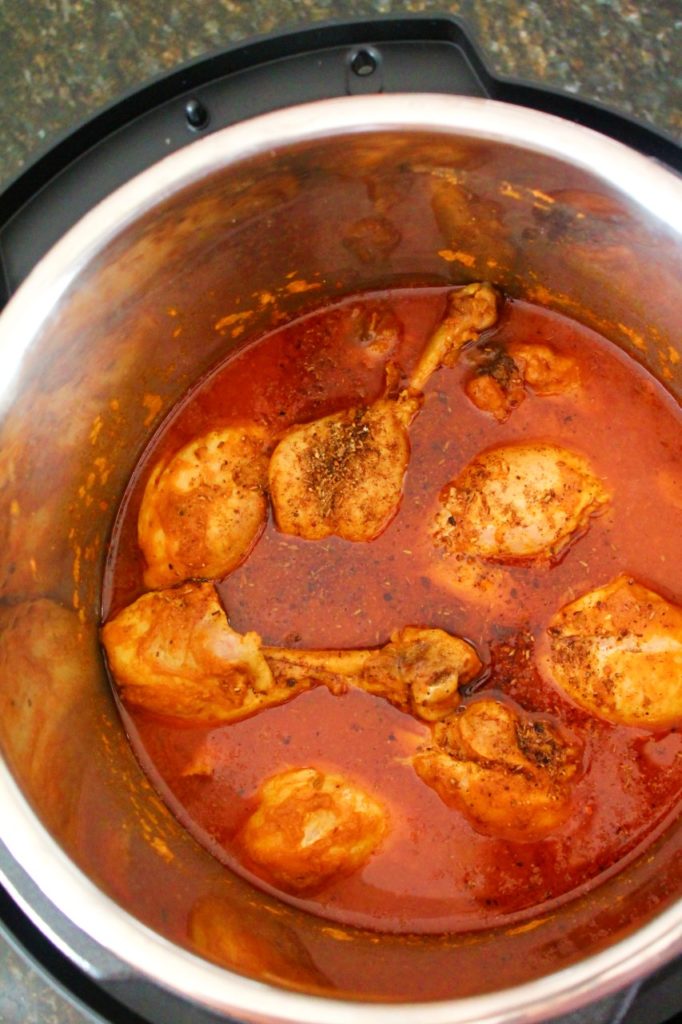
- When the cycle ends, allow a full natural pressure release (about 15 minutes). Do not quick-release, the chicken will tighten up and the sauce will splatter.
Step 6: Finish and serve
- Open the lid carefully. Switch back to Sauté (High).
- Stir in the garam masala and fresh lemon juice (or taste and add amchur now if using). Let the curry simmer for 3-5 minutes to thicken to your preferred consistency.
- Taste and adjust salt. Garnish generously with chopped fresh cilantro. Serve with rice, roti, naan, or paratha.
Note on consistency: The sauce thickens considerably as it cools. If it looks slightly thin in the pot, that's fine - it will thicken by the time it's on the table.
Stovetop Instructions
Follow the same steps for blending aromatics and building the bhuna masala in a heavy-bottomed pot or Dutch oven over medium-high heat.
- After adding the chicken: Cover the pot and simmer over medium-low heat for 20-25 minutes, stirring occasionally. Add water as needed to maintain a saucy consistency. The chicken is done when it's cooked through and tender.
- Conventional pressure cooker: After the bhuna masala stage, add the chicken, stir to coat, and add ½ cup water. Close the lid and cook on high heat until the first whistle. Reduce heat to low and cook for 10 more minutes. Allow the pressure to release naturally before opening.
Pro Tips for Perfect Chicken Curry
- Paste sticks - keep scraping. If using blended onion and tomato paste (recommended), scrape the bottom of the pot frequently during the sauté stage. Paste is denser than chopped aromatics and burns more easily.
- The oil separation is your cue. Don't move on until you see oil pooling on the surface of the masala. This visual cue tells you the water is gone and the spices are fully cooked - no raw flavor, no bitterness.
- Deglaze before pressure cooking. After adding water, scrape any stuck bits from the bottom of the pot. Any fond left on the base is the most common cause of the Instant Pot BURN warning.
- Natural pressure release = more tender chicken. Quick-releasing steam causes proteins to seize. 15 minutes of natural release gives you fall-off-the-bone texture.
- Garam masala goes in last. Always. Adding it during the pressure cook dulls its fragrance.
- Adjust heat level easily. Use fewer green chilies and reduce red chili powder for a milder curry. For more heat, add an extra green chili or a pinch of cayenne at the end.
- Bone-in is worth it. If you have the option, choose bone-in drumsticks or thighs over boneless breasts. The bones enrich the gravy in a way that boneless chicken simply can't replicate.
Variations
Boneless chicken curry
Use boneless chicken thighs cut into large pieces (about 2 inches). Reduce the Instant Pot cook time to 8 minutes with a natural pressure release. The sauce will be slightly thinner since bone-in chicken releases more collagen - simmer a little longer at the end to compensate.
Chicken curry with potatoes
Add 2 medium potatoes, peeled and quartered, along with the chicken in Step 4. No change to cook time. The potatoes absorb the masala beautifully and make this a heartier, more substantial meal.
Creamy coconut chicken curry
Stir in ½ cup full-fat coconut milk after pressure cooking, during the final simmer. This makes the sauce richer and milder, great if you're making it for kids or those who find the spice level too sharp.
Chicken curry without Instant Pot
See the Stovetop Instructions section above. The technique and ingredients are identical - only the cooking vessel changes.
What to Serve With Indian Chicken Curry
This curry is a one-pot main — it pairs with almost anything that can soak up the sauce:
- Steamed basmati rice - the classic pairing; fluffy and fragrant
- Jeera rice - basmati cooked with cumin seeds; adds another layer of flavor
- Roti or phulka - soft whole wheat flatbread for a lighter option
- Naan or garlic naan - for a restaurant-style meal at home
- Paratha - flaky, layered flatbread; especially good with the thick gravy
- Raita - a cooling yogurt side that balances the heat perfectly
Storage & Make-Ahead
- Refrigerator: Store in an airtight container for up to 3-4 days. The flavor improves overnight as the spices continue to meld.
- Freezer: Freeze for up to 2 months in a freezer-safe container. Leave a little headspace. Thaw overnight in the fridge.
- Reheating: Warm gently on the stovetop over medium-low heat, adding a splash of water to loosen the sauce. Or microwave covered in 90-second intervals, stirring between.
- Meal prep: This curry is an excellent meal prep dish. Make a double batch on Sunday and serve it with rice one night and roti another.
Frequently Asked Questions
For bone-in chicken drumsticks or thighs, pressure cook on High for 10 minutes followed by a full natural pressure release (about 15 minutes). For boneless chicken thighs, reduce the cook time to 8 minutes. For boneless chicken breasts cut into large chunks, 6 minutes is sufficient. Always use natural pressure release for the most tender results.
The BURN warning almost always means there are stuck or scorched bits on the bottom of the pot from the sauté stage. The fix: after adding water in Step 4, use a wooden spoon or silicone spatula to scrape every bit of fond from the bottom before sealing the lid. This is especially important when cooking paste-based masalas, which stick more readily than chopped aromatics.
Yes. Boneless chicken thighs work very well and stay juicy - use large 2-inch pieces and reduce the cook time to 8 minutes. Boneless chicken breasts cook faster and can dry out; if using, cut into large chunks and cook for 6 minutes with a natural release. Bone-in chicken is still recommended for the best flavor and sauce texture.
After pressure cooking, switch to Sauté mode and simmer the curry uncovered for 5-10 minutes until it reaches your desired consistency. The sauce also thickens naturally as it cools. If you want a thicker result from the start, use a little less water before pressure cooking.
Absolutely. Follow the Stovetop Instructions section above. Use a heavy-bottomed pot or Dutch oven, cover and simmer over medium-low heat for 20-25 minutes after building the masala. The flavor will be just as deep, the stovetop version gives you full control over texture.
Yes, it freezes very well. Transfer to a freezer-safe airtight container and freeze for up to 2 months. The sauce may look separated when thawed but comes back together perfectly once reheated on the stovetop with gentle stirring.
Bhuna masala is the technique of cooking down the onion-tomato-spice base until all the water has evaporated and the oil separates and pools on the surface. This concentrated, deeply flavored paste is the foundation of most North Indian curries. When you see oil rising to the top and the sauce turning a rich, glossy red, that's the bhuna stage and that's when you know the base is ready.
Yes, this recipe is naturally gluten-free. All ingredients - chicken, onions, tomatoes, fresh ginger, garlic, and spices are gluten-free. Just verify that your store-bought garam masala and chili powder are from dedicated gluten-free facilities if you have celiac disease or a severe sensitivity.
Looking for more chicken recipes? Checkout this amazing collection of 20 Best Chicken Recipes
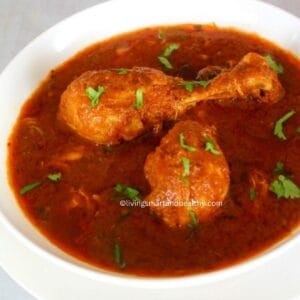
Instant Pot Indian Chicken Curry
Equipment
- 1 Blender
Ingredients
- 8 chicken drumsticks, skin removed
- 1 medium onion, red or yellow
- 4-6 cloves garlic
- 2 medium tomatoes
- 2 green chili, adjust to taste
- 1 inch ginger
- 4 tablespoon oil
WHOLE SPICES
- 1 teaspoon cumin seeds
- 1 bay leaf
DRY SPICES
- ½ tablespoon coriander powder
- ½ teaspoon turmeric
- ½ teaspoon dried mango powder
- 1 teaspoon red chili powder, adjust to taste
- 2 teaspoon garam masala, adjust to taste
FOR GARNISH
- handful of fresh cilantro, chopped
- 1 lemon, cut into wedges
- ½ cup water, or as needed
Instructions
- In a small blender jar, make a fine paste of onion, garlic by adding 2 tablespoon of water. Keep it aside.
- In the same blender jar, make a puree of tomatoes, green chili, ginger by adding 2 tablespoon of water. Keep it aside.
- Remove the skin from the chicken drumsticks and keep it aside.
- Turn ON Saute mode on "High". When it displays "HOT", add oil. Add cumin seeds, bay leaf, saute for 15 seconds.
- Add onion - garlic paste. Saute for 3 - 5 minutes or until the moisture has almost evaporated.
- Add tomato - green chili - ginger paste, dry spices - coriander powder, red chili powder, dried mango powder, turmeric, and salt to taste.
- Saute for 5-7 minutes or until the sauce comes together and you can see the oil separates from the sauce.
- Add the chicken, toss it in the sauce. Saute for 1-2 minutes.
- Add just enough water to cover the chicken. Chicken will also release its own juices when cooked. So you don't need to add a lot of water.
- Turn ON Pressure cook / Manual mode (high) and set the cooking time for 10 minutes. Followed by a natural pressure release, around 15 minutes.
- Turn ON Saute mode (high). Add some garam masala, some fresh lemon juice, bring it to a boil. Simmer the sauce until desired consistency. Note: The sauce thickens as the curry cools down.
- Garnish with some handful of fresh cilantro and enjoy this Easy Indian Chicken Curry with some rice, roti, naan or paratha.
Notes
- You can choose to chop the veggies or make a paste. If using the paste, make sure to cook it properly. Paste tends to stick to bottom, quite often, so keep scraping the pot few times, to avoid any burnt bottom.
- Saute the sauce until it comes together and you can see the oil separates from the sauce.
- This is called "bhuna masala", means cook the sauce down until the oil separates from the sauce. This is a secret to this flavorful curry.
- It is important to deglaze the pot, add water and deglaze the pot. If there is any sauce sticking to the bottom, you might end up having "BURNT" sign while cooking the curry.
- I prefer bone-in chicken. You can use chicken of your choice, thighs, whole chicken cut into small pieces.
- Adjust the cooking time depending upon the size of the chicken pieces.
- Recipe uses chicken drumsticks and these cook perfectly in the recommended time.
- Adjust the spiciness by adding less green chili, red chili powder or garam masala to suit your taste. I used Thai green chili for this recipe, which are quite hot.
- Dried mango powder is optional, it adds a nice tangy flavor to the curry. You can also use some fresh lemon juice in the recipe. Adjust to taste.
- PRO TIPS FOR EASY INDIAN CHICKEN CURRY - please refer to the post earlier.
- FAQ ABOUT EASY INDIAN CHICKEN CURRY - Please refer to the post earlier.
Nutrition
Disclaimer
Nutrition values are my best estimates. If you rely on them for your diet, use your preferred nutrition calculator.



Priya M says
I made this last night for the first time and I can't believe how good it turned out! I was nervous about the bhuna masala step but once I saw the oil separate I knew I had it right. My husband said it tasted just like his mom's chicken curry. Definitely going in our weeknight rotation!
Jyoti Behrani says
The moment when the oil separates, you just know the masala is ready! So happy it got the family stamp of approval, Priya 😊
Kevin T says
Great recipe but I got the BURN notice twice before I figured out what was going wrong. Turns out I wasn't scraping the bottom well enough after adding the water. Once I did that it worked perfectly. The curry itself was incredible - so much more flavor than any jarred sauce I've tried.
Jyoti Behrani says
Kevin, you're not alone, the BURN notice is the #1 Instant Pot frustration and it almost always comes down to exactly that: stuck masala on the bottom. So glad you pushed through! I added a bolded reminder in the instructions because of comments just like yours. The curry is absolutely worth the learning curve. 🙌
Sarah L. says
I only had boneless chicken thighs so I followed your note and cooked for 8 minutes. Came out perfectly tender! I added potatoes too and they soaked up all that masala. Served it with your jeera rice recipe and honestly it was a full restaurant meal at home. Five stars!
Jyoti Behrani says
Sarah, boneless thighs with potatoes is such a great combination - the potatoes act like little sponges for the masala! And jeera rice alongside is exactly how I'd serve it too. Thank you so much for the five stars, it means the world! ⭐⭐⭐⭐⭐
Amanda R. says
This looks amazing! Quick question - my kids are pretty sensitive to spice. Can I make this milder without losing the flavor? I don't want to just end up with a bland curry.
Jyoti Behrani says
Absolutely, Amanda! Here's how I'd adjust it for kids: reduce the red chili powder to ¼ teaspoon, use just one green chili (or skip it entirely), and stir in ¼ cup of coconut milk at the end for a slightly creamy, mellow finish. All the flavor from the bhuna masala stays - you're just dialing back the heat. My little ones eat it this way all the time. Let me know how it goes!
Deepa K. says
I batch cooked this on Sunday - doubled the recipe and froze half. Just reheated the frozen batch tonight and it was honestly even better than fresh! The flavors had deepened so much. This is going to be my go-to freezer meal for busy weeknights. Thank you for such a detailed post, Jyoti!
Jyoti Behrani says
Deepa, this made my day! Chicken curry is one of those dishes that genuinely improves after a day or two as all the spices meld together and the freezer version is no exception. Doubling and freezing half is such a smart move. Hope it saves many a weeknight dinner! 🙏
Laura C. says
I added potatoes and carrots to stretch it for a bigger family. Worked perfectly!
Jyoti Behrani says
Smart move, Laura! Cut them into bigger chunks, about 1 inch, so they don’t turn mushy. Thanks for sharing your twist!
Nisha V. says
Can I use ghee instead of oil for the sauté step?
Jyoti Behrani says
Absolutely, Nisha! Ghee adds a lovely nutty flavor and is perfect for sautéing the onions and spices. Use the same amount as the oil in the recipe.
Greg H. says
Just made this for the first time and my kids actually ate it. Parent win! Thank you!
Jyoti Behrani says
That’s the best kind of review, Greg! Kids eating curry is a big win. Thanks so much for letting me know. 🙌
Maya R. says
I don’t have red chili powder. What can I substitute?
Jyoti Behrani says
Cayenne pepper works just fine.
Josh L. says
Natural release or quick release when it’s done?
Jyoti Behrani says
I like a 5-minute natural release followed by a quick release, Josh. It keeps the chicken tender and avoids splatter from the sauce.
Farah M. says
Do I have to use fresh tomatoes? I only have canned.
Jyoti Behrani says
Canned works great, Farah! Use about the same amount of crushed or diced tomatoes. Sometimes they’re more consistent in flavor than fresh ones, especially off-season.
Riya S. says
Is this keto-friendly? I’m cutting carbs.
Jyoti Behrani says
The curry itself is fairly low in carbs, mostly coming from the onions and tomatoes. Serve it over cauliflower rice. Check your own ingredient labels to be sure it fits your plan.
Harry T. says
Tastes great but I wanted it a bit more restaurant-style. Any tips?
Jyoti Behrani says
Try finishing with a teaspoon of crushed kasuri methi (dried fenugreek leaves) and a small pat of butter or ghee at the end, Hari. That’s the secret behind that restaurant-style aroma.
Alicia P. says
What should I serve with this besides rice?
Jyoti Behrani says
Warm naan or roti is perfect for scooping up the sauce, Alicia. For something lighter, try it with cauliflower rice, or add a simple cucumber-tomato salad on the side.
Brain S. says
Sauce came out a little thin for my taste. How do I thicken it?
Jyoti Behrani says
Easy fix, Brian! After cooking, remove the chicken, press Sauté, and let the sauce simmer for 5 to 7 minutes until it reduces.
Mark D. says
I used bone-in chicken thighs because that’s what I had. Any changes needed?
Jyoti Behrani says
Bone-in works well, Mark, and adds extra flavor to the sauce! Add about 5 minutes to the pressure cook time, and make sure the chicken reaches 165°F at the thickest part.
Sunita D. says
Can this be frozen? I like having meals ready for busy weeks.
Jyoti Behrani says
It freezes beautifully, Sunita. Cool it completely, then freeze in portions for up to 3 months. Thaw overnight in the fridge before reheating. If you used cream, stir it in fresh after reheating for the best texture.
Rachel J. says
How long does this keep in the fridge? I want to make a big batch on Sunday.
Jyoti Behrani says
Great plan, Rachel! It keeps well in an airtight container for 3 to 4 days in the fridge. Reheat gently on the stove or in the microwave with a splash of water.
Vikram P. says
Do you have to use the Instant Pot? Can I make this on the stovetop?
Jyoti Behrani says
Yes, Vikram! Simmer it covered on medium-low for about 20 to 25 minutes, stirring occasionally, until the chicken is tender and cooked through. You may need a splash more water since there’s more evaporation than in a pressure cooker.
Kelly M. says
Dinner on the table in 30 minutes on a Tuesday night. This is exactly what I needed. My husband went back for seconds!
Jyoti Behrani says
Weeknight wins are what this recipe is for, Kelly! Tell your husband I said thank you for the seconds. 😄
Anita D. says
This was my first time making chicken curry at home and it turned out amazing. I added a handful of spinach at the end and loved it. Thanks, Jyoti!
Jyoti Behrani says
What a great idea, Anita! Spinach adds color and nutrients and wilts in seconds. Congratulations on your first homemade curry, and I’m so glad you enjoyed it! 💛
Tom W. says
I have a 6-quart Instant Pot. Do I need to change anything?
Jyoti Behrani says
Nope, Tom! A 6-quart is the perfect size for this recipe.
Neha G. says
I don’t have garam masala. Is there something I can use instead?
Jyoti Behrani says
A pinch each of cinnamon, cumin, and black pepper makes a decent stand-in, Neha. It won’t be identical, but it still tastes good. Garam masala is worth picking up at an Indian grocery store or making it at home. It lasts for months and you’ll use it a lot! Here's homemade Garam Masala recipe if you would like to try: https://www.livingsmartandhealthy.com/best-garam-masala-recipe/
Chris B. says
I doubled the recipe for meal prep and it came out great. Tasted even better the next day!
Jyoti Behrani says
Thanks for the tip, Chris! Curries do taste better on day two once the spices settle in. Doubling works well if you keep the liquid the same and stay within the max fill line of your pot.
Raj M. says
I got the “burn” notice on my Instant Pot. What did I do wrong?
Jyoti Behrani says
That’s common, Raj! It usually means something is stuck to the bottom. After sautéing the onions and spices, add a splash of water or broth and scrape the bottom with a wooden spoon before pressure cooking. Hope that helps!
Jennifer T. says
Can I use frozen chicken? I never remember to thaw things in time!
Jyoti Behrani says
You can, Jennifer! Add about 3–4 minutes to the pressure cook time and make sure the pieces aren’t stuck together in one big block. Check that the chicken reaches 165°F before serving.
Amit Patel says
Made it for dinner guests and everyone asked for the recipe. Served it with basmati rice and cucumber raita. Perfect combo!
Jyoti Behrani says
Love that pairing, Amit! Cool raita is exactly what this curry wants. Thanks for sharing it with your guests. 😊
Sarah L. says
I’m new to Indian cooking and was nervous, but this was so easy. My only question: is it very spicy? I have kids.
Jyoti Behrani says
Welcome to Indian cooking, Sarah! It’s medium-mild as written. For kids, skip the green chili and cut the red chili powder in half. You can add extra heat to your own bowl at the table.
Priya S. says
This tastes just like what my mom makes, but I don’t have to stand over the stove for an hour. Thank you for this recipe!
Jyoti Behrani says
That is the best compliment, Priya! The goal is that home-style taste without the long simmer. Thanks to your mom for the inspiration!
Megan says
Made this tonight and my whole family cleaned their plates! I can’t believe how rich the sauce tastes for a 30-minute dinner. Definitely going into the regular rotation.
Jyoti Behrani says
So happy to hear this, Megan! The Instant Pot really does build deep flavor fast. Thank you for trying it and taking the time to share. 🙏